Amazon recently introduced a brand new feature for Brand Registry owners called Amazon Storefronts. The Storefront builder is essential for not only protecting your brand but also for increasing sales and best of all, it is easy to use. In this article, I will walk you through the essentials of maximizing your new Storefront on Amazon.
Brand Registry 2.0 Required
One of the prerequisites for creating an Amazon Storefront is having your brand registered with Brand Registry 2.0 which requires an active Registered Trademark. Sellers with the original Brand Registry may also have access to Amazon Storefronts, but it is still recommended that all sellers migrate to Brand Registry 2.0.
How Amazon Storefronts Protect Your Brand
For many brands, manufacturers, and private labels selling on Amazon one of the biggest challenges they face is that of duplicate and unauthorized listings by other sellers. In some cases, these listings may be completely illegitimate (counterfeit) while at other times they may simply be low-quality listings that violate MAP or offer unauthorized bundles. Currently, when an Amazon customer clicks on the Brand beneath a product title, it takes them to a search results page showing an assortment of the Brands products on Amazon.
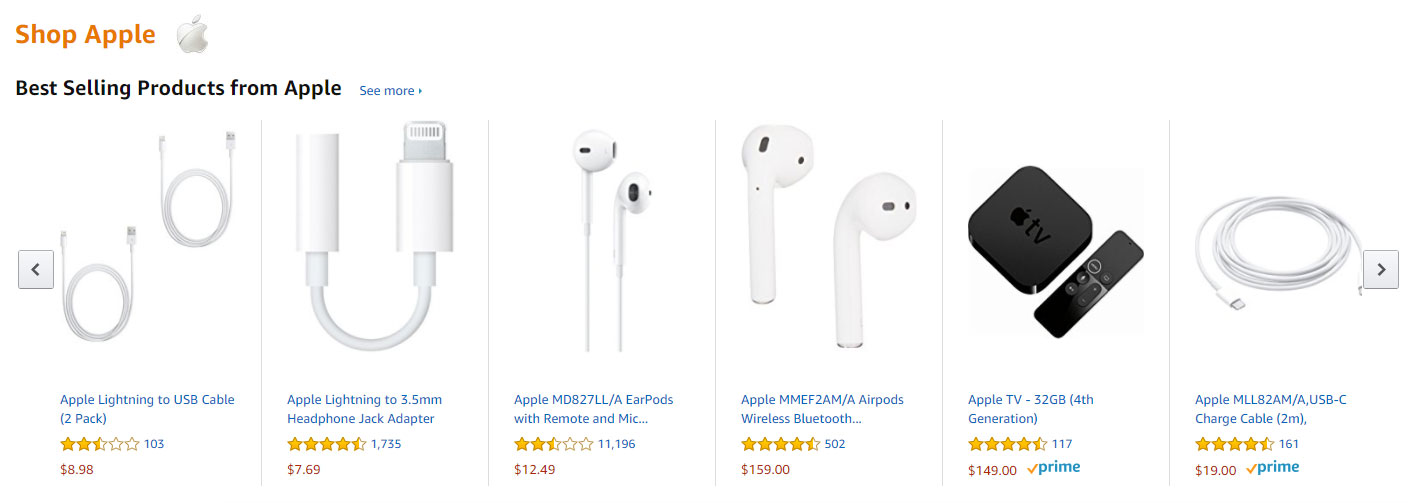
Amazon Brand Search Results
There are several problems that this presents for brands, namely that brand owners are unable to control which products display in the search results and in which order. In addition, sellers are unable to provide any helpful information about the brand or product selection. They lack a way to help customers better understand the brand, know which product may be best for them, and how to get the most out of using it.
The solution is to create a branded Amazon Storefront that displays only the products you want, in the order you want while providing valuable information to Amazon customers. In this next section, I will walk you through how to create your Amazon Storefront followed by ways to maximize its use by driving traffic to increase sales.
Delegating Access to Amazon Storefronts
As a brand owner, you can delegate access to create or edit your Amazon Storefront in two ways:
- Assign Brand Registry Rights to another Seller Account (Learn more about Assigning Brand Registry Rights)
- Assign a User in your Seller Central Account access (For example an outsourced designer, employee, etc.)
If you want to assign a user in your Seller Central access to create your Storefront, you can go to Settings — User Permissions and select Manage Permissions for the user you want to delegate access to.

Delegate Storefront Access to a User in Seller Central
Scroll down to Storefronts and provide them with View & Edit rights to be able to create and edit the storefront or View only if you are assigning rights to someone who only needs access to the analytics of the storefront. If you already have Brand Registry assigned to another Amazon seller you can request that they build a storefront on your behalf (in this case they can delegate user access to you as the brand owner).
Create Your Amazon Storefront
To Create Your Amazon Storefront, login to Seller Central and select Storefront on the top menu followed by Manage Stores.
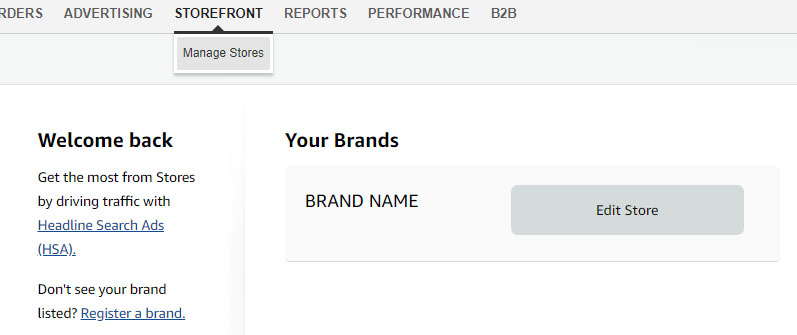
On your Seller Stores page, you will see all of the brands currently registered to your account (Note that with Brand Registry 2.0 it is possible to register multiple brands or have multiple brands assigned to your account.)
If you have been assigned Brand Registry from a Brand Owner and are receiving this error in Storefronts, you will see this:
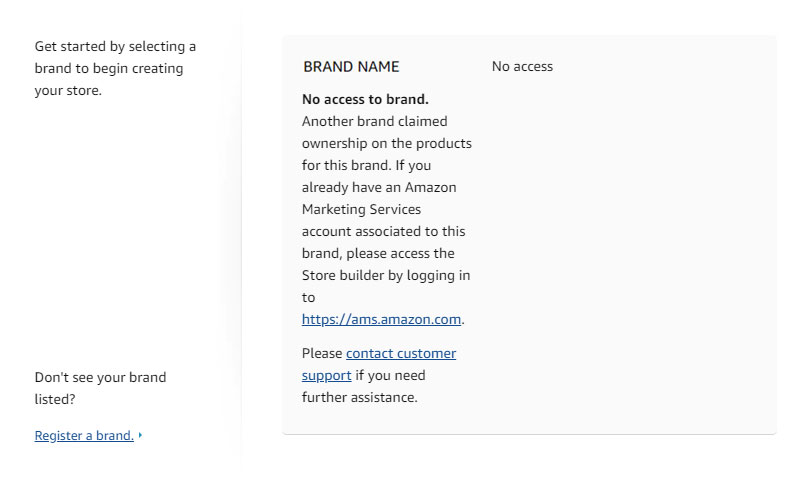
You will need to contact the HSA/Storefront Team and ask them to resolve the issue. To do this select Get Support –> Advertising and Stores issue –> Stores –> Basic Settings –> Other Issues and request that their technical team correctly assign the Storefront to your Seller Central account.
Uploading Your Brand Logo
The first thing Amazon requires is for you to upload your Brand Logo (at least 400 x 400 pixels). However, you can choose whether or not you want to display the logo on the Storefront by selecting the Visible: Yes / No.
Adding a Page Description
The second thing you are required to do is provide a brief page description (this can always be changed later) for the primary page on your Storefront. This will not be shown on the page itself but is added as the meta description for search engines, such as Google, and will show up as the description in search results.
Amazon Storefront Design
The first thing you will need to do to begin your Amazon Storefront Design is to select your initial template.
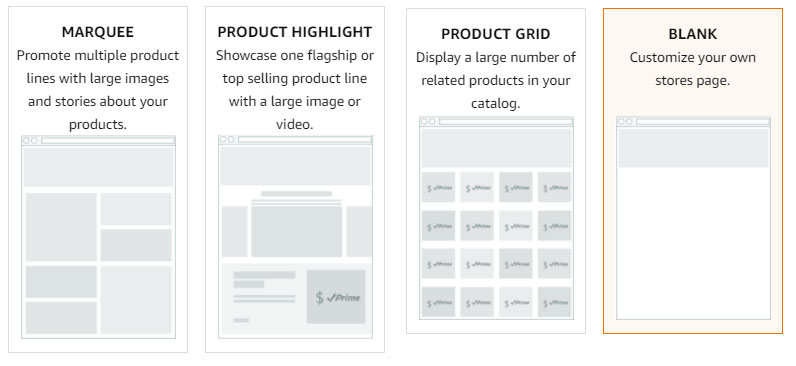
You can preview the options by selecting a template and selecting Save, but note that once you select a template, you can completely customize it the same as you can with the blank template (it just pre-populates).
You can then begin your Amazon Storefront Design by selecting and populating Content Tiles. Note that it is possible to add multiple pages to your Storefront and you can start to conceptualize the layout of your Amazon Storefront even before having access or getting started.
Amazon Storefront Content Tiles
Amazon Storefronts are built on a concept Amazon refers to as Content Tiles. You can select Tiles that you then drag and drop onto the storefront page where you can arrange them, organize them or delete them. Once your tiles are laid out, you can begin to populate them with images, text, videos, and other product content. You can then repeat the process by creating additional pages and adding additional tiles.
Split Section
You can choose any number of split section options to add tiles to. You can flip all of the options horizontally to achieve any desired layout from the available options that Amazon provides.

Product
Once you select a product Amazon will auto-populate the price, primary image of the product and ✓Prime if the product is fulfilled by Amazon. Full-width product or landscape tiles also allow you to add a title, description, align the text left or right, and change the position of the primary product image.

Text
You can align your text left, right or center. You can also make the entire text box bold or all caps. In addition, you can link to a product on your storefront or Amazon adding a “Shop Now” button below the text.

Video
Videos must be at least 1280 x 640 pixels, and less than 100MB. File types supported include avi, mov, mpg, MPEG, m4a/v, and m4p. Remove any links or references to external websites from your video prior to upload.

Image
Your Images must be at least 1500 x 1500 pixels to use. You can also add text as an overlay at the bottom of the image, beneath the image or to the right or left of the image. Link a product to add a “Shop Now” button.

Product Grid
You can add products by Keyword or ASIN, both from your Storefront as well as any product on Amazon.com.

Gallery
The Storefront gallery supports between 3 to 8 images. Images must be at least 1,500 x 750 pixels.

Best Selling Products
This tile is automatically populated to reflect your best selling products.

Recommended Products
This tile is automatically generated for each visitor of your store based on their purchases and preferences.

Amazon Storefront Examples
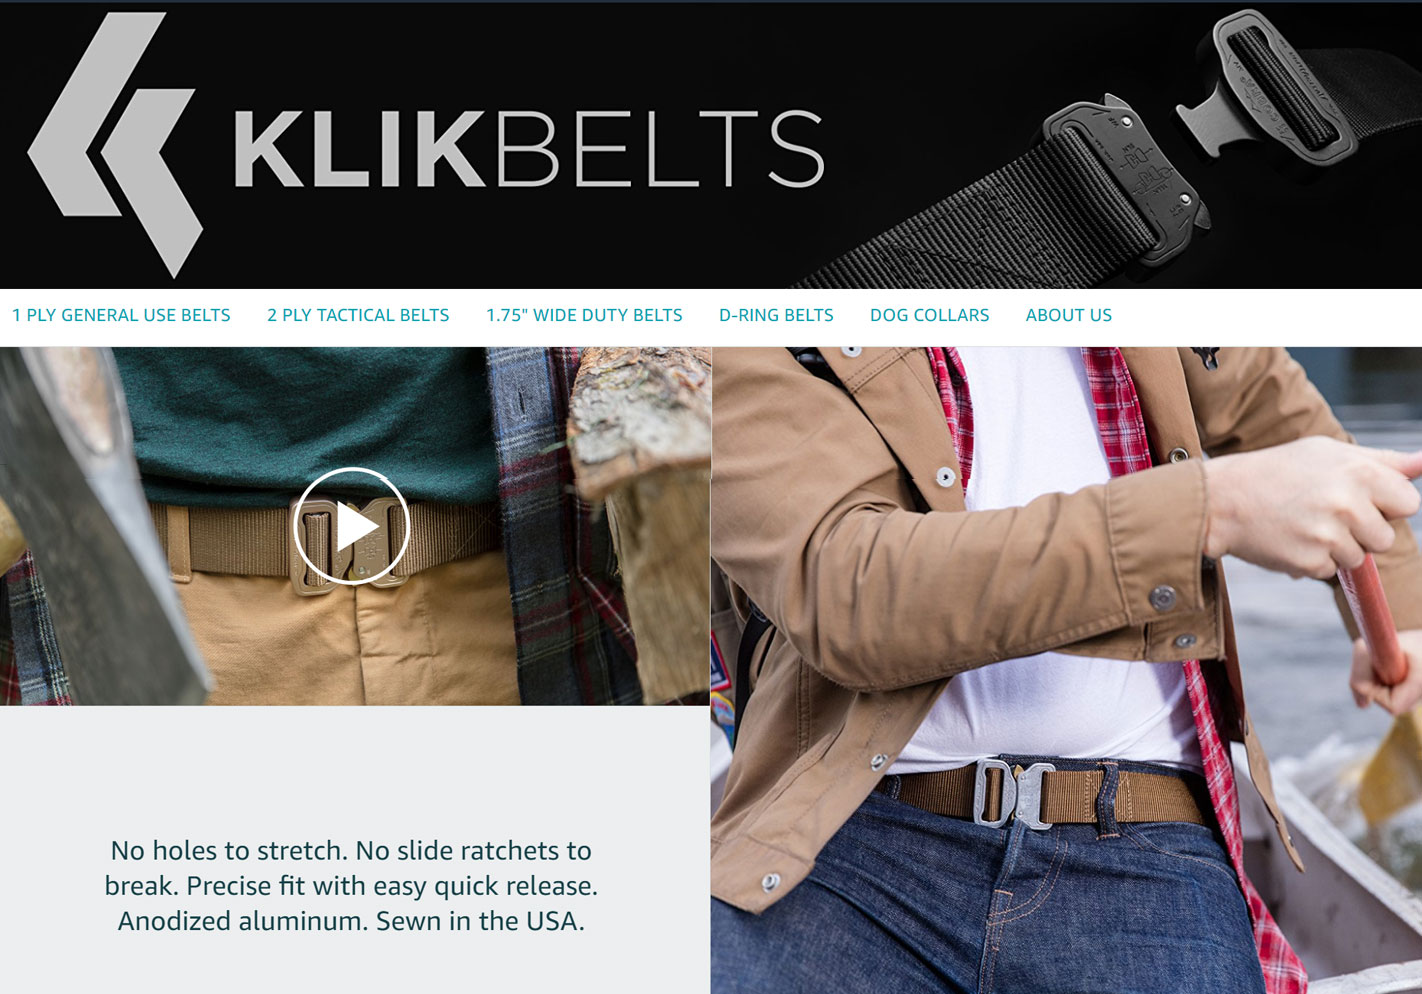
Here are a handful of Amazon Storefront Examples to give you some ideas of how other brands have set up their storefronts and utilized the layouts and content space that Amazon allows.
Klik Belts (Multi-Page Storefront)
Good Day Chocolate(Single Page Storefront)
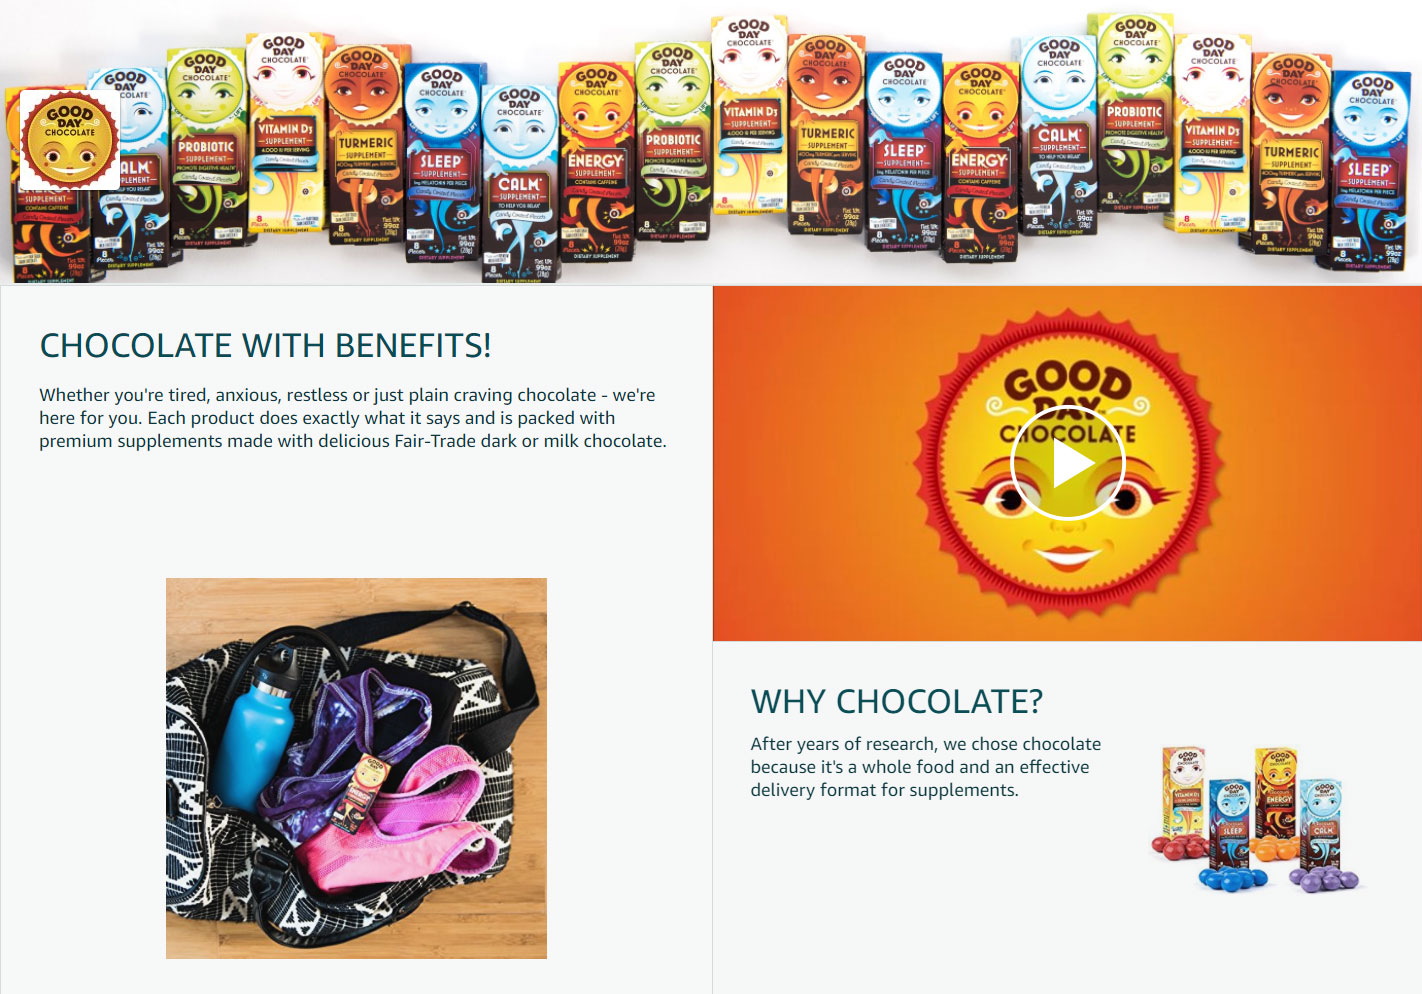
Good Day Chocolate - Single Page Amazon Storefront
Amazon Storefront Approval Process
Similar to Enhanced Brand Content, the Storefront must pass a manual approval process prior to being published. You can read Amazon's Content Acceptance Policy to ensure that the Storefront will be approved.
Amazon Storefront vs. Custom Storefront URL
With your new Amazon Storefront you can now get your brand name as the URL:
www.amazon.com/your-store
It appears that Amazon wants your brand name to rank organically by leveraging their domain authority. Unlike the Custom Storefront URL clicking products from your Amazon Storefront does not guarantee you the buy box. Only using your Custom Storefront URL will Amazon add your merchant ID to the URL ensuring that you are the only buy box winner:
www.amazon.com/shops/yourstore
How to Increase Sales Using Your Amazon Storefront
Now that your storefront is built there are some great opportunities you can leverage to drive traffic to your Amazon Storefront. Internally you can drive traffic to your storefront using Headline Search Ads. Additionally, you will want to create Custom Source Tags in order to effectively track your external campaigns as well.
Amazon Storefront Custom Source Tags
Amazon now allows you to create Custom Storefront Source Tags for your Amazon Storefront and track the resulting traffic and sales. This is a great opportunity to finally be able to track the ROI of external traffic. To get started select Storefronts -> Manage Stores -> View Insights. From this page, you can view on Overview, Traffic, Sales, Page Analytics, and Sources. To create a source tag select Sources -> Create Source Tag.
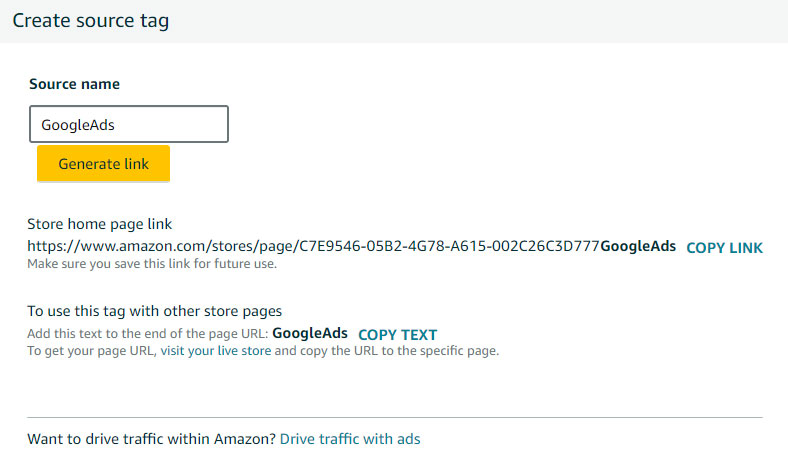
I recommend creating Source Tags using one word, such as: GoogleAdWords or FacebookCampaign. Amazon will then provide you with a specific link to use for each channel in order to effectively track conversions. You can also use each tag with other store pages by adding it to the end of the store page URL.
Amazon Storefront Traffic
Within the storefront you can view the traffic coming into your storefront from both active and passive means:
- Amazon Headline Search ads: Traffic from Headline Search ads on Amazon.
- Amazon Organic Traffic: Traffic from within Amazon, including from search results or detail page links.
- Tagged Sources: Traffic being tracked with a custom source tag.
- Other: All other traffic sources not categorized.

Google AdWords Driving Traffic to Amazon Storefront
Amazon Storefront Analytics
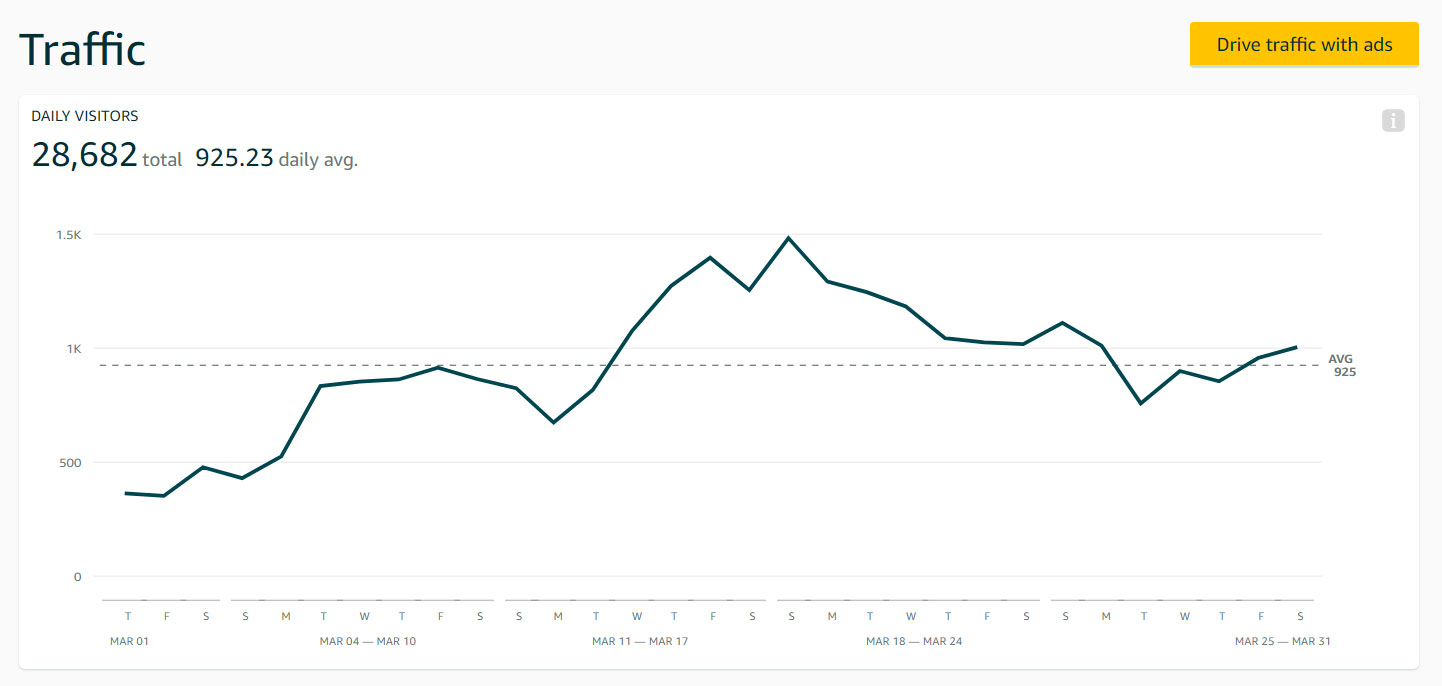
One of the benefits of Storefronts is the analytics you get access to, which Amazon refers to as Insights:
- Daily visitors: Total unique users or devices that viewed one or more pages on your store in a single day.
- Views: Number of page views during this time period. Includes repeat views.
- Sales: Estimated total sales generated by store visitors within 14 days of their last visit.
- Units sold: Estimated total units purchased by store visitors within 14 days of their last visit.
- Views/Visitor: Average number of unique pages viewed by a daily visitor to your store
With the advanced brand protection, marketing, and analytics opportunities it is essential for any brand with a registered trademark to set up their Amazon Storefront not only to protect their brand on Amazon but also to be able to effectively capture organic traffic and drive external traffic to their Storefront to increase Amazon sales.
