Your business could likely use a boost to reach more potential customers. And quickly.
Google Ads can help.
When you finish this article, you’ll know exactly how to run Google ads that can benefit your business.
Before we get to that, let’s go over some background information.
What Is Google Ads?
Google Ads is an online advertising platform that lets you display targeted advertisements across places like:
- Google Search results pages
- Google-owned properties like YouTube and Google Maps
- The Google Display Network (GDN): A group of third-party websites and apps that display ads
- The Google Search Network (GSN): A group of search-related partner sites
For example, you can create text ads that appear in Google's search results when a user types in a relevant keyword:
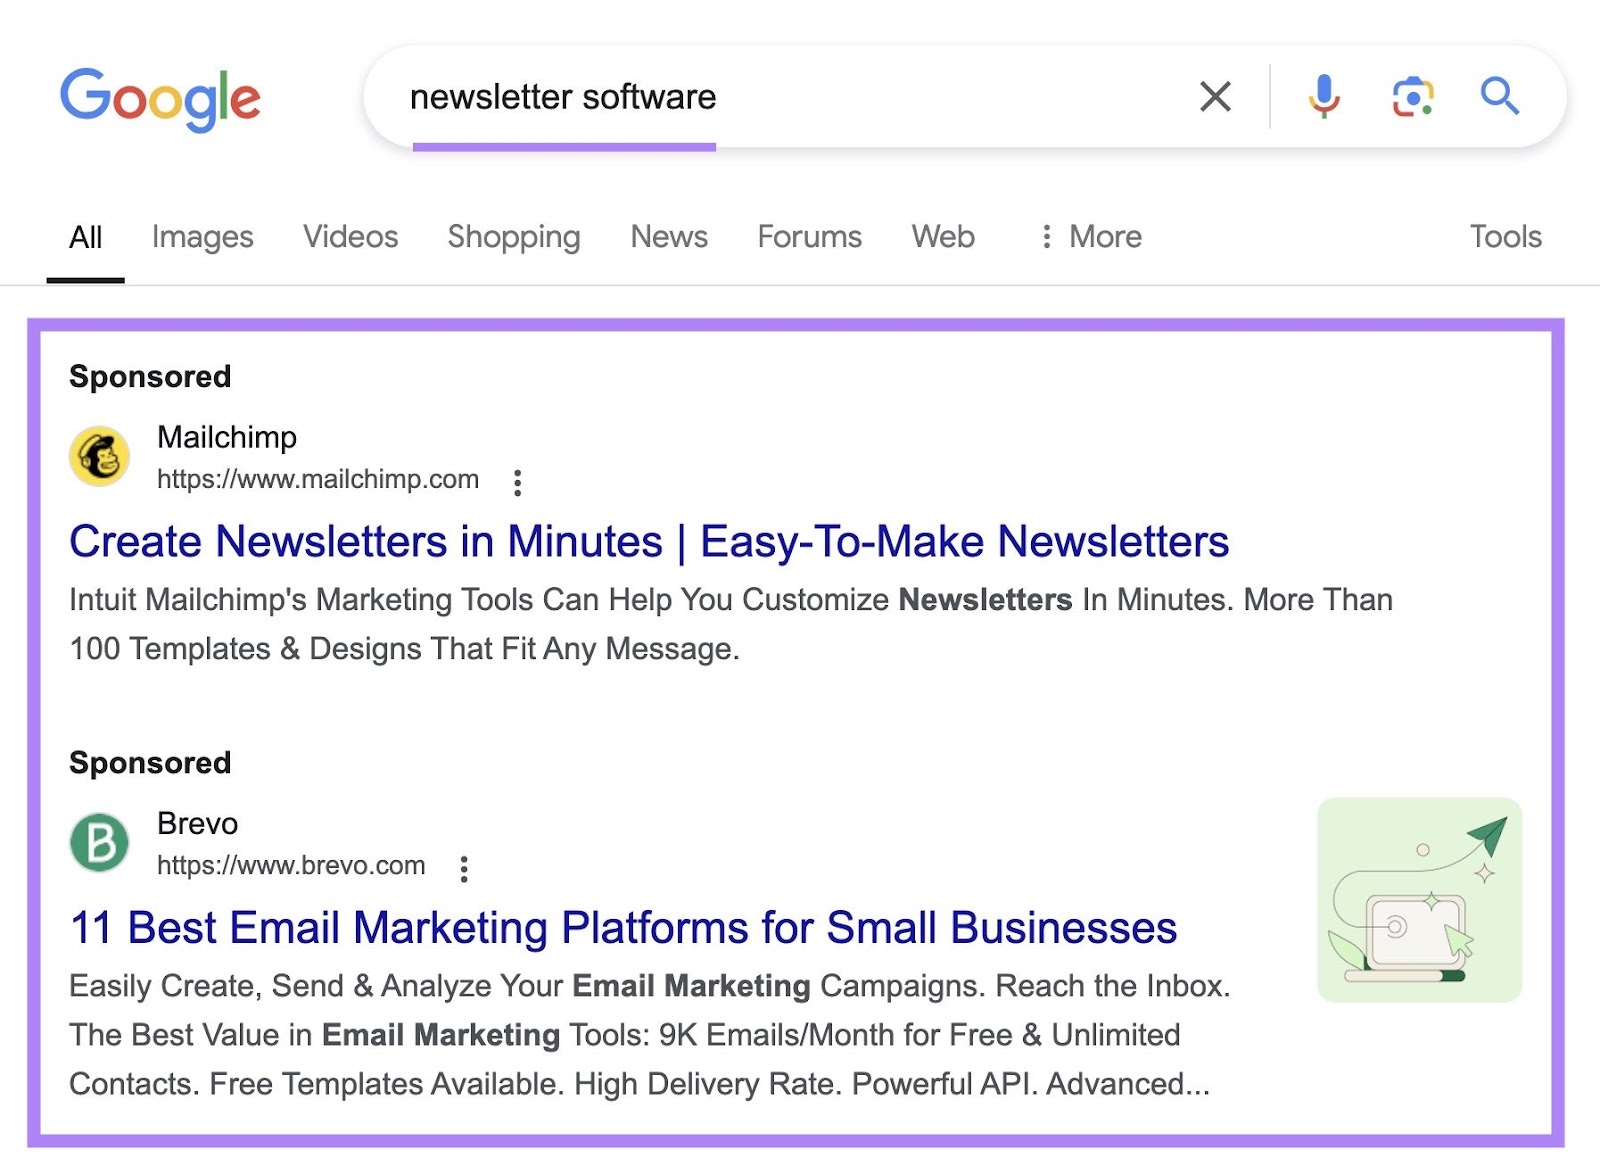
Given all the places where your ads can appear, it’s clear that you can reach many audiences using Google Ads. And there are many formats to choose from.
Plus, Google estimates that for every $1 companies spend on Google Ads, “they receive $8 in profit through Google Search and Ads.”
How Do Google Ads Work?
Google Ads uses a real-time auction system. You and other advertisers place bids to have your ads shown to potential customers.
Every time a user searches on Google, searches on a partner site, or visits a site/app in Google's network, the system runs an auction. And it considers advertisers’ bids as well as factors like ad quality and relevance to determine whether your ad will appear and where it will be positioned.
This means a well-crafted ad can outperform one from a higher-bidding competitor.
How to Run a Google Ads Campaign in 10 Steps
Here’s how to get started with Google Ads:
1. Do the Necessary Prep Work
Take some time to prepare before you start working in Google Ads, so you don’t have to stop in the middle of setting up your campaign.
For search ads, that usually means creating a campaign-specific landing page, doing keyword research (finding terms related to your business that your ideal customers are searching), and analyzing your competitors’ ads.
To start finding valuable search terms, use the Keyword Magic Tool.
Open the tool, enter a broad keyword relevant to your offering, select the location you want to target, and click “Search.”
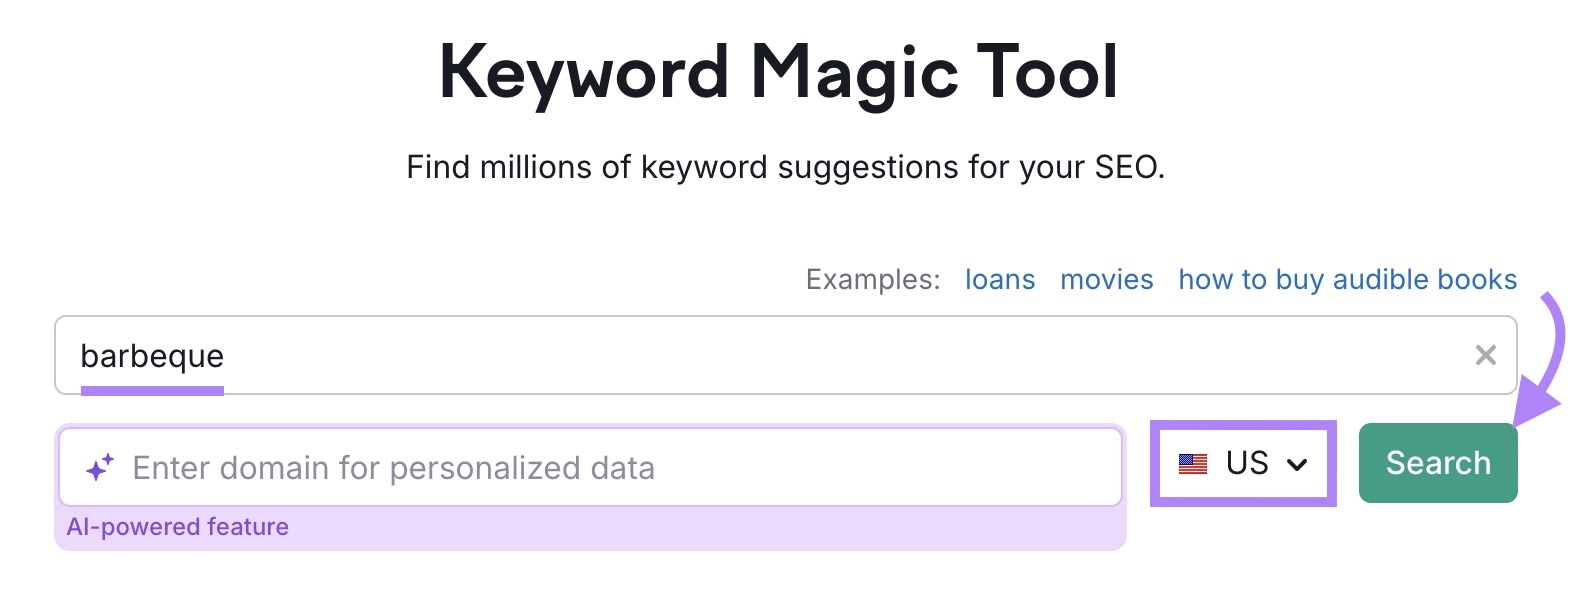
The tool will generate a list of relevant keywords based on your original term.
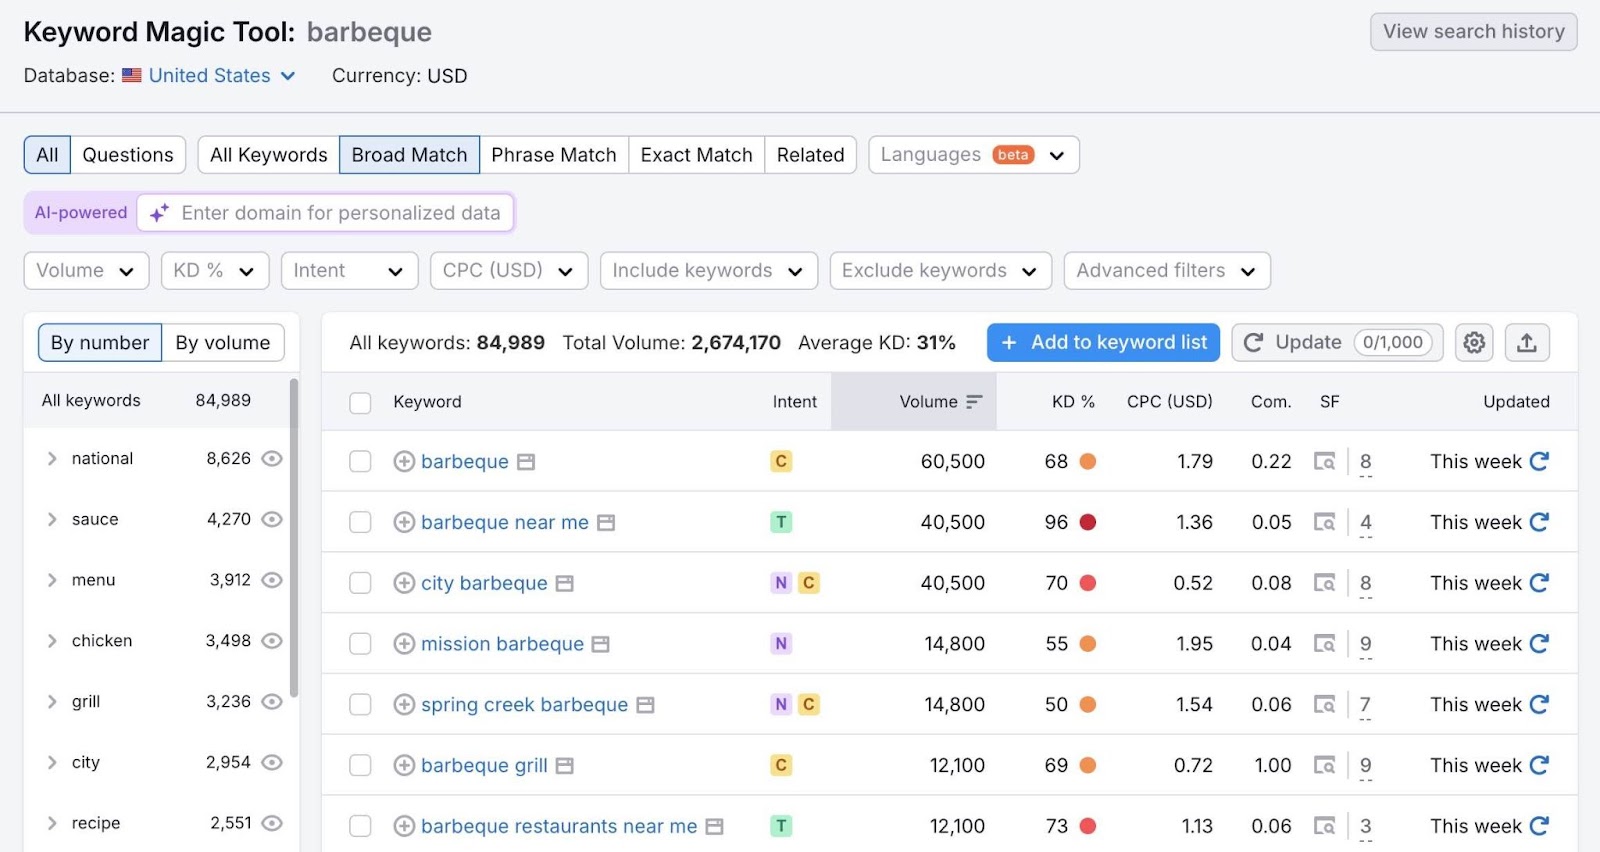
Review the list to find the best keywords for your campaign. Consider factors like:
- Search intent: This reflects why a user searches for a particular term. In most cases, you’ll want to prioritize keywords with commercial intent (researching brands or services) or transactional intent (ready to convert).
- Search volume: This is the average number of monthly searches a keyword gets. Choose keywords that users frequently search for to ensure enough people see your ads.
- Cost per click (CPC): This is the average price advertisers pay when someone clicks on their search ads. And it can help you estimate how much it will cost to run Google Ads.
- Competitive density: This metric shows how many advertisers are competing for a keyword. The lower the score, the less competition you’ll face.
Next, do a quick Google Ads competitor analysis to find out what keywords your competitors are bidding on. And what ads and landing pages they’re using.
Use Advertising Research for this.
Open the tool, enter a competitor’s domain, and click “Search.”

From the “Positions” report, scroll down to the “Paid Search Positions” section.
Here, you’ll see a list of keywords your competitor’s ads rank for and the corresponding landing pages. Along with information like each keyword’s CPC and search volume.
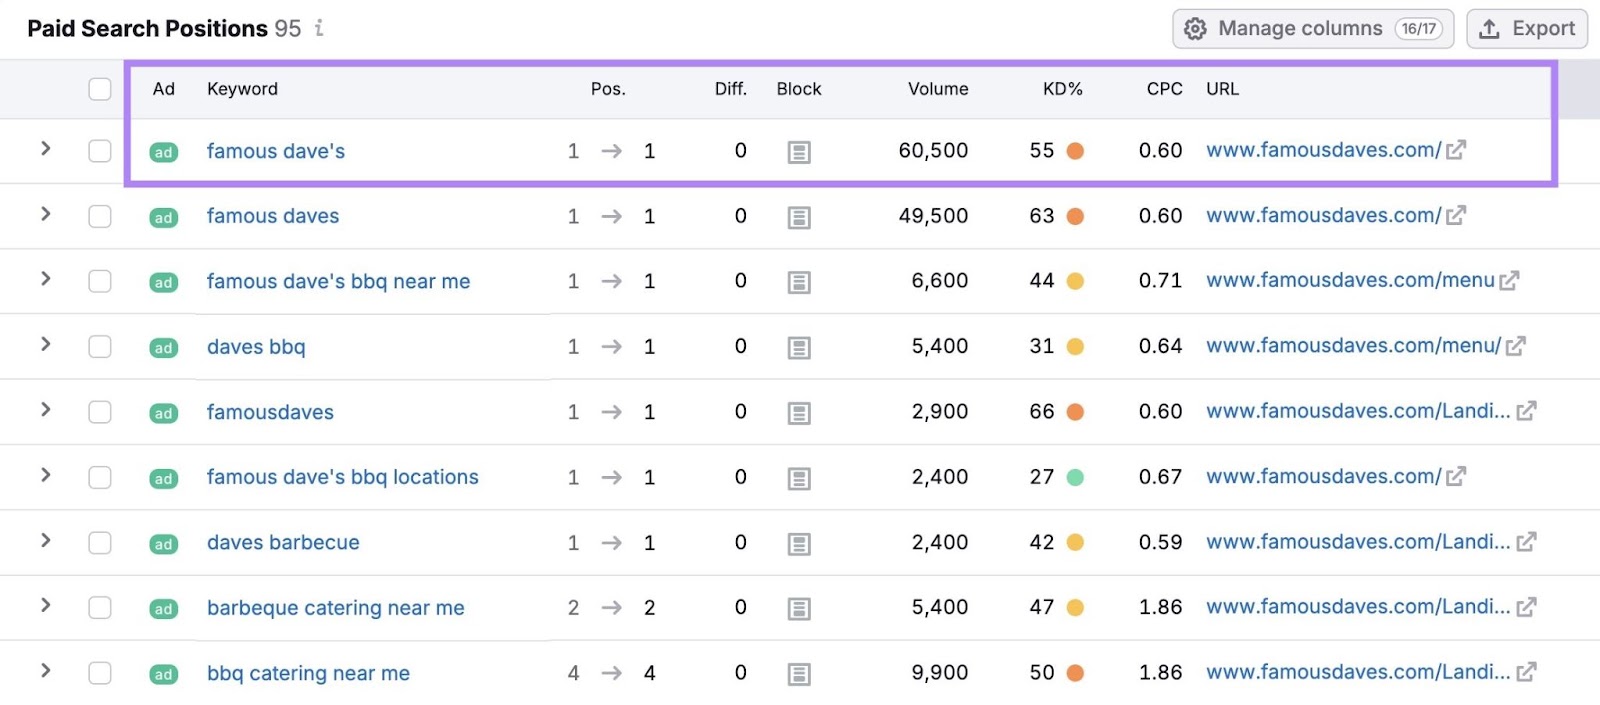
Review this list to look for valuable keywords that also align with your planned campaign.
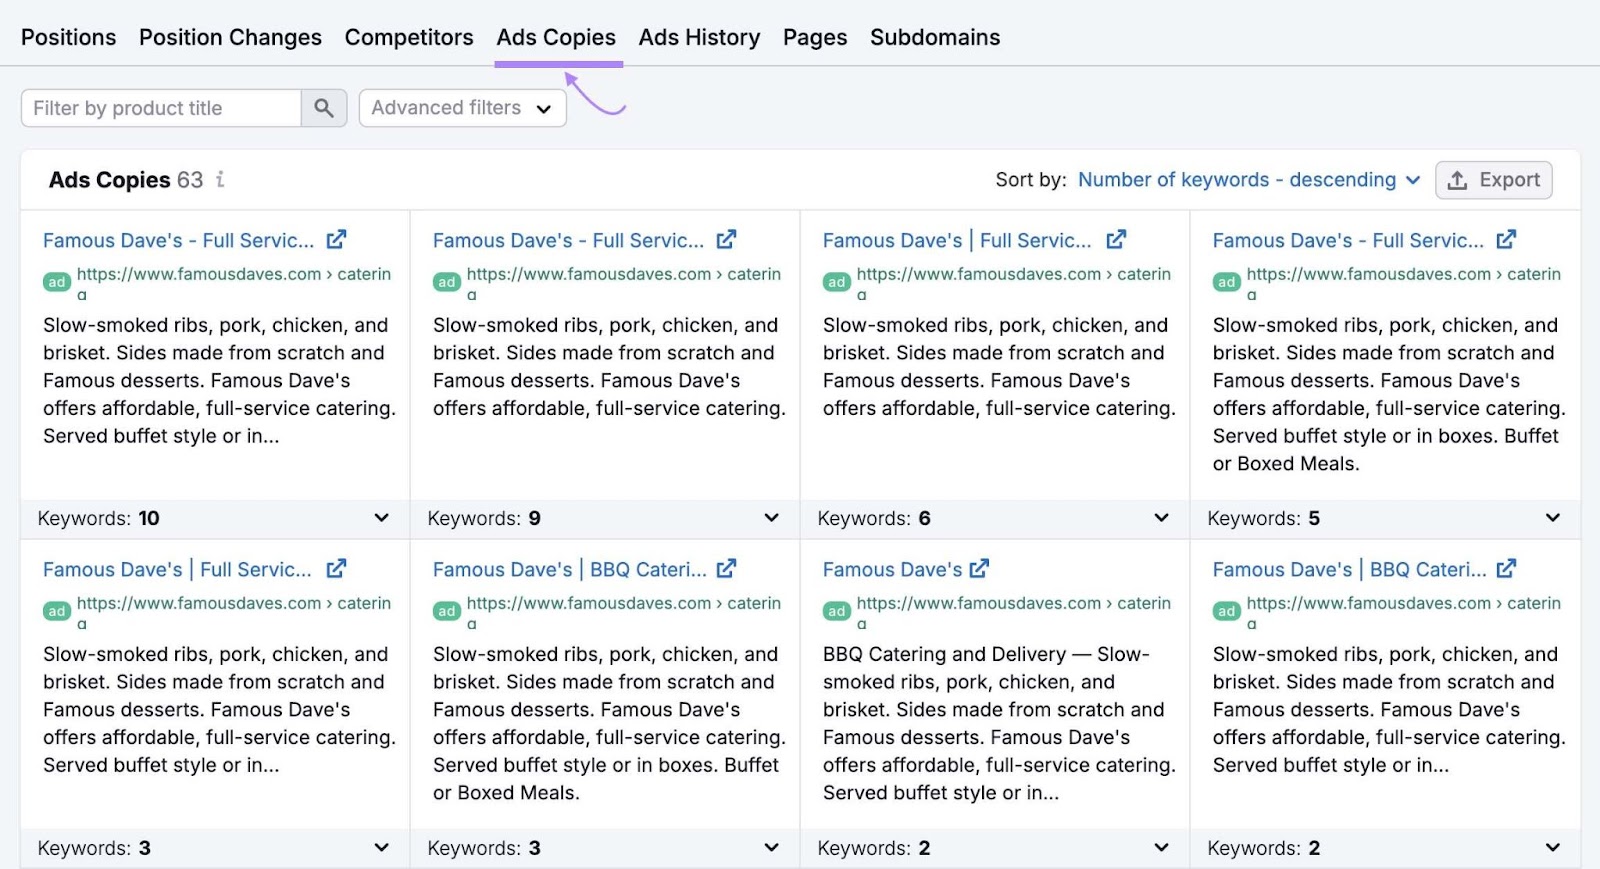
Next, navigate to the “Ads Copies” tab.
Here, you can study the exact copy this competitor has used. Which can inspire your own ad copy
Further reading: How to Do PPC Keyword Research for Your Ad Campaigns
2. Create a Google Ads Account
First, log in to the Google account you want to use for your Google Ads—likely a business account tied to your company.
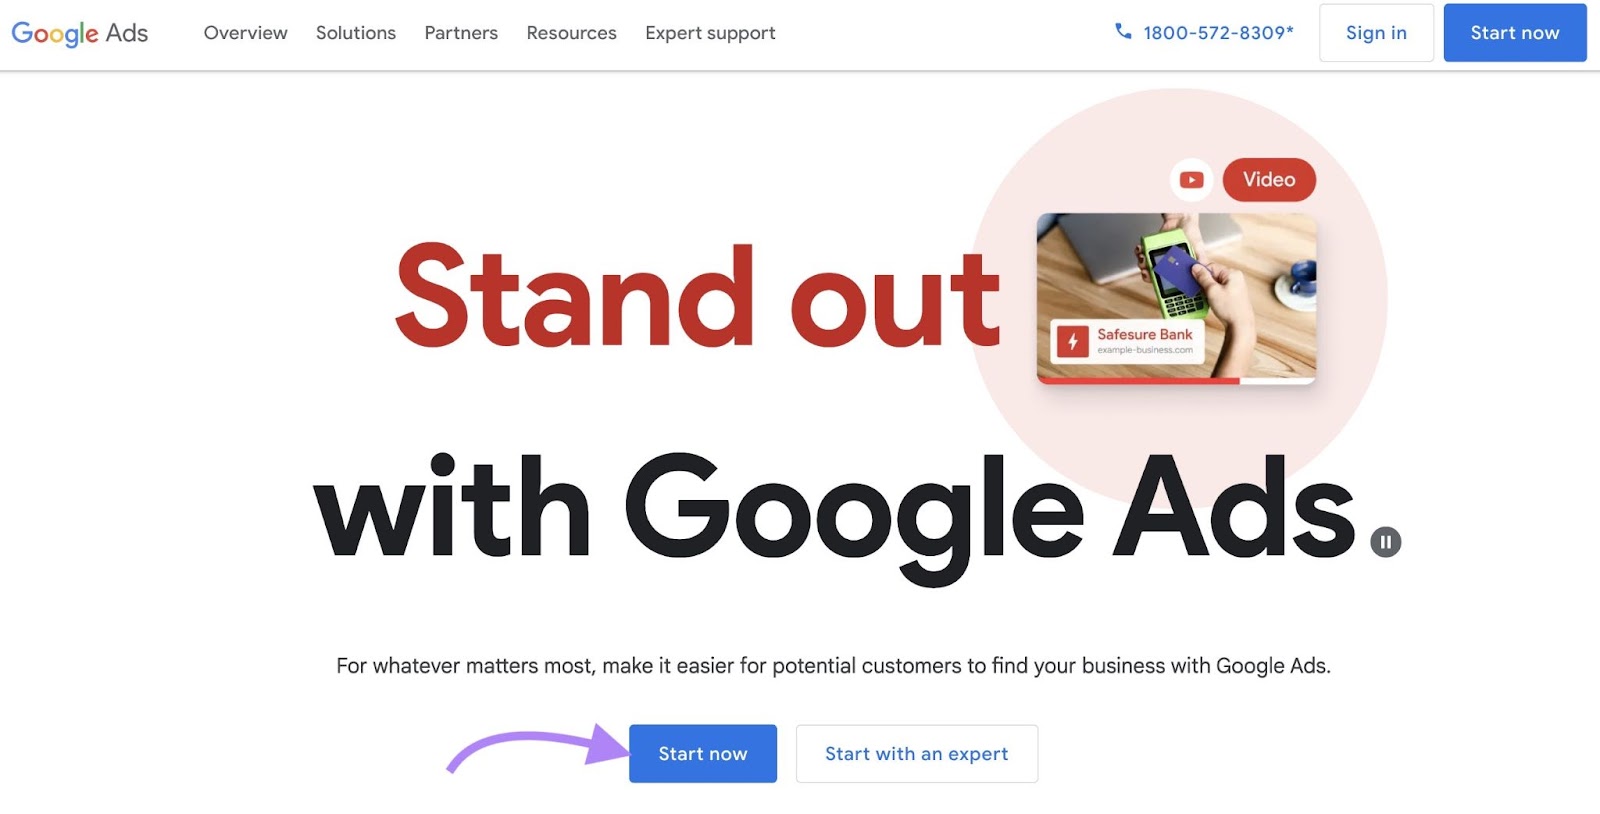
Next, click “Start Now” from the Google Ads homepage.
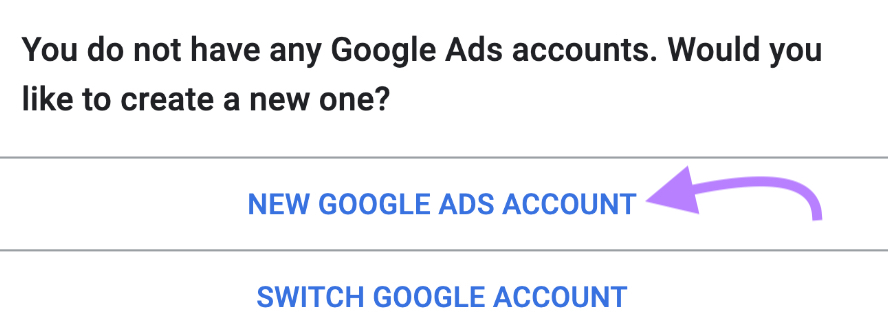
Confirm that you’d like to create a new account by clicking “New Google Ads account.”
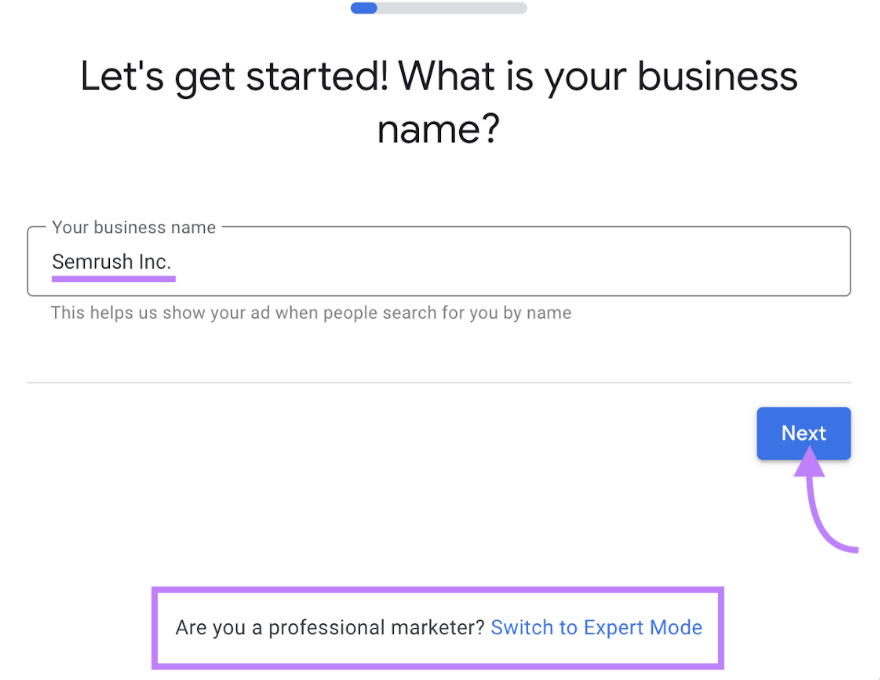
Next, Google will prompt you to input your business information.
At this stage, you might see an option to “Switch to Expert Mode.” If you do, select this option since it gives you more control over your campaigns.
But sometimes, Google Ads asks you to create your first campaign right off the bat.
In this case, click “Skip campaign creation” or “Create an account without a campaign,”depending on what you see.
Follow the platform’s instructions to finish setting up your account. This includes entering your payment details and confirming your account settings.
For more detailed steps, follow Google’s official guide to setting up your account.
3. Choose an Objective and Campaign Type
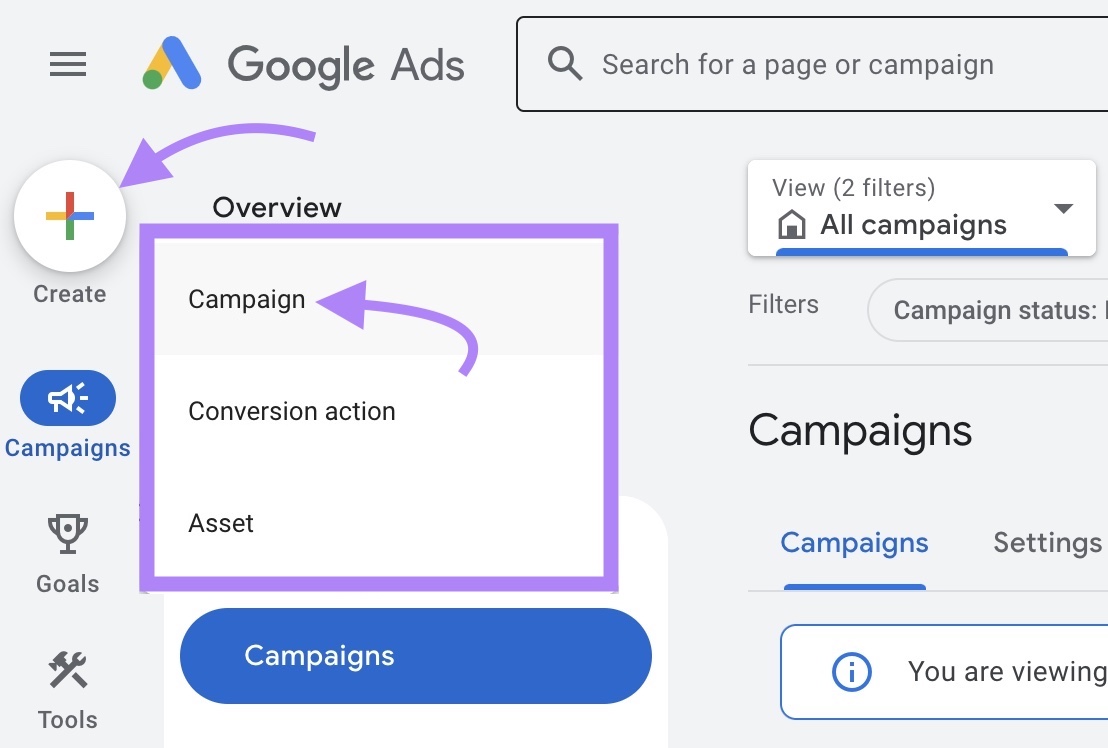
After creating your Google Ads account and heading to your dashboard, click the “+” icon and select “Campaign.”
You’ll be prompted to select an objective you want to achieve with your Google Ads campaign. And the platform will then tailor the settings based on your objective.
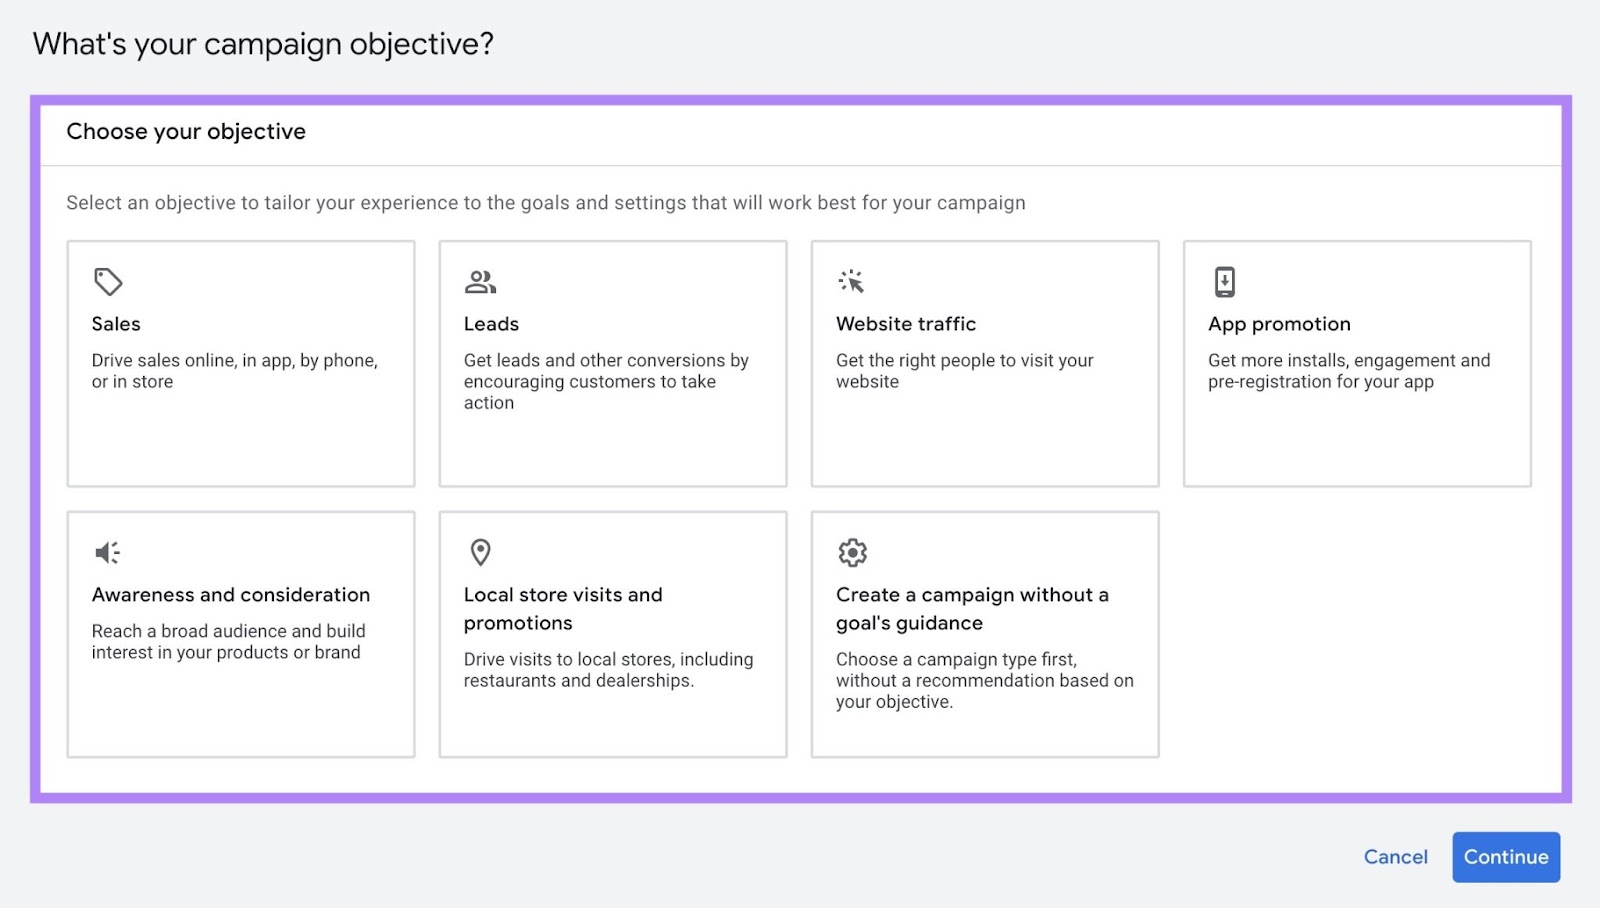
Here’s what each objective means:
- Sales: Boost product or service sales
- Leads: Generate leads to drive more sales or conversions
- Website traffic: Get people to visit your site
- App promotion: Increase app downloads or in-app actions
- Awareness and consideration: Get more people interested in your offering or brand
- Local shop visits and promotions: Increase in-person visits to your local business
For this workflow, we’ll select “Website traffic.”
The screen will now populate with campaign types that fit your chosen objective.
We’ll choose “Search” (text ads that show in Google’s search results):
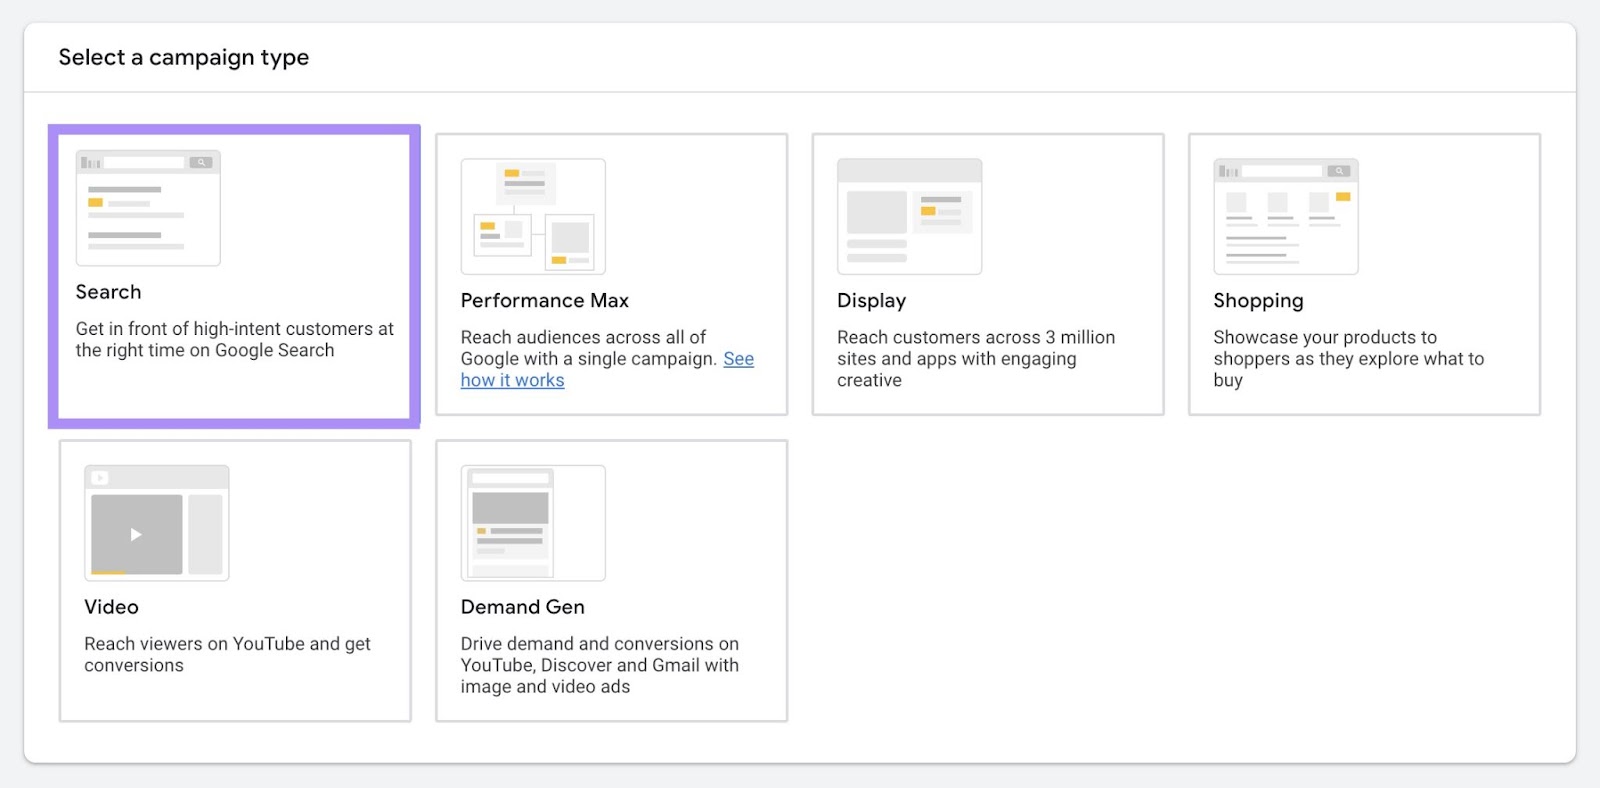
But you also have some other options for your campaign type:
- Demand Gen: Image and video ads intended to drive demand that show across YouTube, Discover, and Gmail
- Display: Image and video-focused ads that appear on websites and apps within the GDN
- Shopping: Product listings that appear in Google Shopping and search results
- Video: Video ads that appear on YouTube and other sites
- Performance Max: Automated campaigns that use AI to run your campaign across all of Google's advertising channels
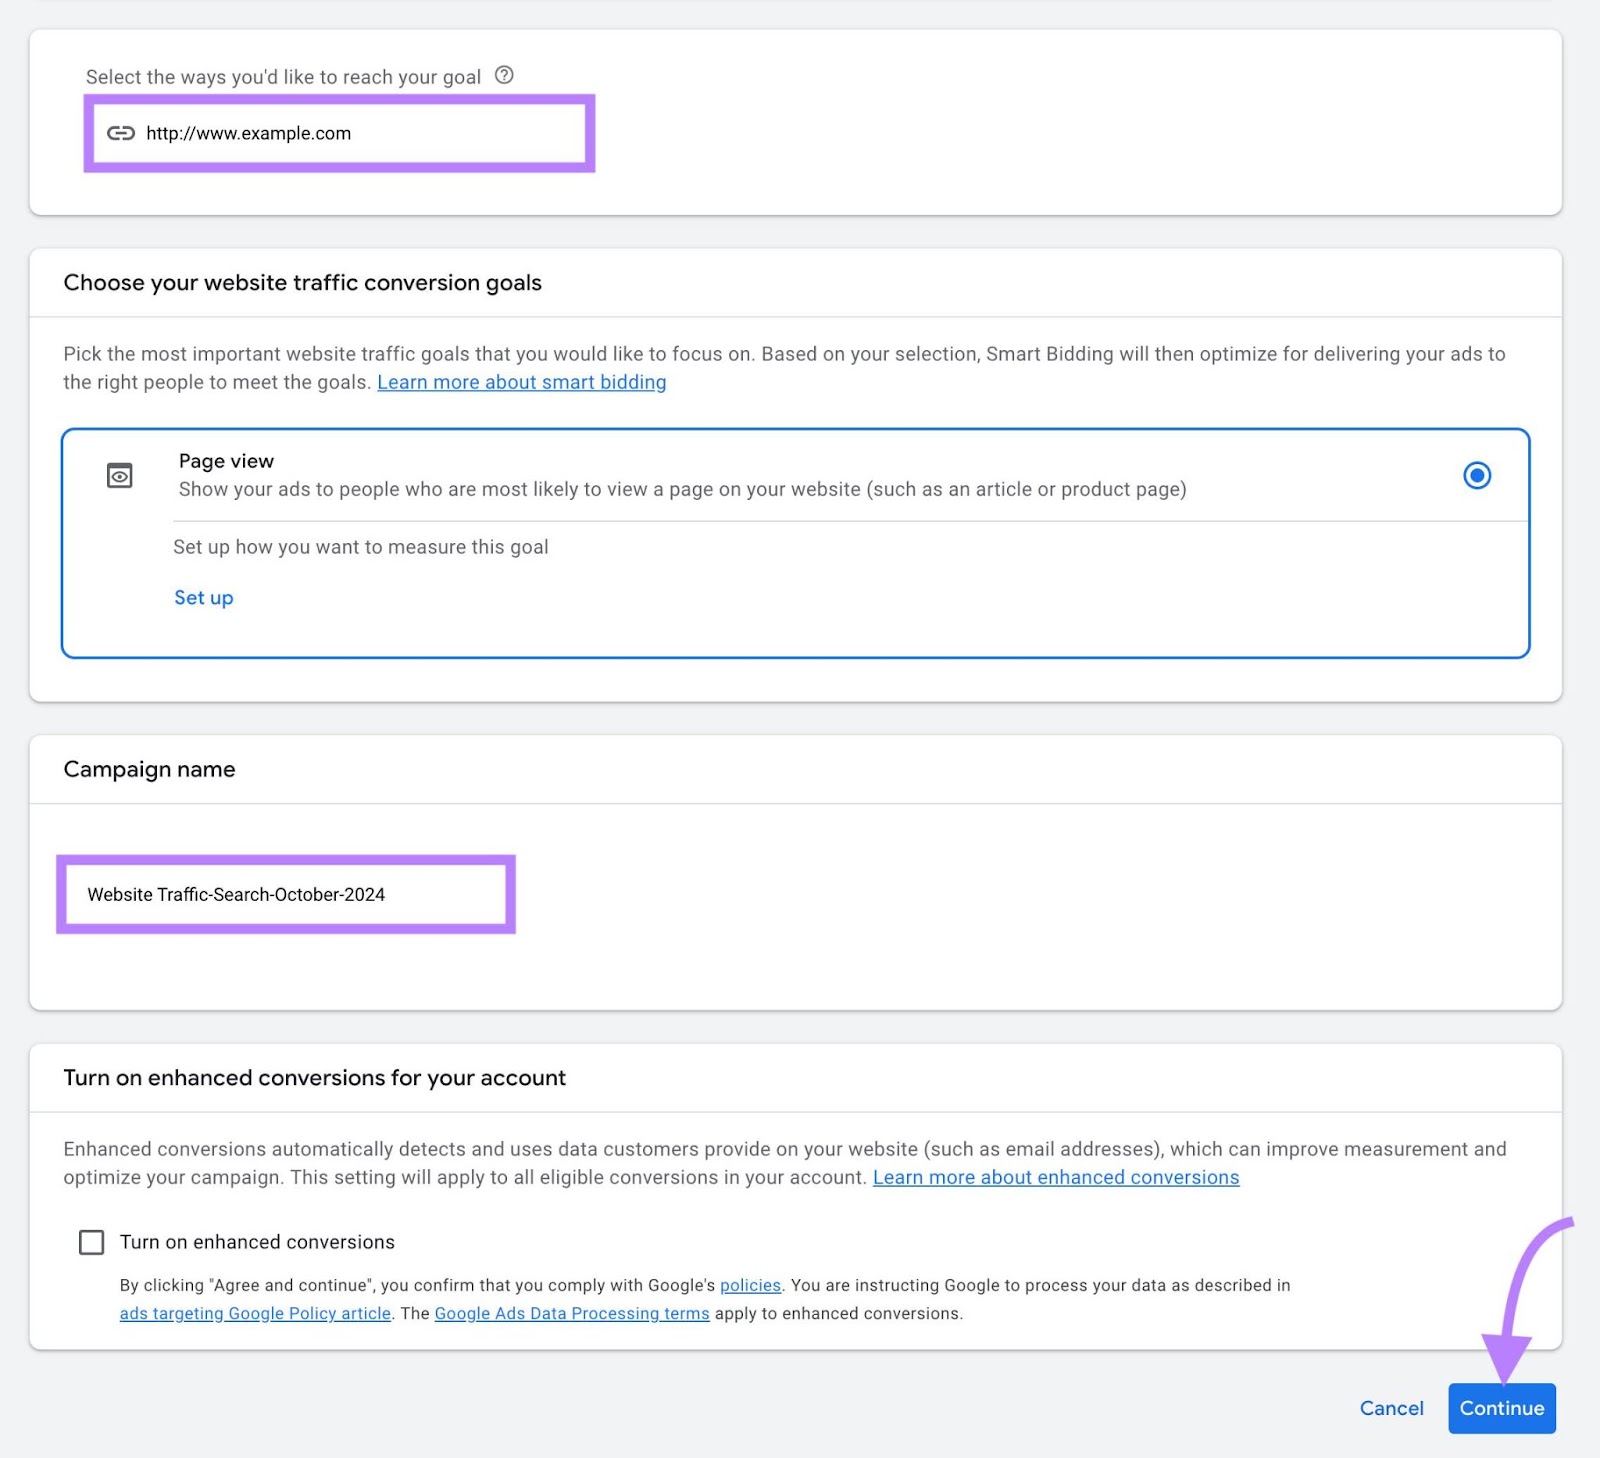
Once you’ve chosen your campaign type, you’ll be prompted to select or enter some relevant information.
In this case, we need to specify that we’re trying to drive website visits and indicate the page we want to send people to.
Finally, give your campaign a name and click “Continue.”
4. Choose a Bidding Strategy
Now, select what you want to focus on for your campaign.
Your options include:
- Conversions: This focuses on actions that you've defined as valuable to your business. Like purchases or sign-ups.
- Conversion value: This focuses on the value you associate with desirable actions users take
- Clicks: This focuses on people who click on your ads
- Impression share: This focuses on the portion of impressions your ad gets out of the total number they could get
We’re trying to drive people to our website, so we’ll choose “Clicks” for this campaign.
Then, check the box to set your maximum CPC and enter the value you’re willing to pay (revisit what you learned during your keyword research if you need help).
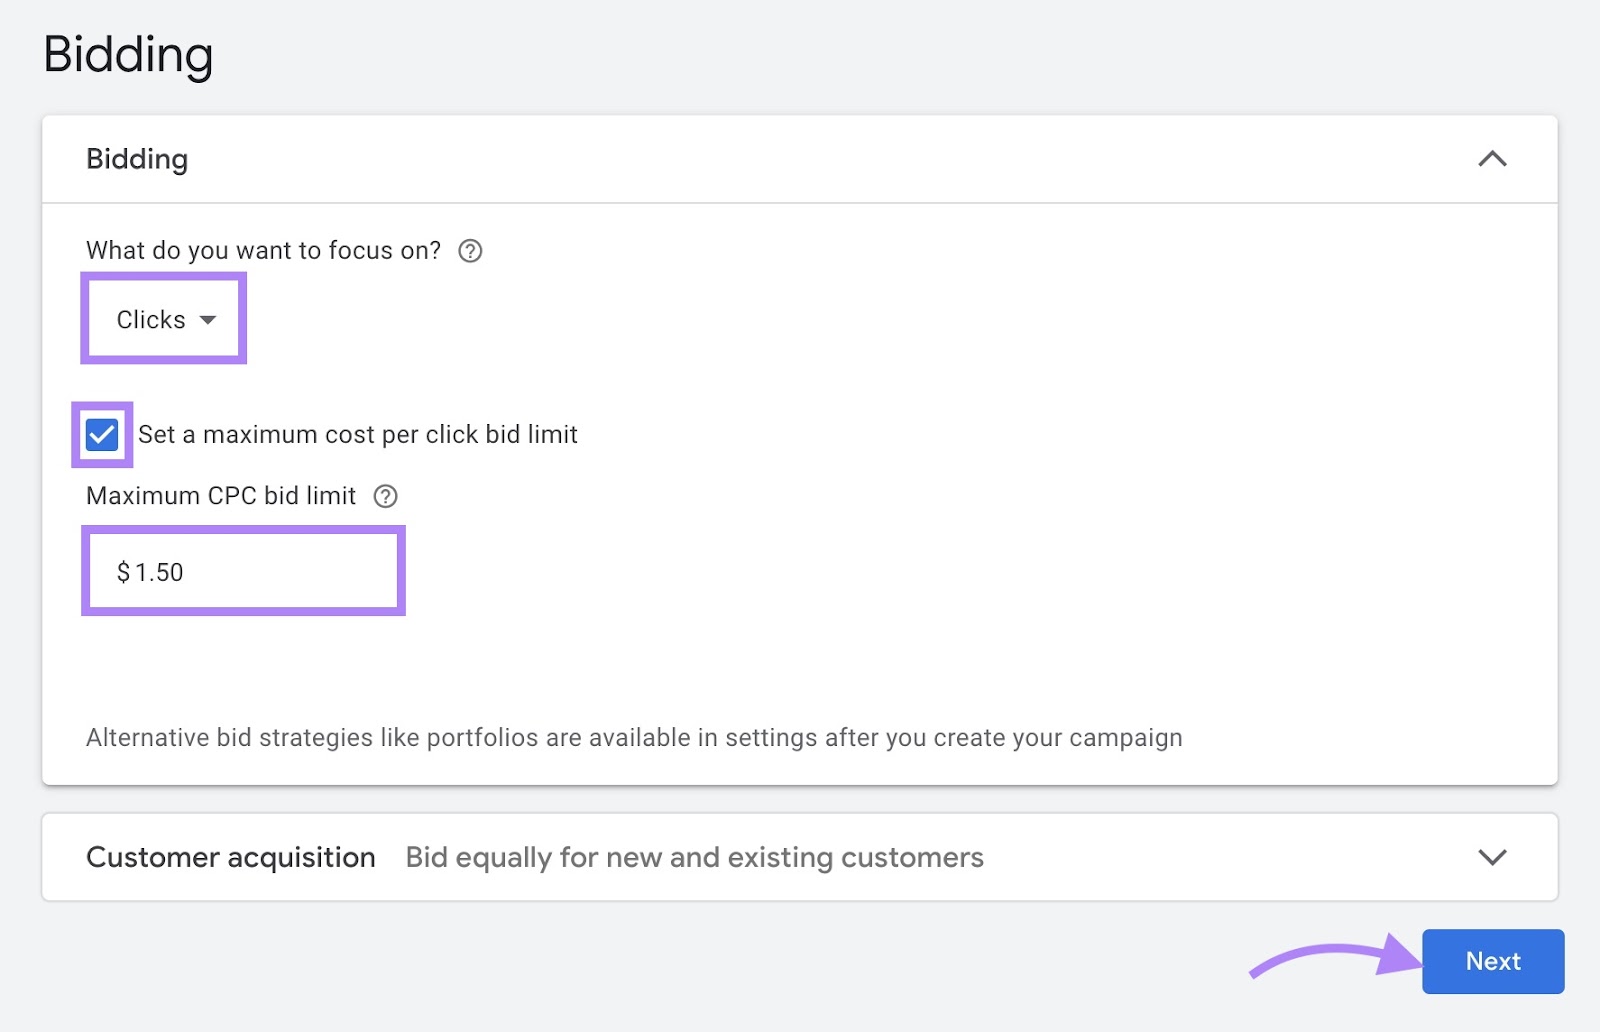
Or leave this box unticked, and Google Ads will automatically adjust your bids to maximize clicks without going over your budget. This can be a good starting point for gathering data on your first campaign's performance.
Click “Next” when you’re ready.
Further reading: The Ultimate Guide to Google Ads Bid Strategy (with Examples)
5. Customize Your Campaign Settings
In the “Campaign settings” step, you'll define who sees your ads and where your ads can appear to ensure you reach the right audience.
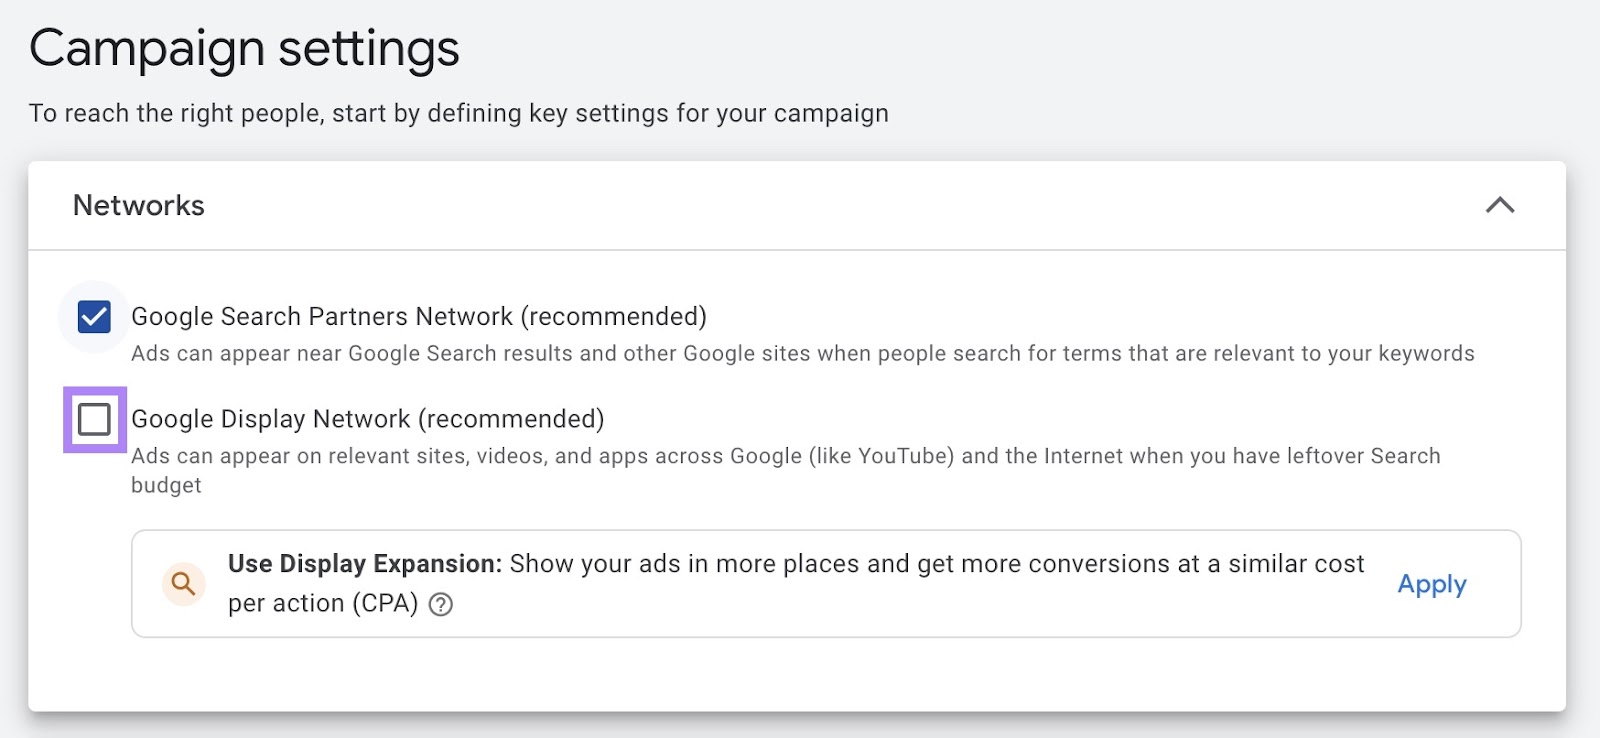
The first step is to select your target network(s):
- Search Network: Your ads appear on search results pages
- Display Network: Your ads show on a variety of websites and apps
If your ad won't include an image, it's best to untick the "Include Google Display Network" option.
That’s because the GDN is primarily designed for visual ads. And text-based ads might not perform as well.
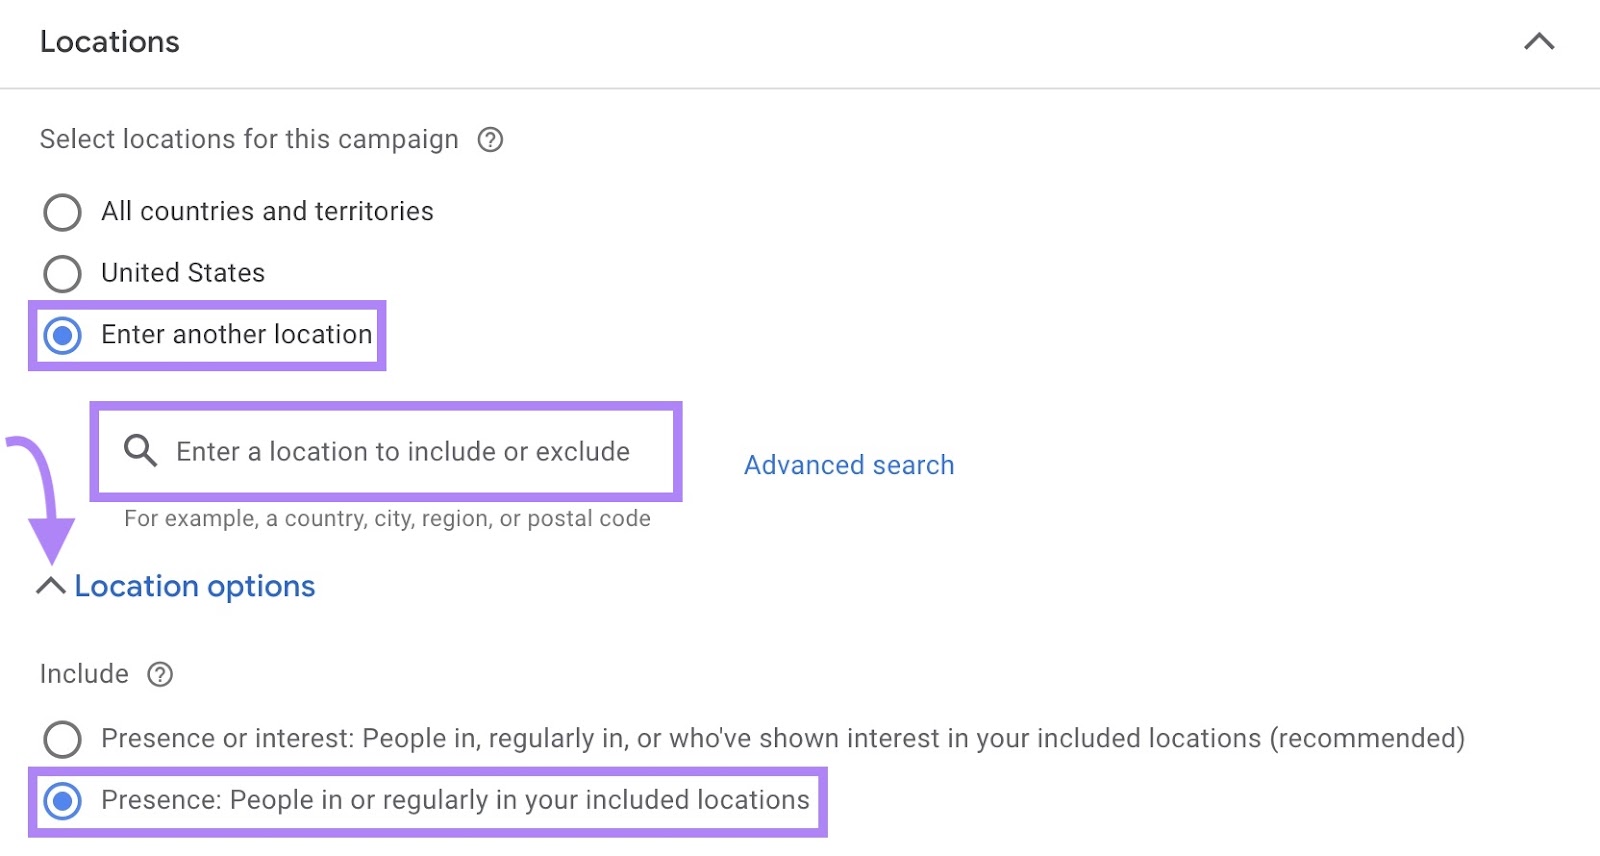
Next, choose your campaign’s location.
If you don’t see the location you want on the list, select “Enter another location” and type in your desired area in the search bar.
Google Ads automatically shows your ad to locals, frequent visitors, and people who simply show interest in your target country.
To change this setting, click “Location options” and select the circle next to “Presence: People in or regularly in your included locations.”
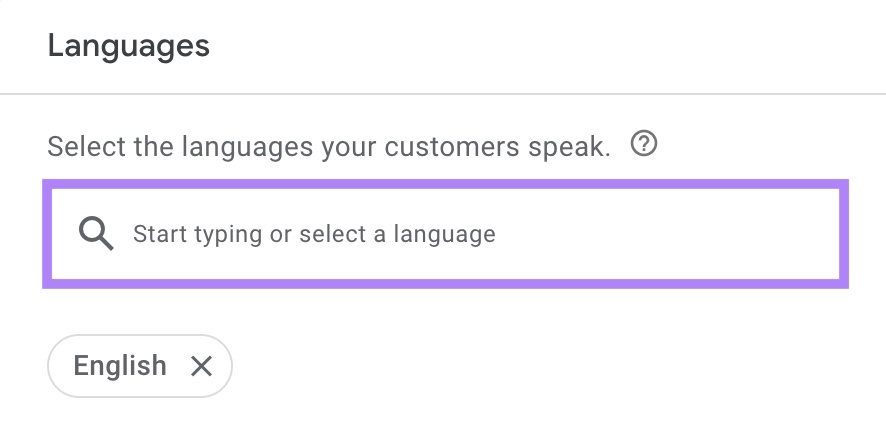
Next, select the language(s) your potential customers speak.
Scroll down to the “Audience segments” section to define the group of people you’re targeting based on things like shared interests or behaviors. Which helps your ads reach the most relevant people.
For example, if you're running a local barbecue restaurant, you can target people interested in dining out and barbecue cuisine within your area, which helps you avoid wasting your ad budget by showing ads to vegetarians or people who rarely eat out.
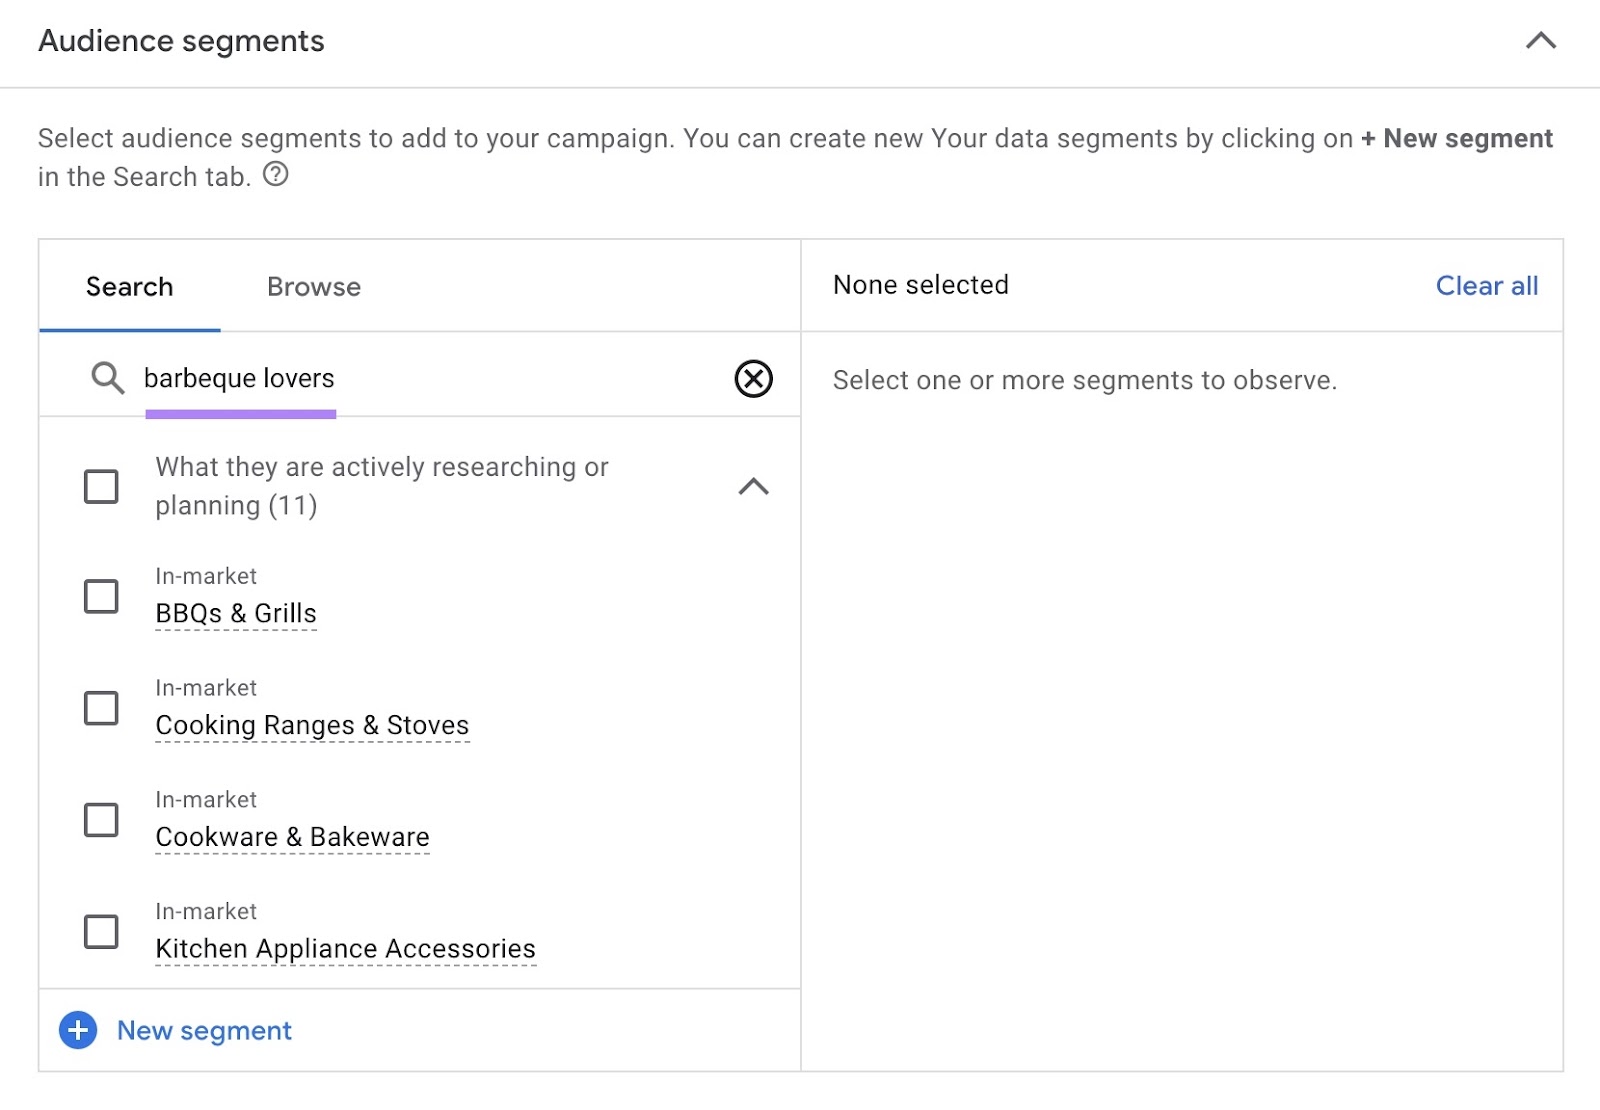
Click “Next” to move on to the next step.
Further reading: Google Ads Audience Segments: Types, Tips, and Best Practices
6. Use Google Ads’ AI Assistant (Optional)
Google Ads offers an AI-powered tool to help generate elements like keywords and headlines, which can be particularly useful if you're new to creating ads or looking for fresh ideas.
To use this tool, you'll need to provide the URL where people will land when they click your ad.
Then, provide more information about your offering, under the “What makes your products or services unique?” section.
Then, click “Generate.”
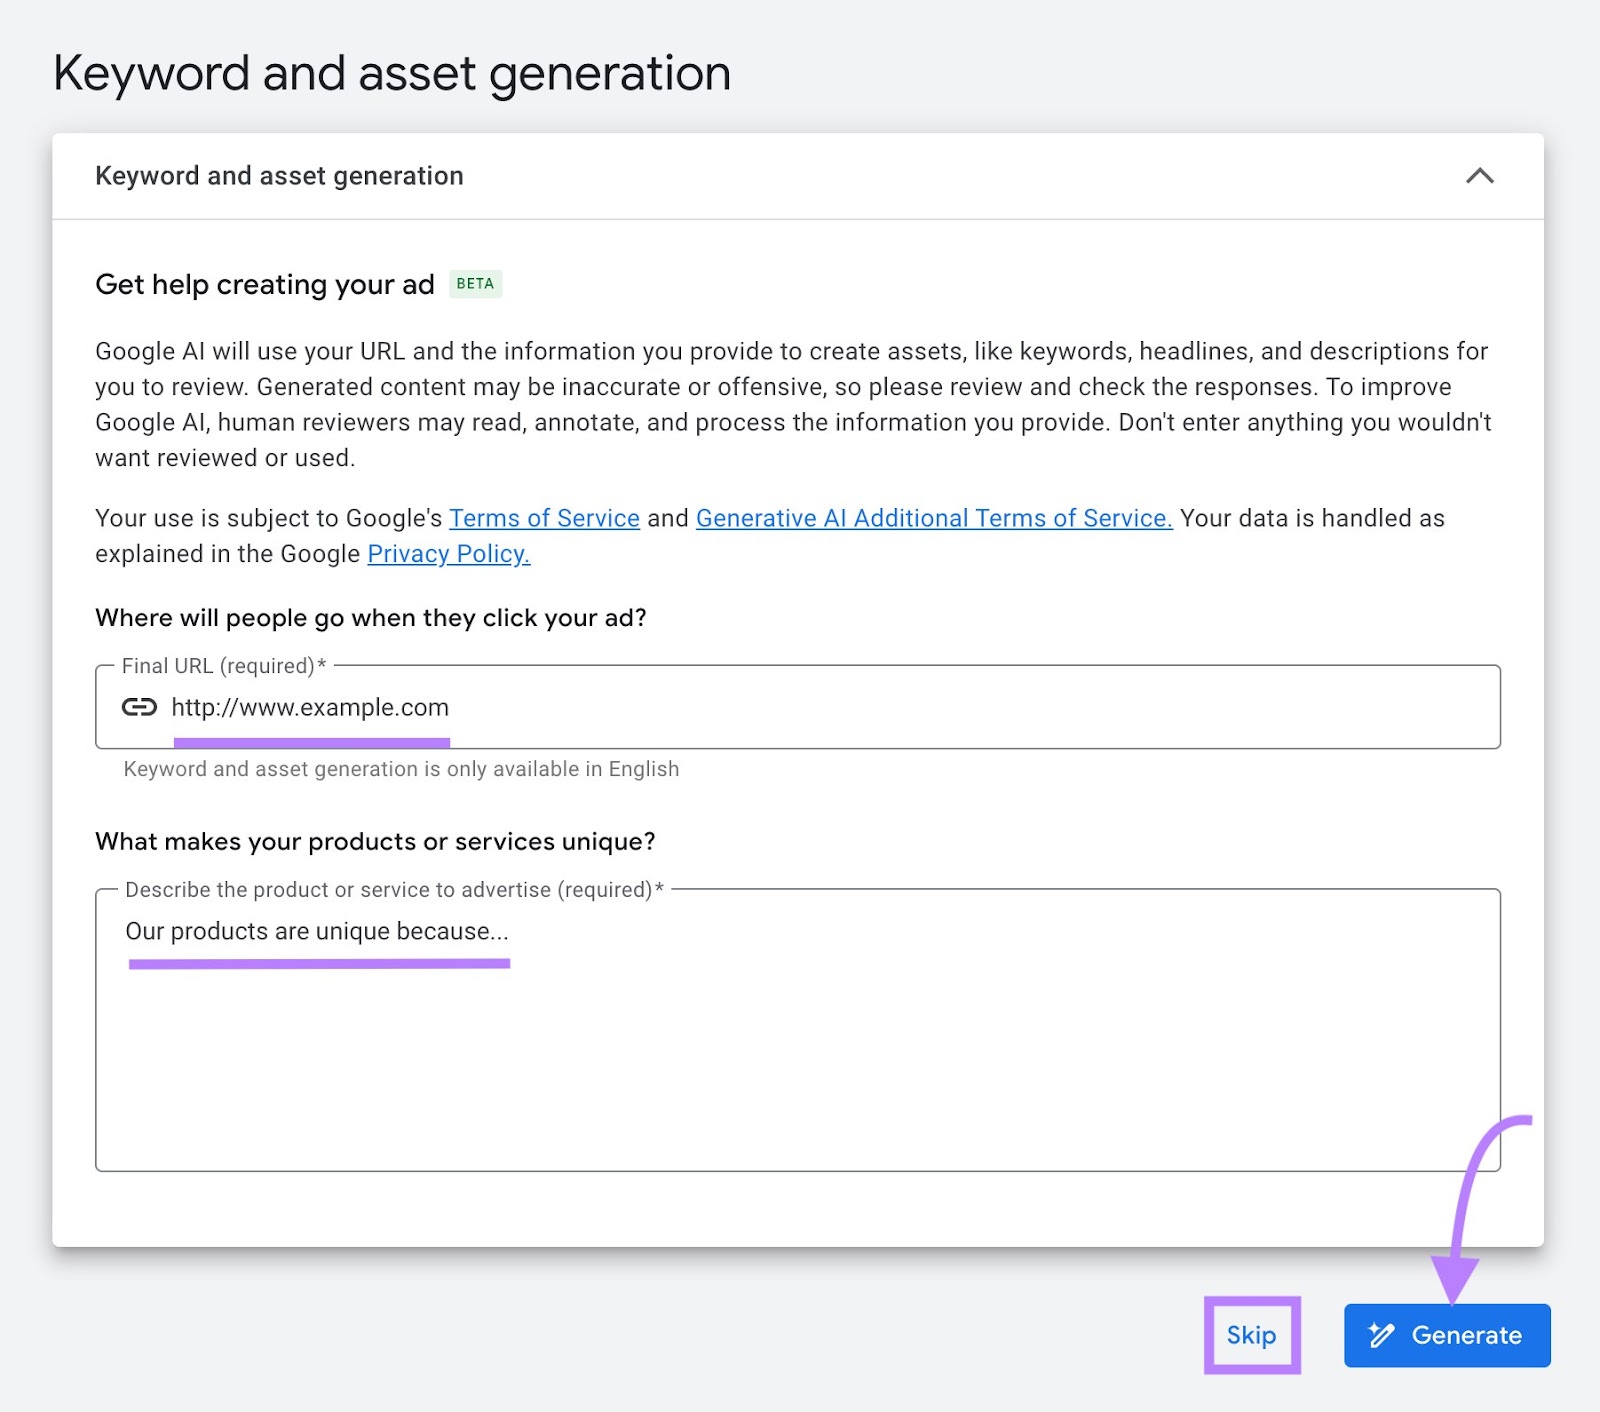
If you choose to use this feature, always review the generated content carefully and make any necessary adjustments.
You can also click “Skip” to move on to creating your ad without using AI.
7. Create Your Ad
The first step in creating your campaign (if you didn’t get assistance from AI) is adding your Google Ads keywords.
There are a few ways to do this.
The first is to enter your destination URL and the products or services you want to advertise. And click "Get keyword suggestions" to have Google Ads generate a list of potential keywords for you.
You’ll see your suggestions in the “Enter keywords” box.
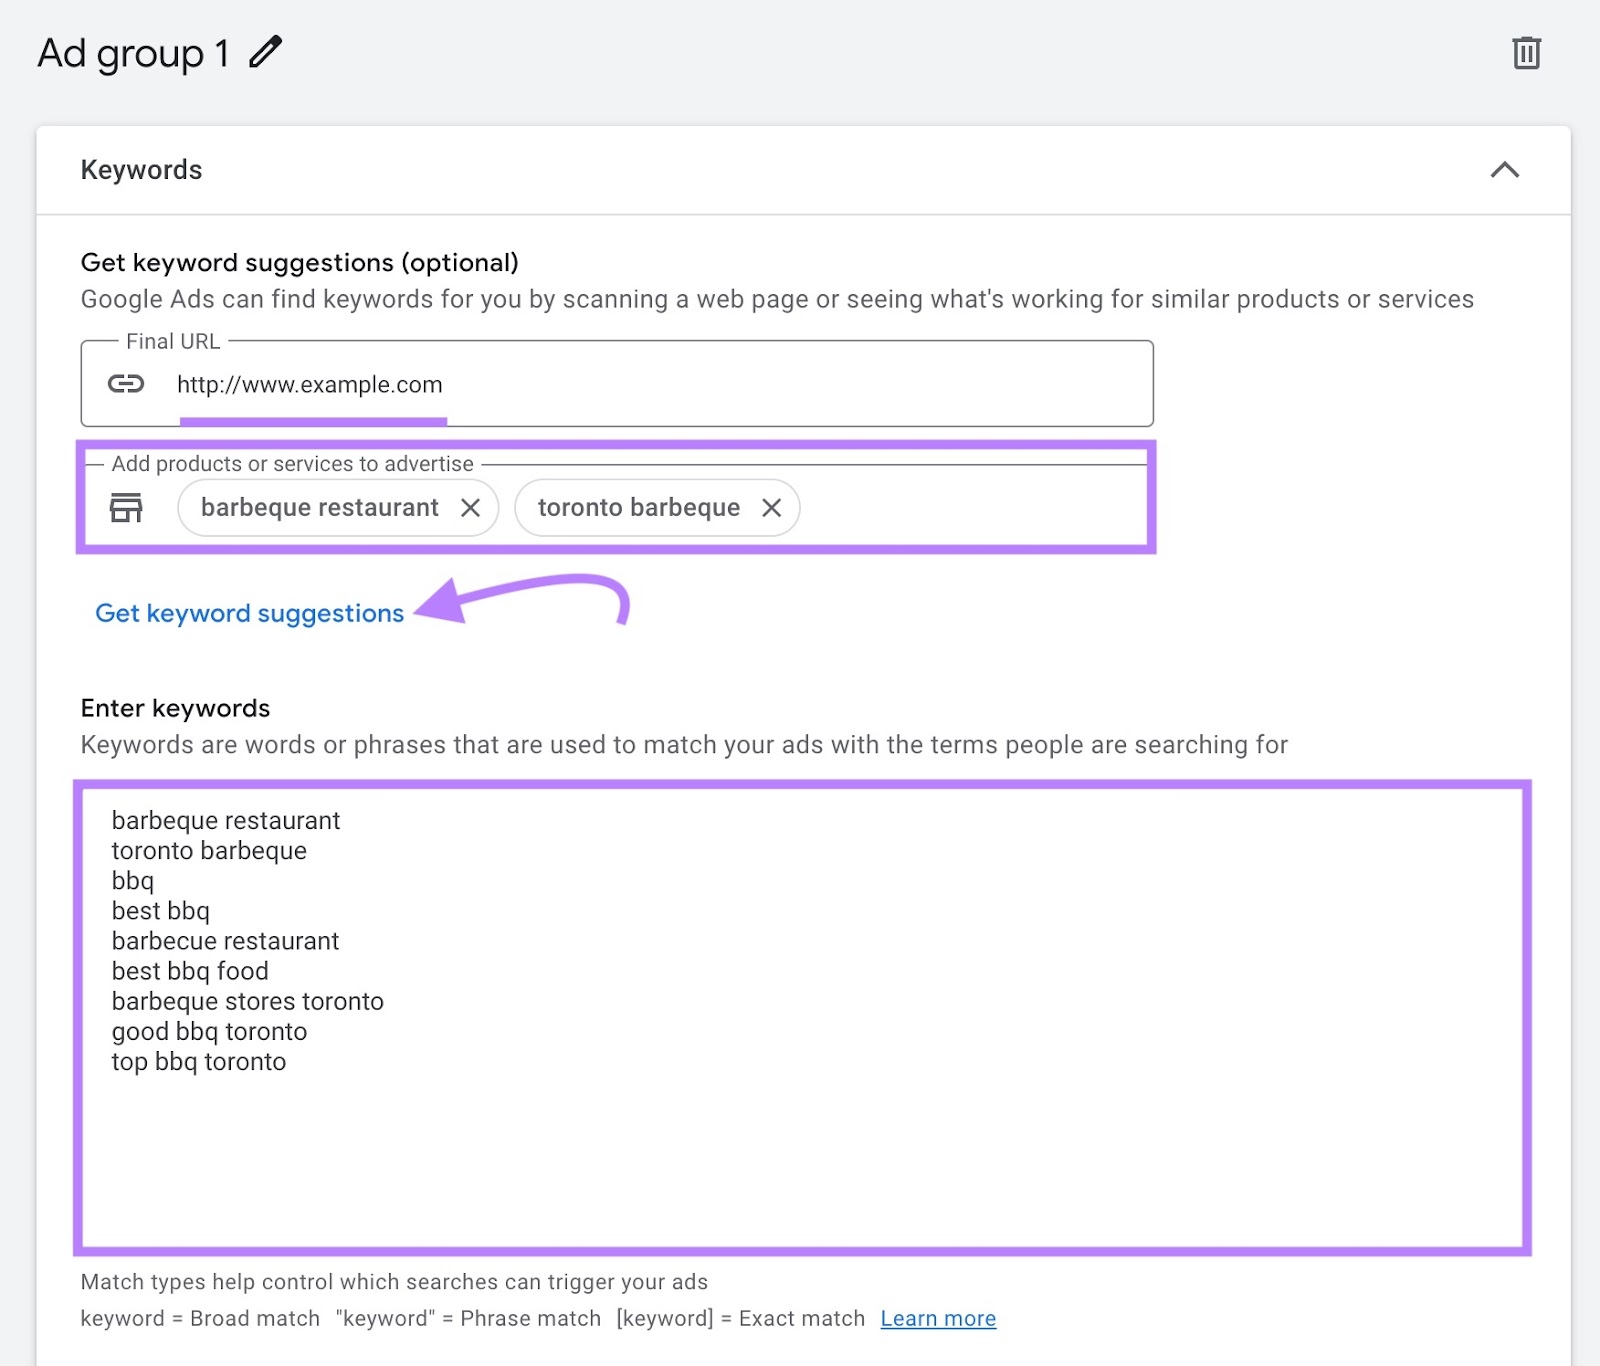
Otherwise, enter the terms you discovered using the Keyword Magic Tool and Advertising Research.
Then, scroll down to the “Ads” section and enter your destination URL under “Final URL.”
You can adjust how you want your URL to appear in the "Display path" section.
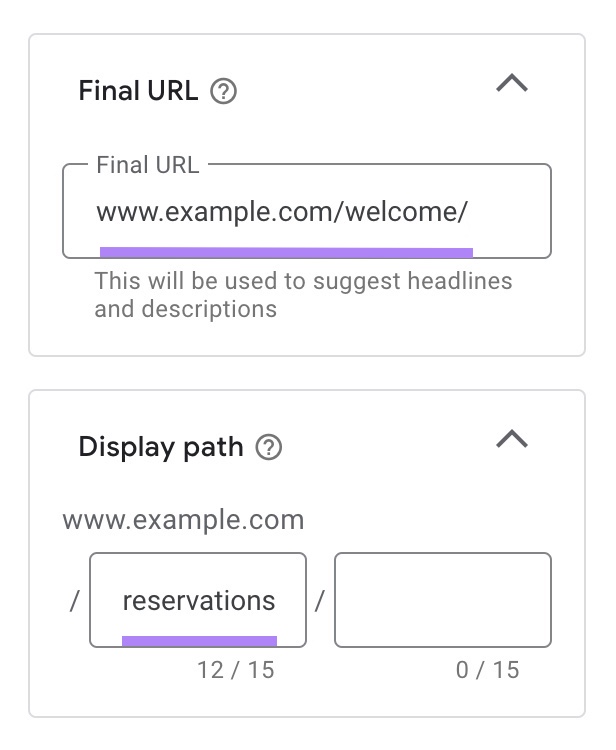
Modifying this can provide a clean, easy-to-read URL that gives users a clear idea of what to expect when they click your ad.
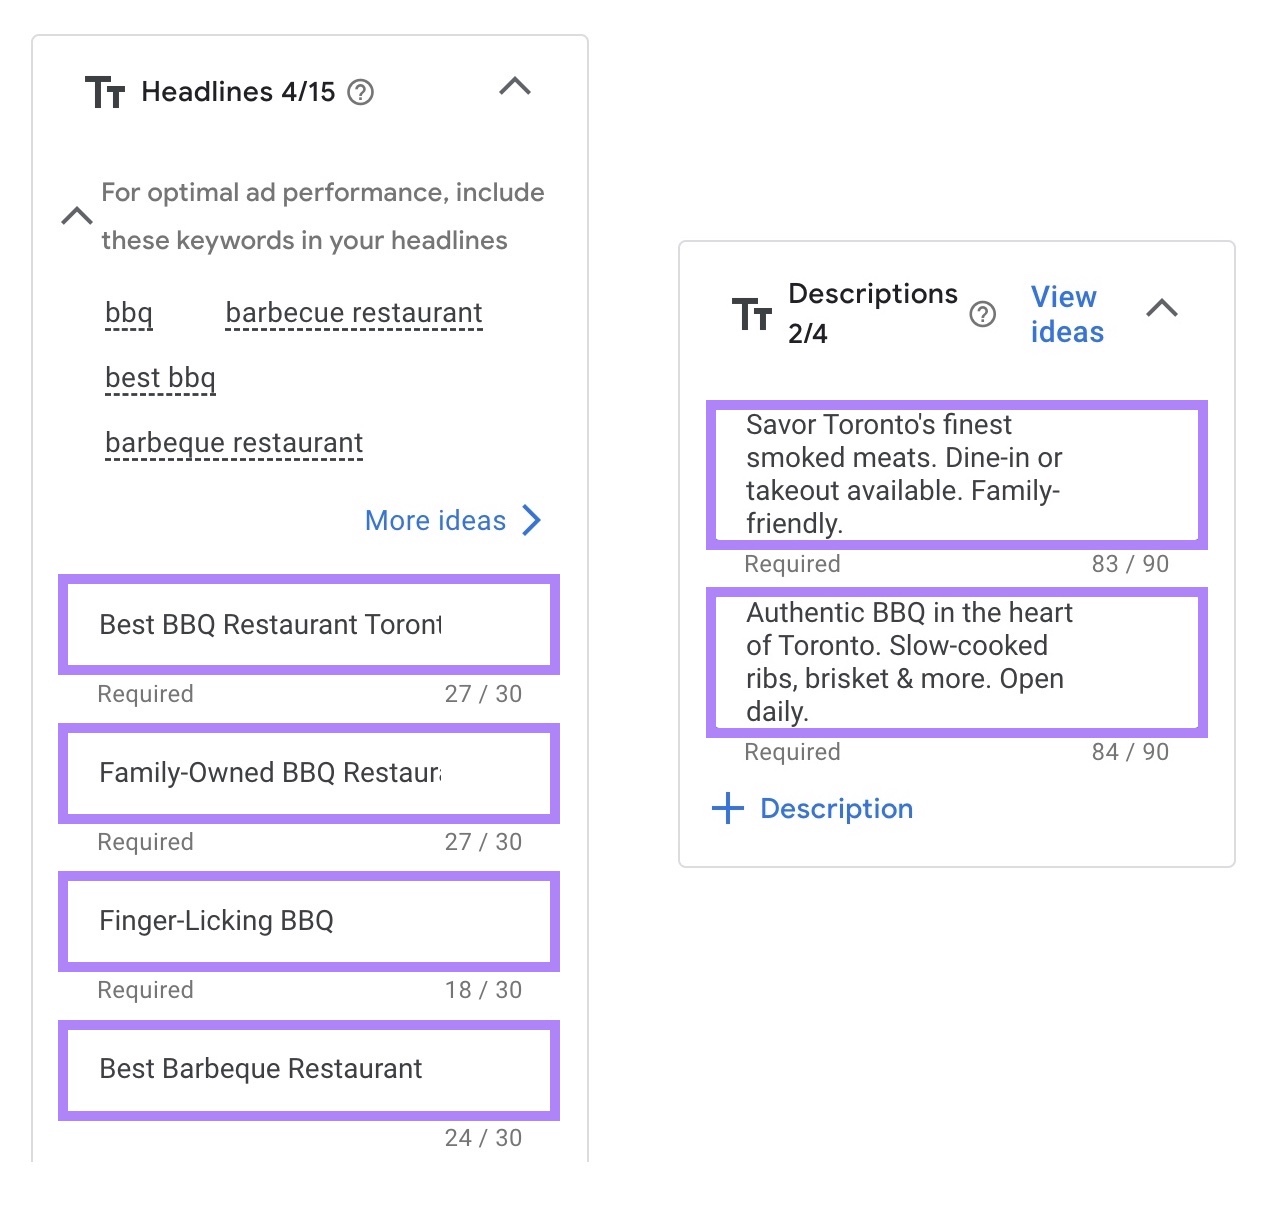
Next, write your headlines. These are the large, blue lines people usually see first.
You can enter up to 15 headlines that are each 30 characters or shorter. The more you add, the easier it is for Google to test different combinations and understand which ones perform best.
Google recommends keywords to include. But focus most on creating compelling and relevant headlines.
And add two to four descriptions that can be up to 90 characters each. Use this space to highlight what makes your offering special and include a call to action (CTA).
You can also add sitelinks—additional links in your ad to take people to specific pages on your site. This helps users quickly navigate to the most relevant sections of your website.
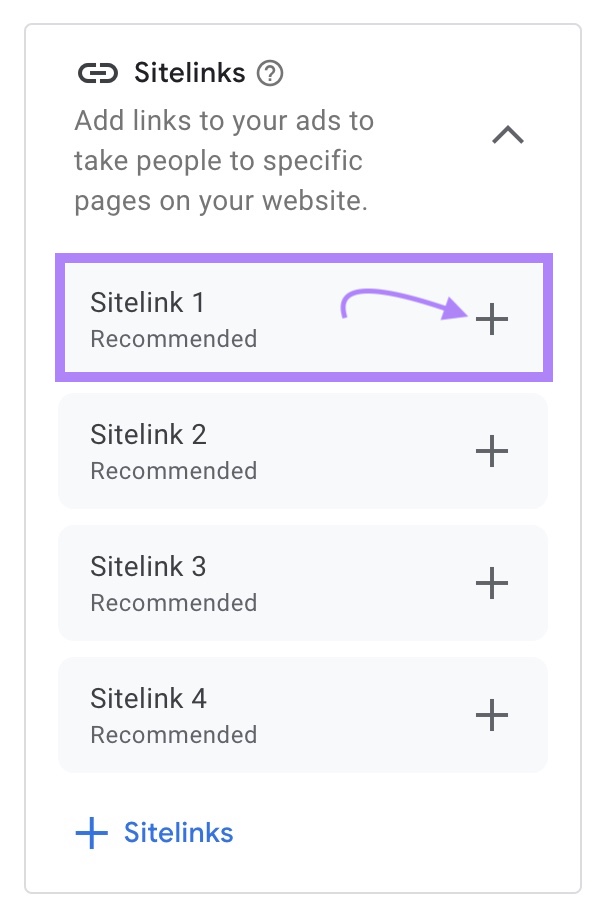
For example, a BBQ restaurant owner might add links to their menu, reservations, and special offers pages.
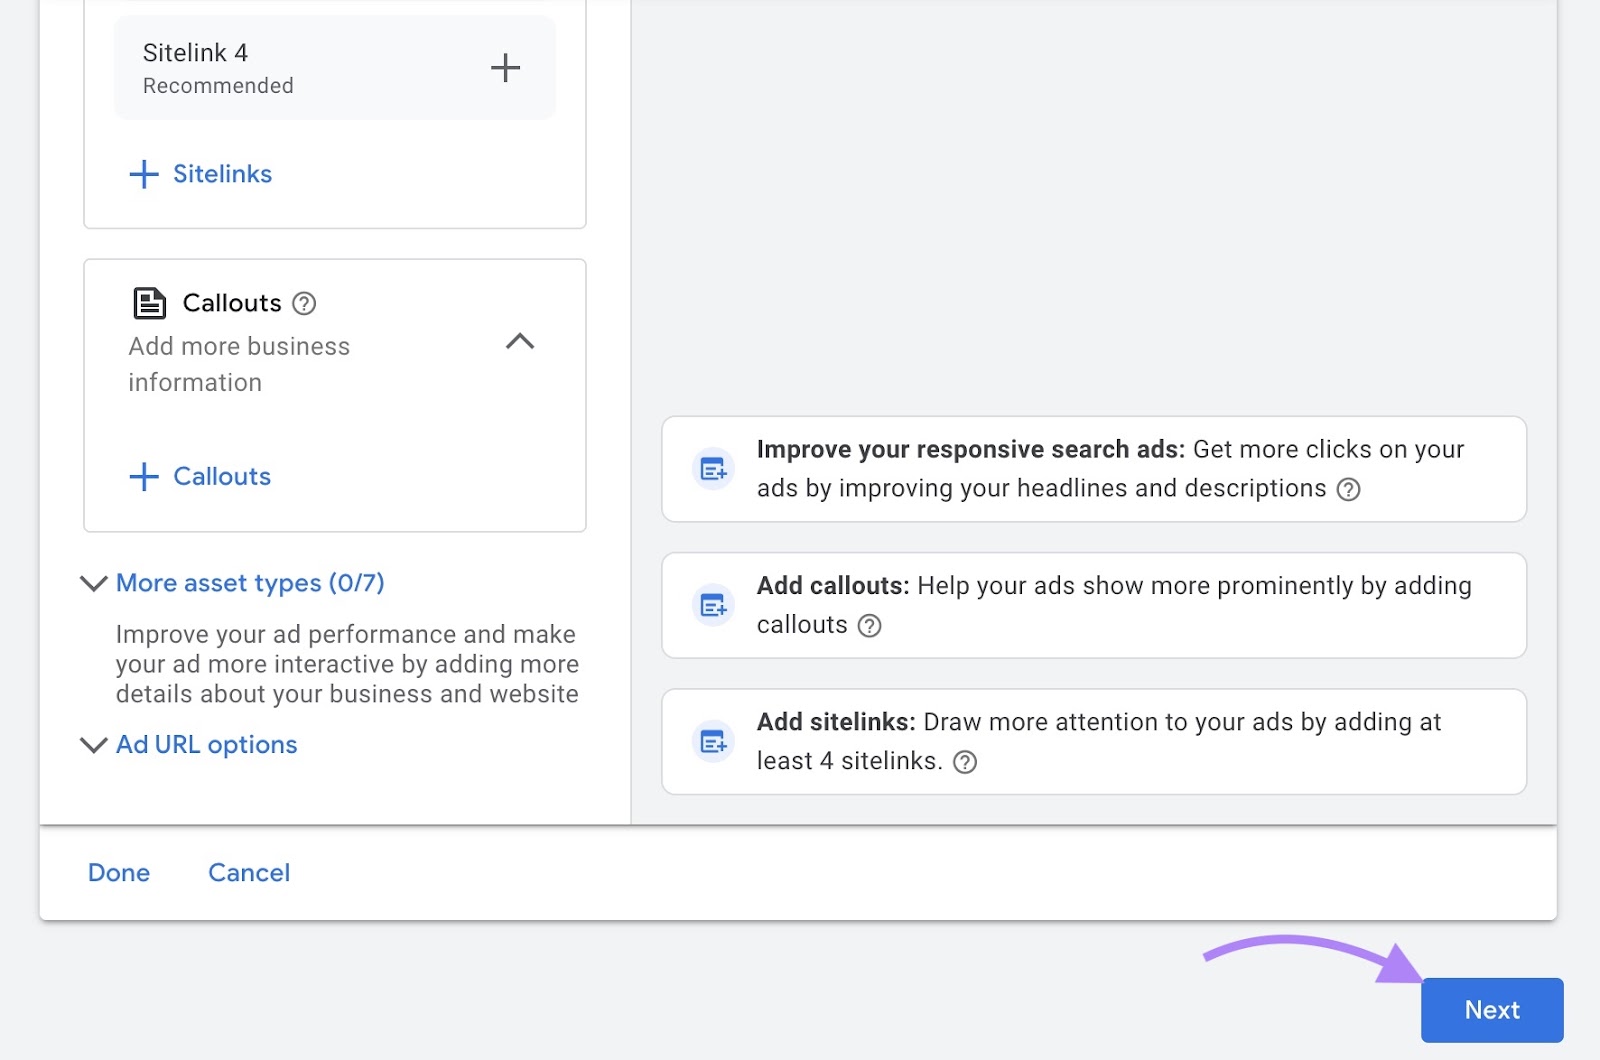
When you’re done, click the “Next” button at the bottom of the page.
8. Set an Ad Budget
In this step, decide how much you want to spend on your ad campaign each day.
Google might automatically recommend an average daily budget based on your campaign settings. But you can also set up a custom budget.
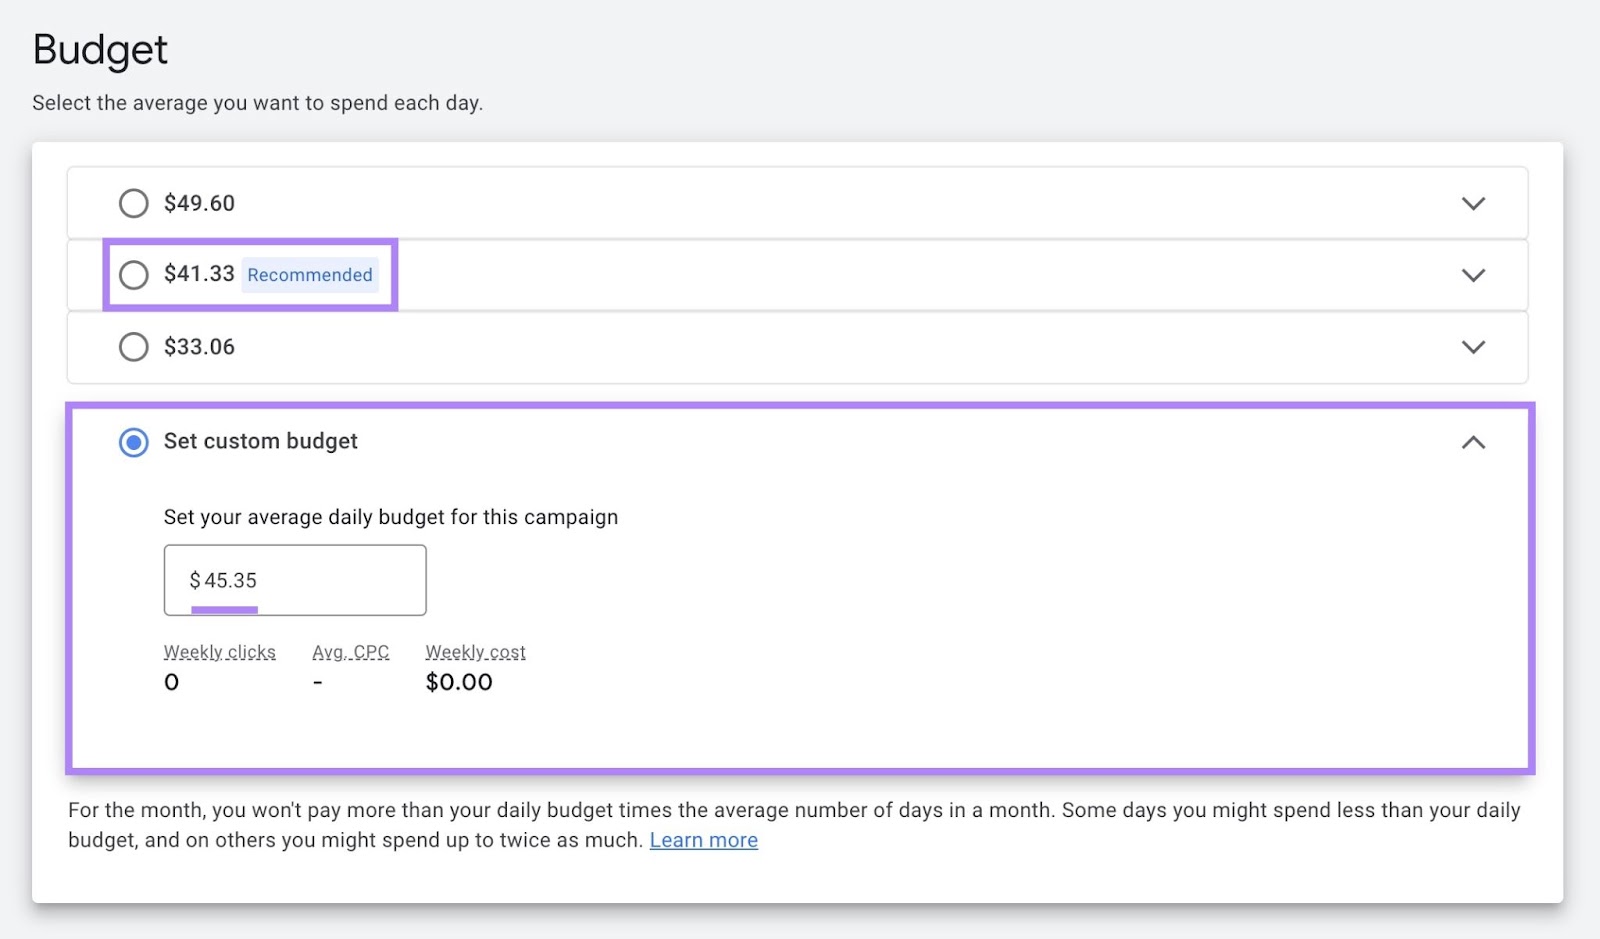
To calculate your daily budget, divide your total monthly Google Ads budget by 30.4 (the average number of days per month).
So, if your monthly budget is $1,378, your daily budget would be around $45.
Enter that number in the box under “Set custom budget” and click “Next.”
9. Review Campaign Settings
At this stage, your campaign is ready to publish. But before you do that, take a look at the “Recommendations” and consider implementing them to optimize performance.
Each recommendation provides a percentage estimate of how much it could improve your campaign.
Click on the arrows to navigate through the recommendations. And click the “View” button next to one to go to the appropriate step and make the suggested improvement.
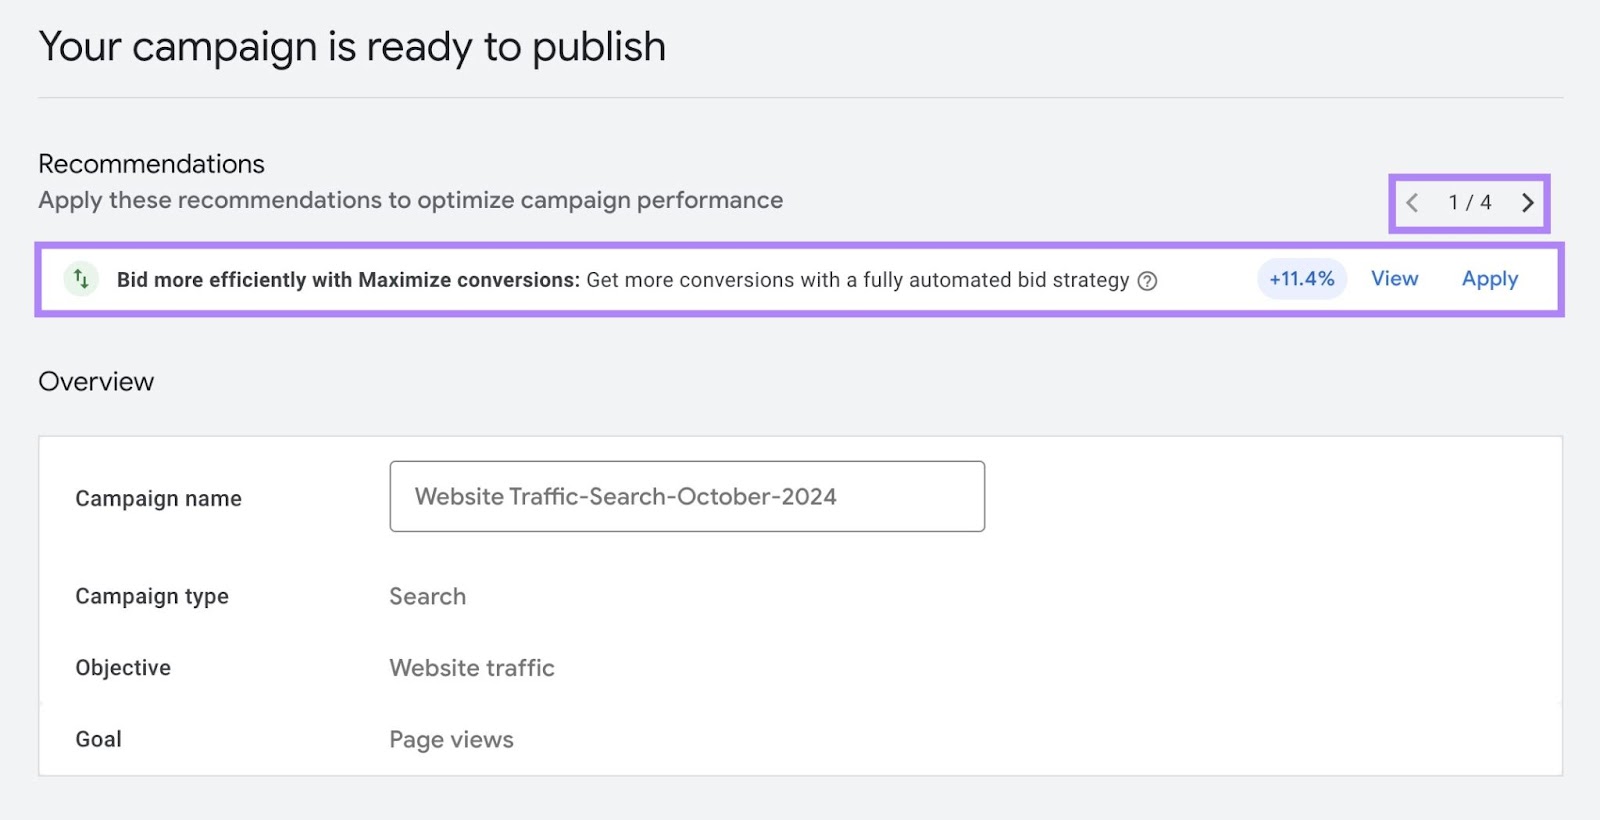
Finally, review your campaign details one more time.
If you need to change anything, just click on the relevant field and you’ll automatically go to the corresponding page.
Once you’re done, navigate back to the review page using the menu on the left side of your screen.
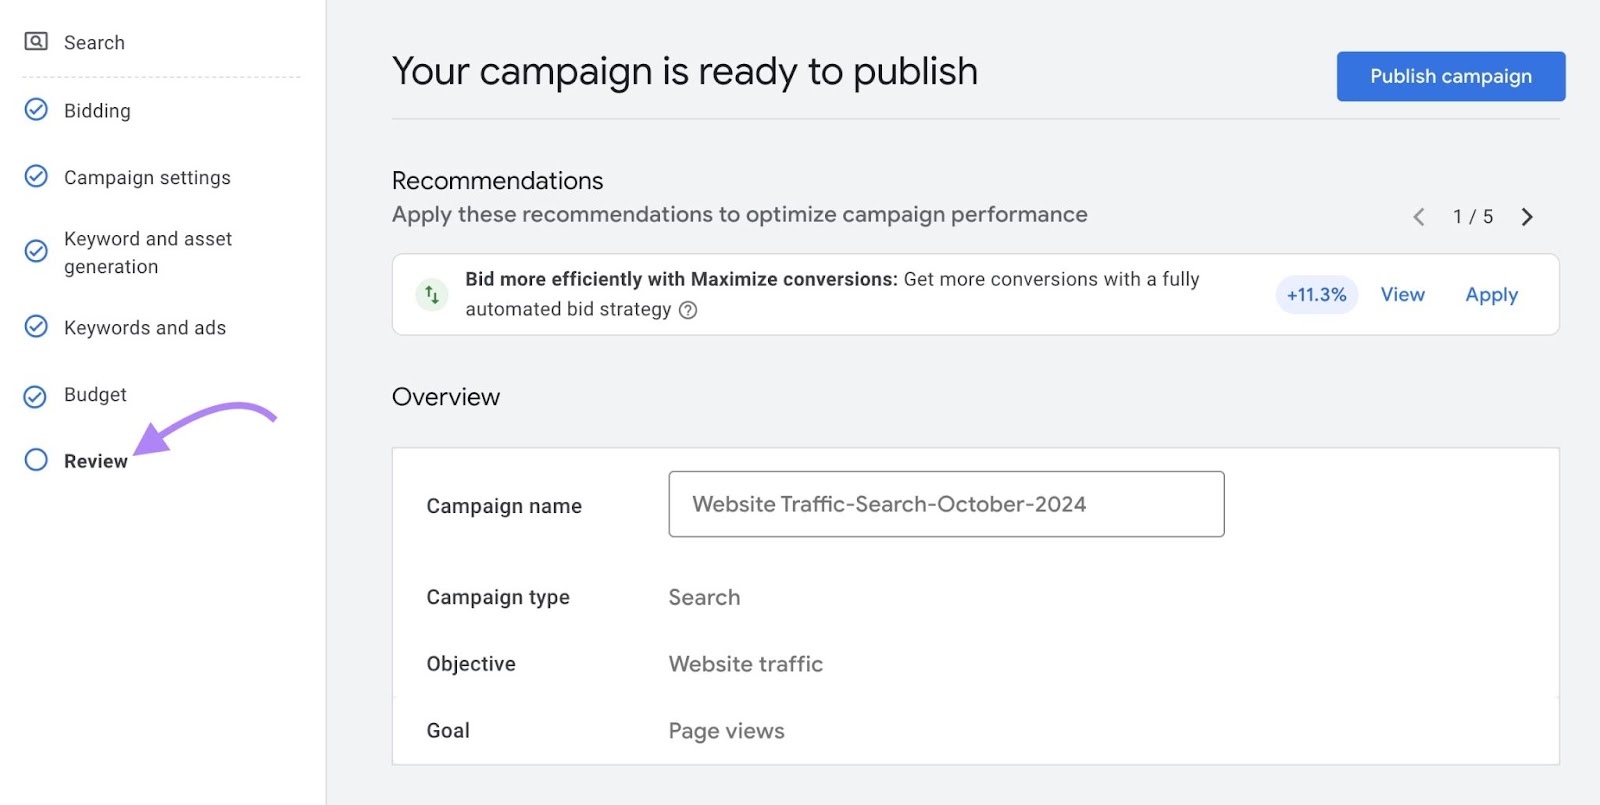
10. Launch Your Campaign
Once your campaign is exactly as you want it, click “Publish campaign” on the “Review” page.
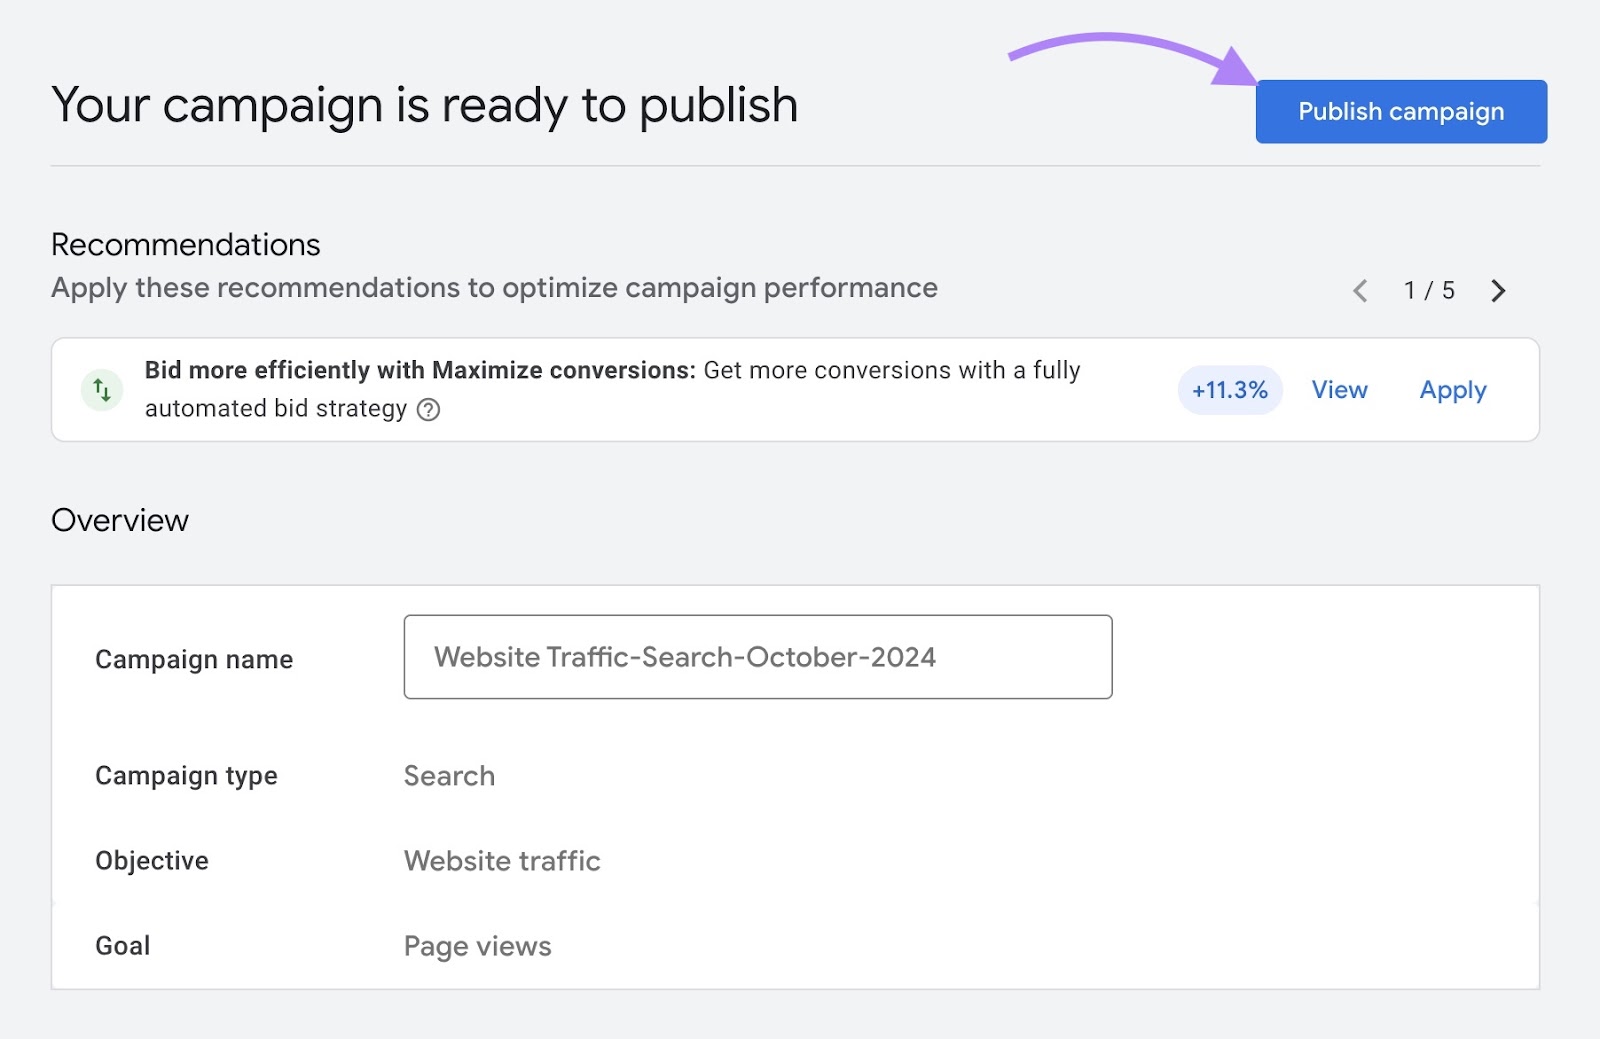
Google reviews every ad before it can go live. Which can take one to two business days.
Once you publish your campaign, you’ll see a screen like the one below, prompting you to take steps to measure the success of your campaign.
For example, you might want to set up a way to measure conversions.
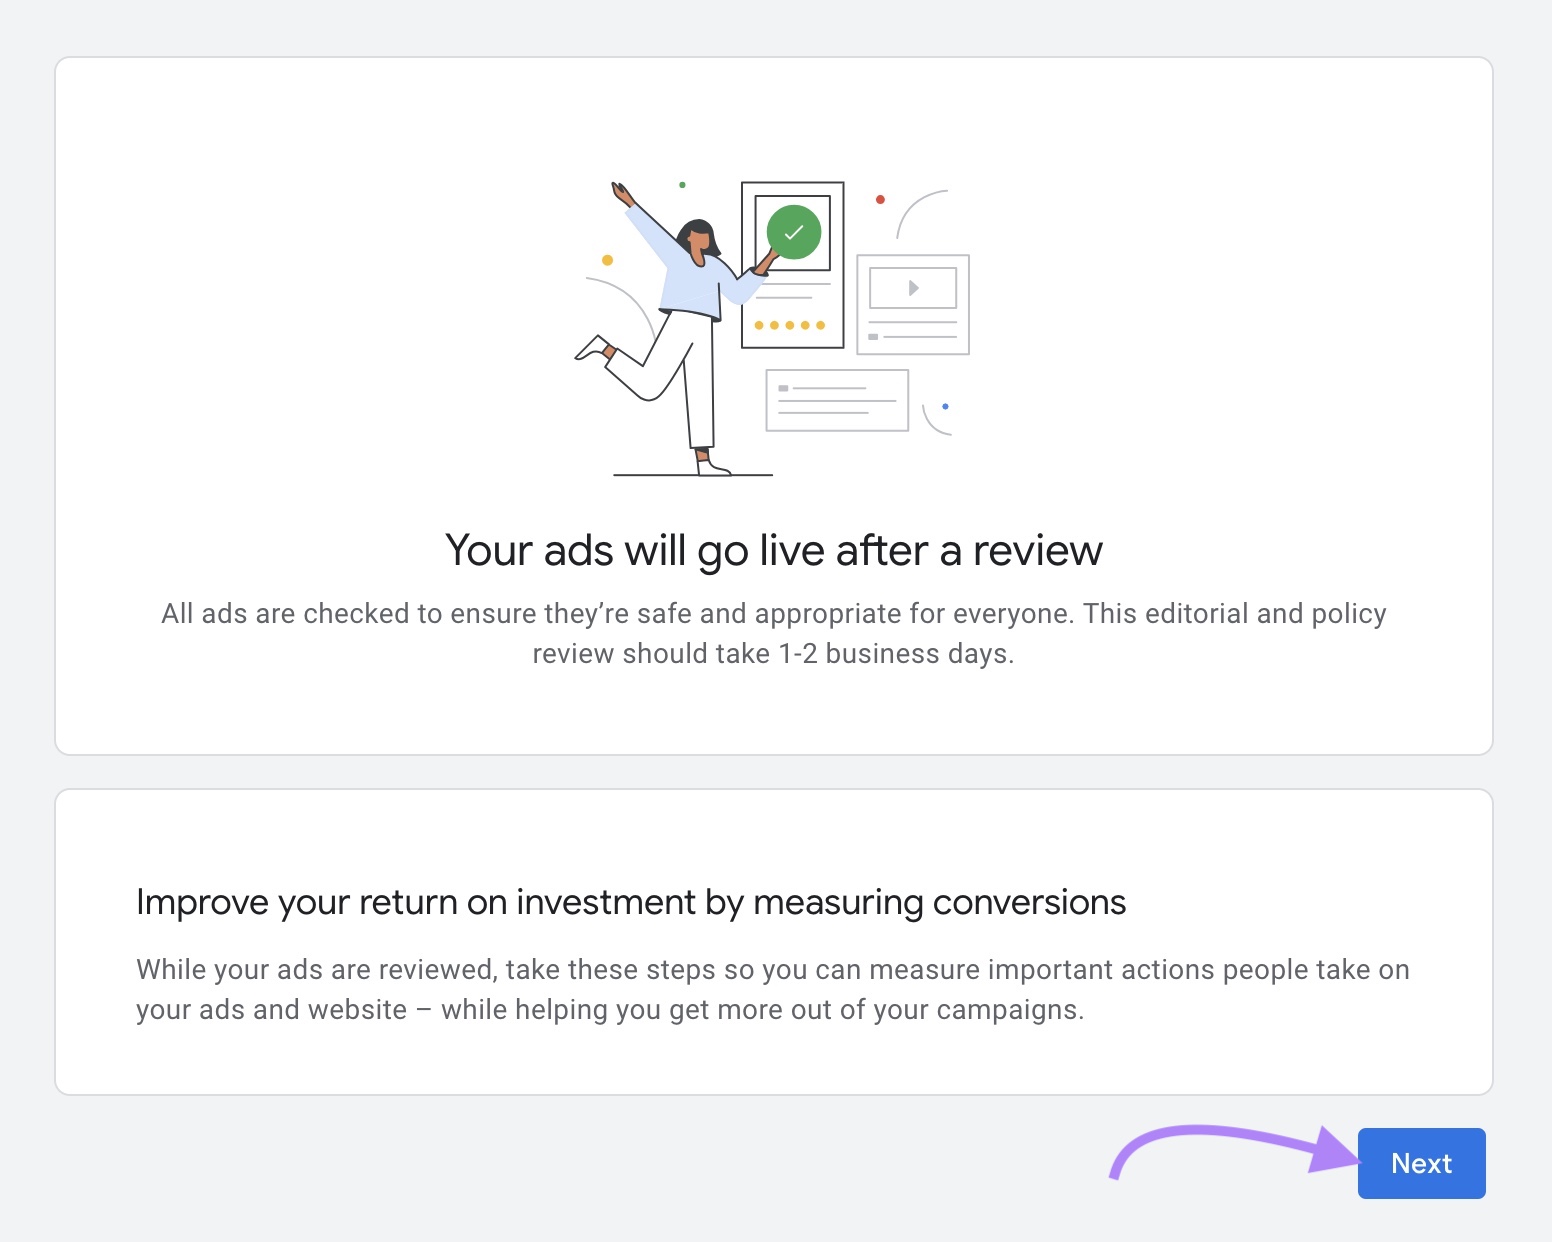
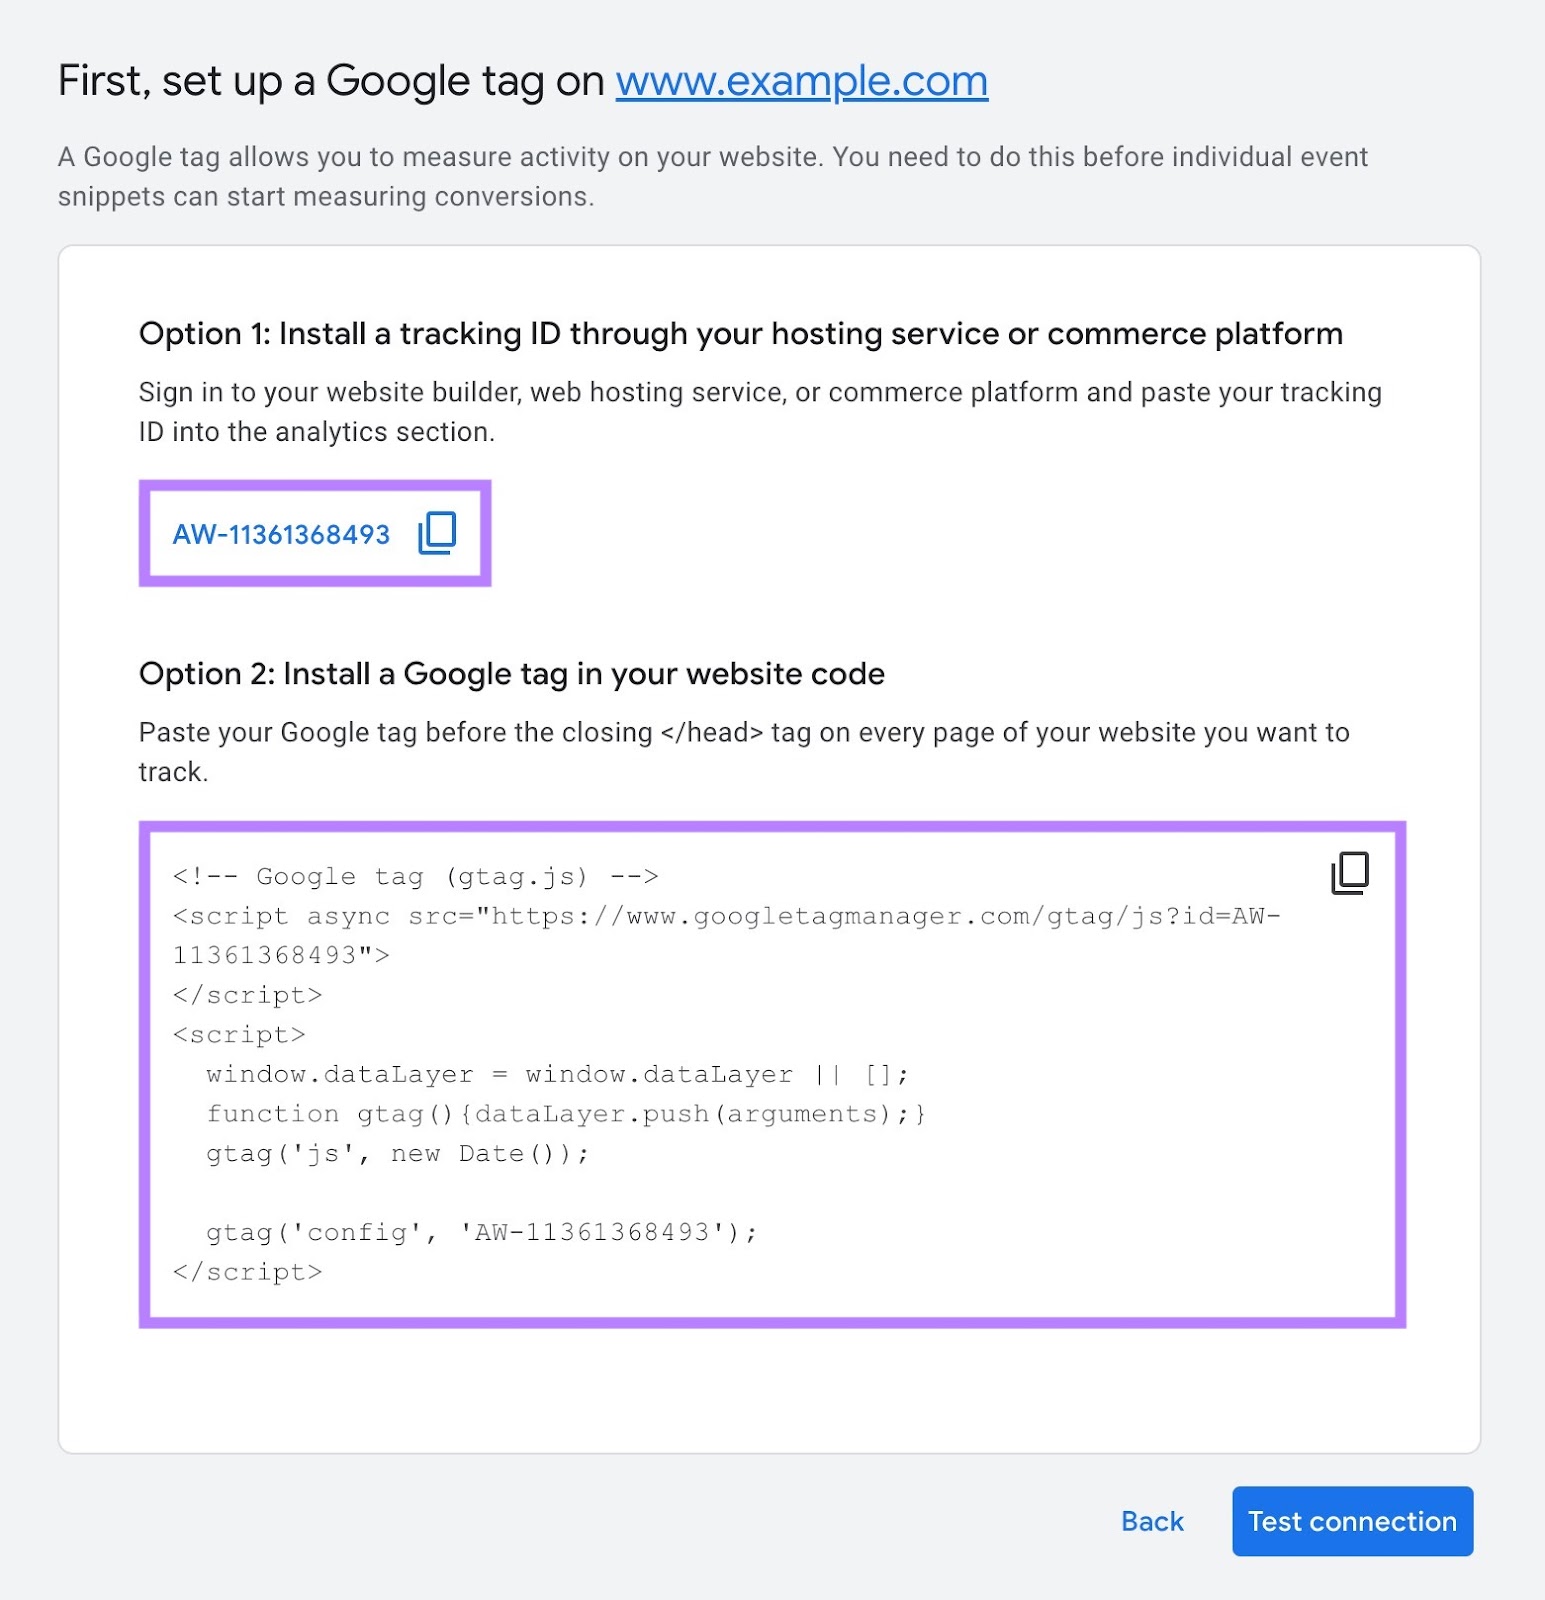
Setting up conversion tracking involves adding a small piece of code to your website. To track important actions like purchases or sign-ups.
You can install this code either through your website builder (if you use one) or by pasting the code directly into your site’s HTML.
Drive Success with Google Ads
Now that you know how to run ads on Google, monitor your campaign to see how it performs.
And use Semrush’s Advertising Research tool to analyze even more of your competitors’ advertising strategies to get additional ideas.
Sign up for a free Semrush trial to get started.
