What Is Error 404?
An HTTP error 404 occurs when the web server cannot find a resource (like a webpage) at a certain URL.
This can happen if:
- The user has used the wrong page URL, e.g., by making a typo in it
- The website owner has deleted the resource and it’s no longer available on the server
- The website owner has changed the URL linking to the resource
- The website owner has misconfigured the website so that the server can’t find the resource
Website owners tend to view 404 errors with dread.
Why?
Because it means people can’t visit a page’s content even if they tried. Despite the hard work the website owner put into creating it.
But 404 errors aren’t always bad. In fact, they can help search engines appropriately index and rank your pages. We’ll get into that.
In this article, you’ll learn about error 404 in detail, including all its impacts. We’ll also explain how you can identify 404 errors on your website. And methods you can use to fix them too (if they need to be fixed).
What Does a 404 Error Look Like?
There’s no one right way for a 404 error to appear.
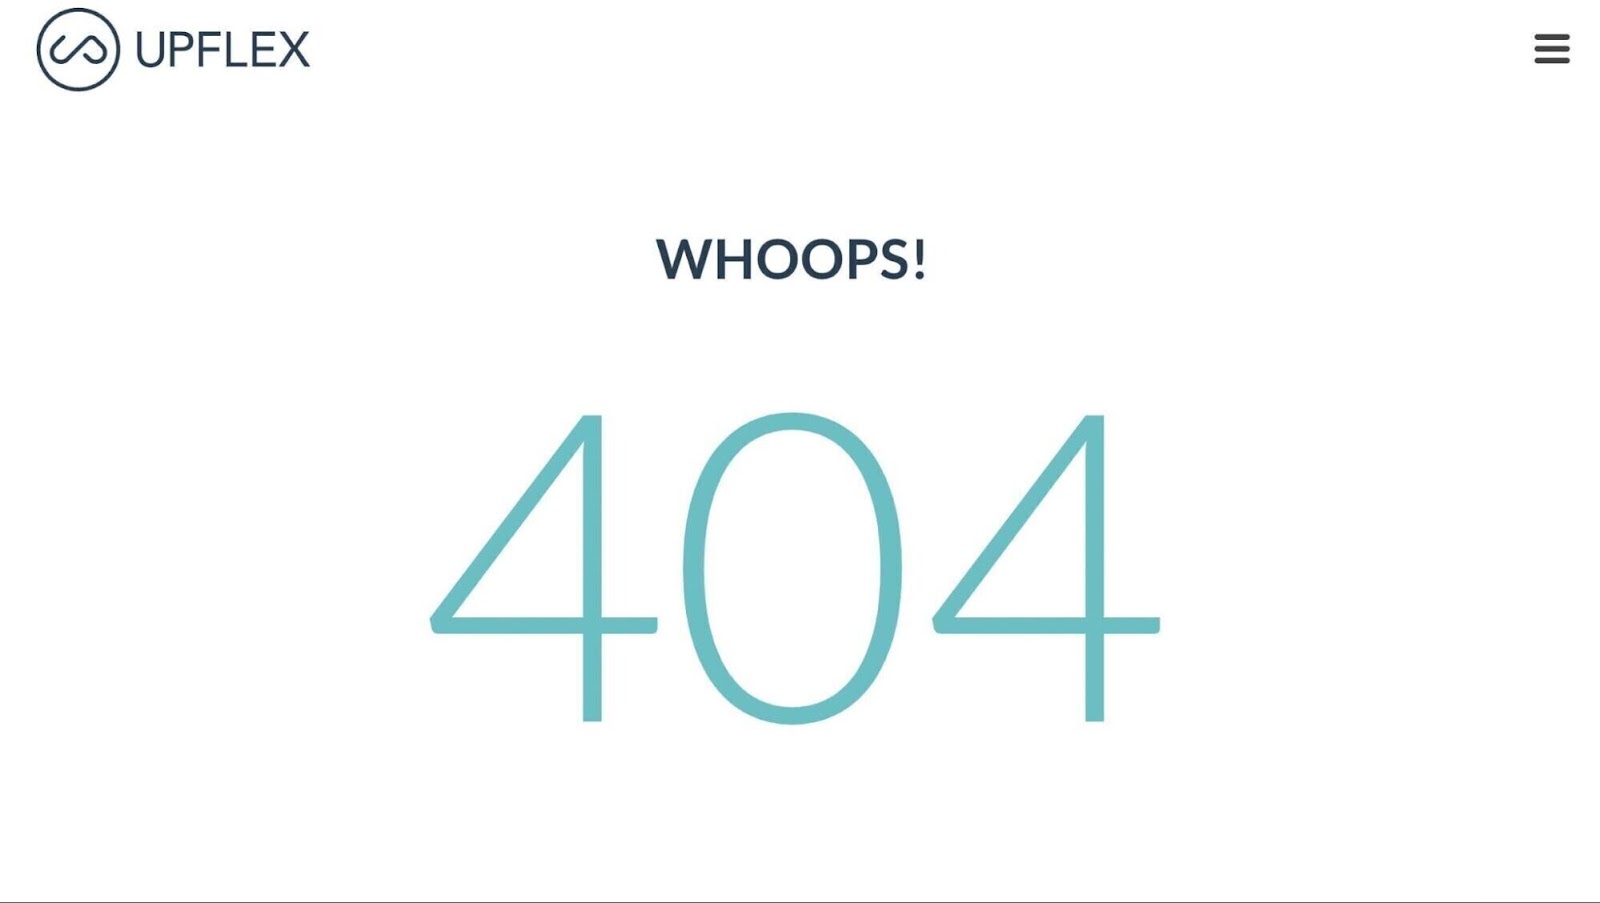
Sometimes, the pages displaying this error are very simple. Like this:
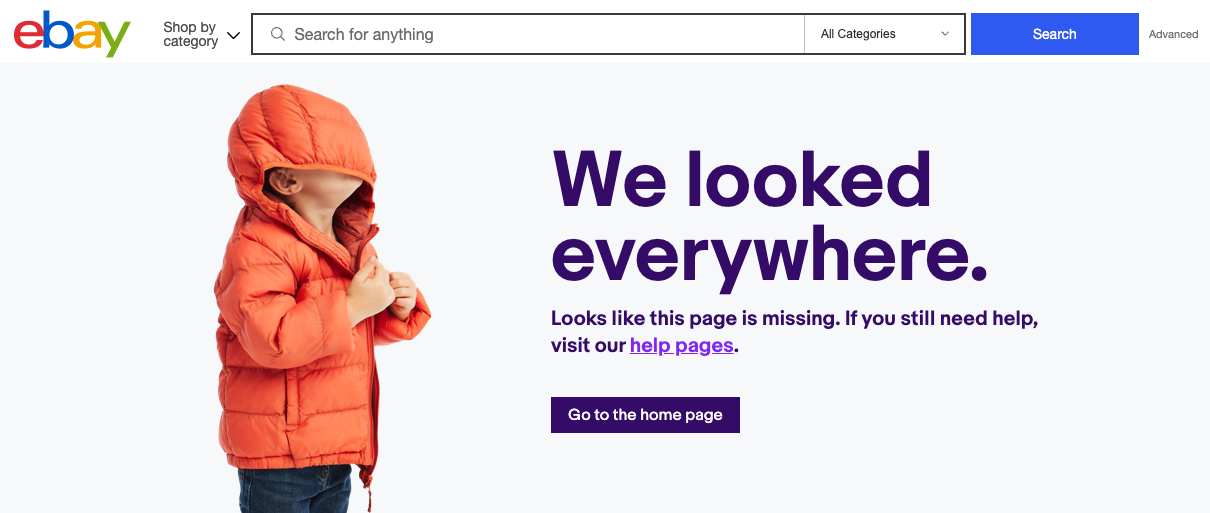
And sometimes they’re more intricate. Or even playful. Like this:
Or this:

Other messages you may see on 404 error pages include:
- “The page you are trying to access doesn’t exist”
- “This page has been moved or deleted”
- “The requested page URL can’t be found”
But all 404 error pages have one thing in common: the code that gave them their name.
HTTP status codes are relayed every time you visit a site.
As soon as you type in a URL or click a link, your browser sends a request to that site’s server. The server always responds with an HTTP status code that tells the browser more about that page.
There’s a whole language around which numbers mean what. HTTP status codes are always three digits. And they come in five categories.
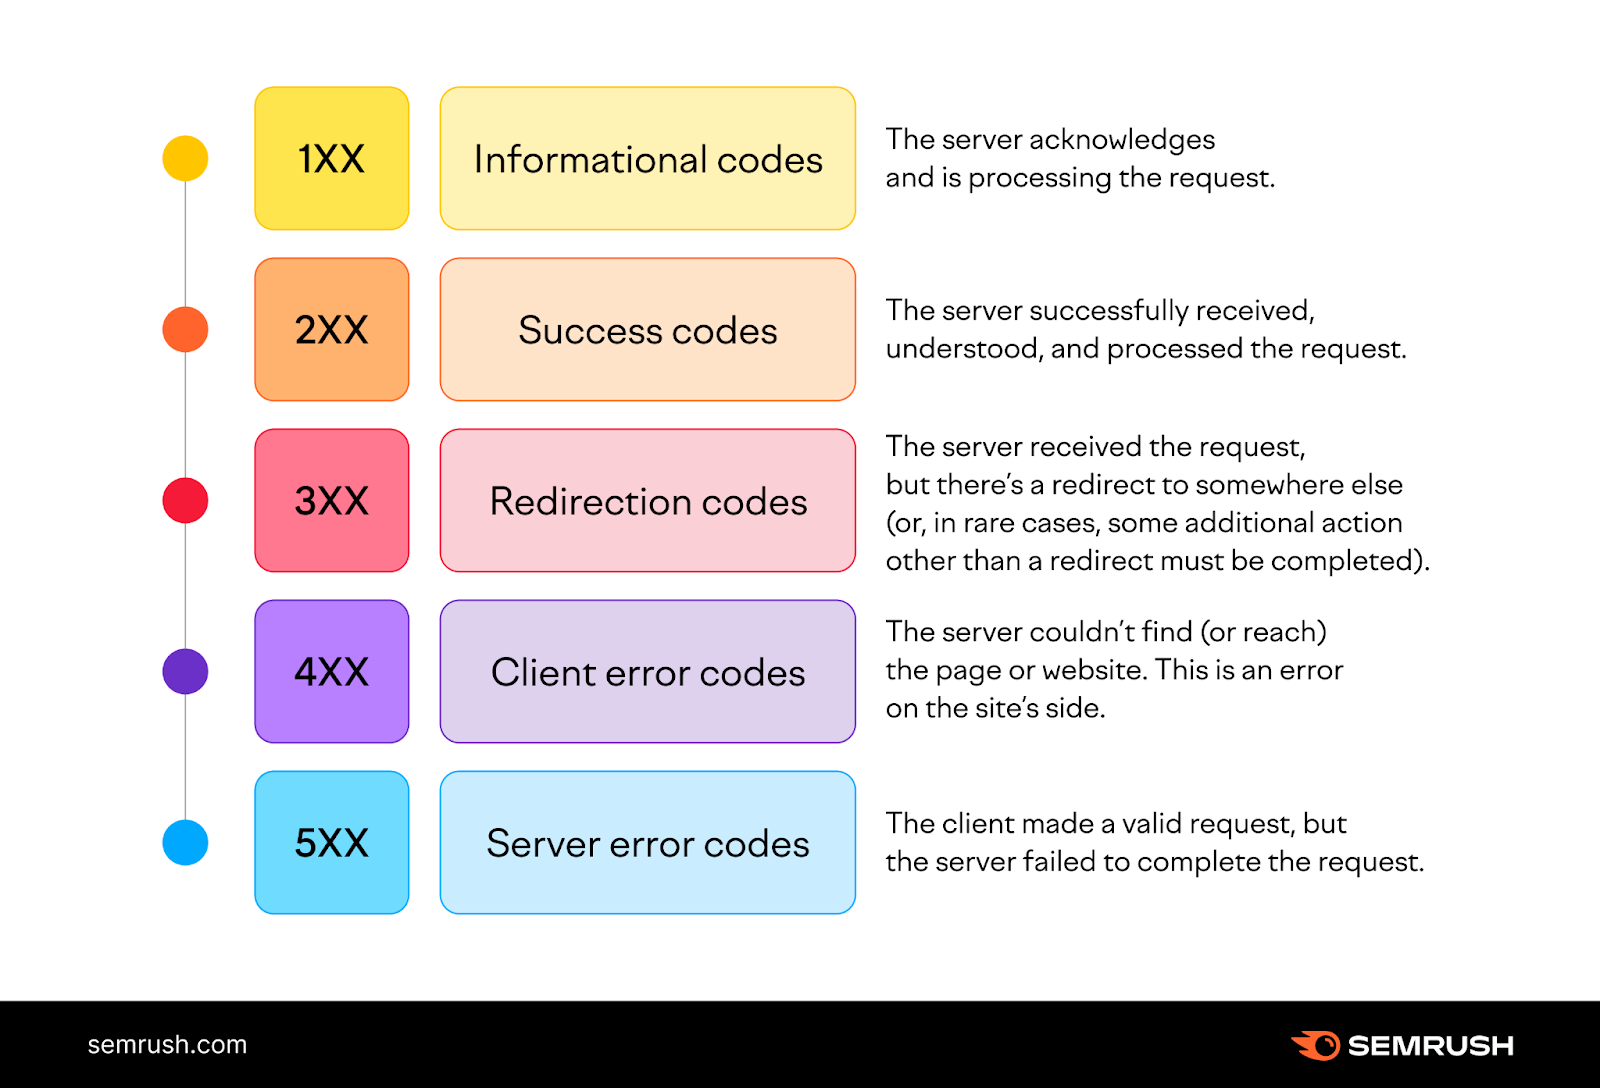
“404” is the error code that indicates the resource at that URL is “not found.”
When a browser tries to load content for a URL where content can’t be found, it gets the “404” HTTP status code back from the server instead.
You can check any URL’s HTTP status code by using an HTTP status checker tool like httpstatus.io.
To use it, simply launch the tool and paste a URL into the text field. Then click “Check status.”
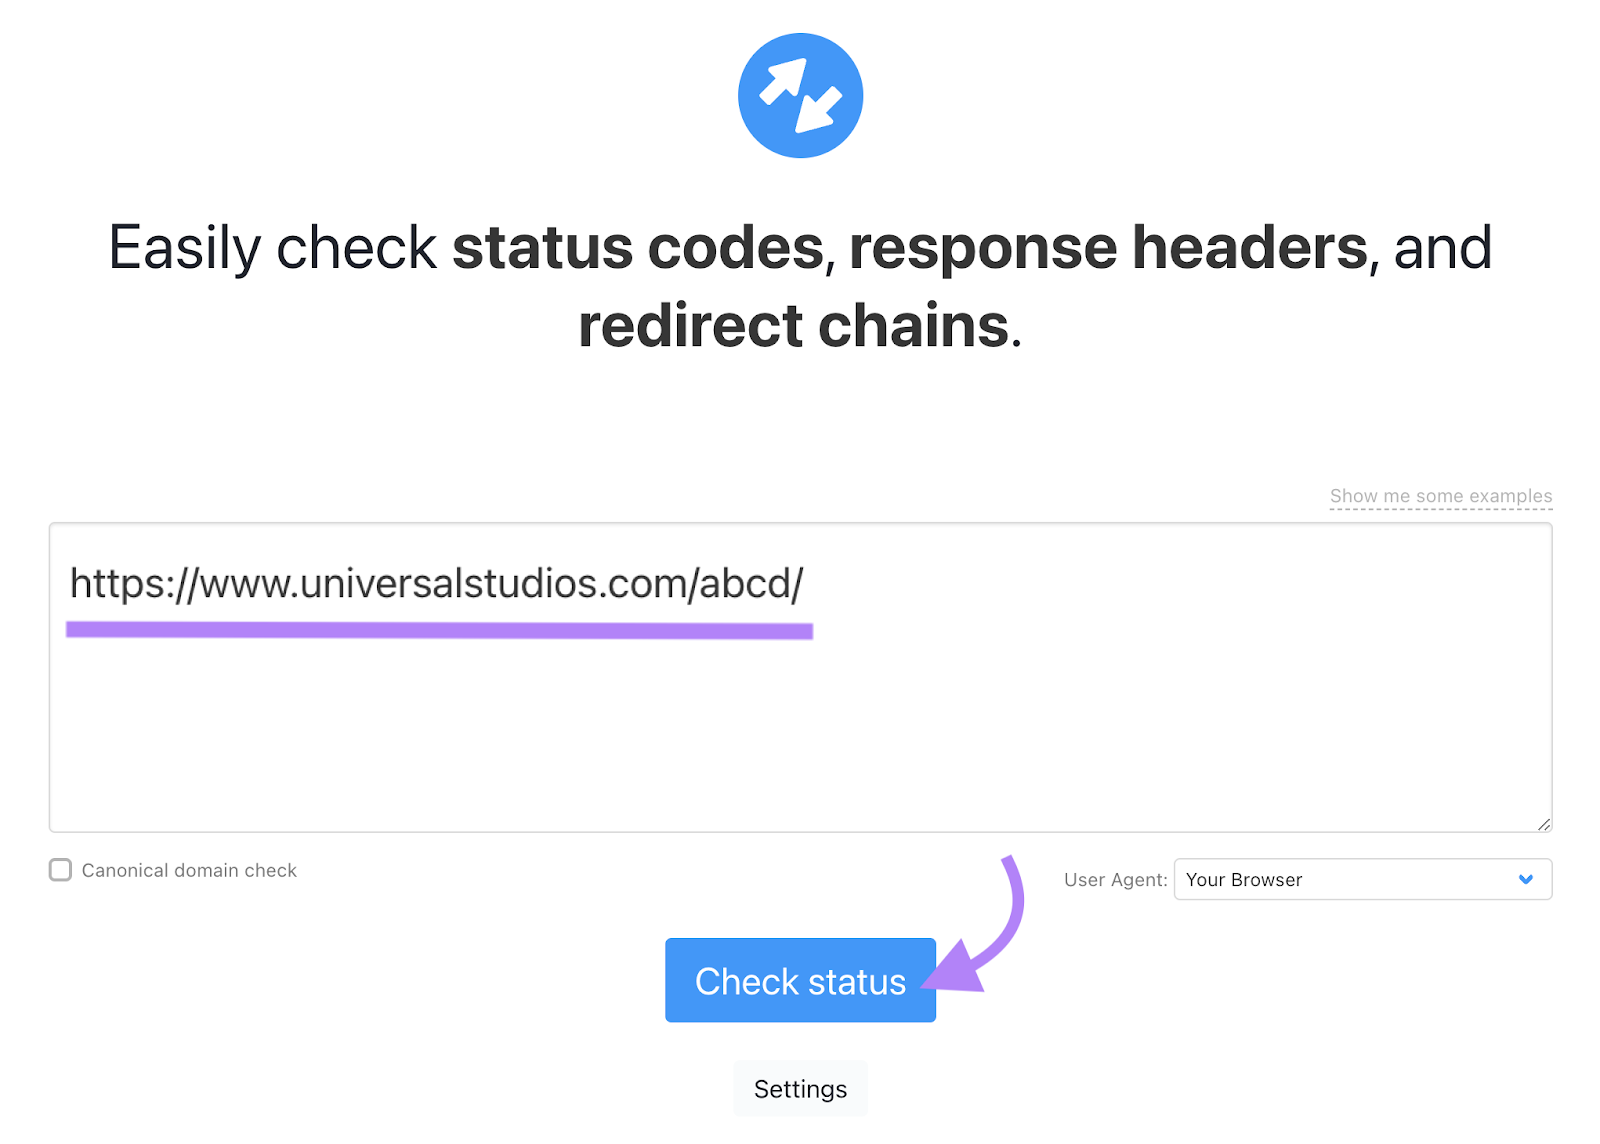
The tool will report the URL’s status code.

‘Hard’ vs. ‘Soft’ 404 Errors
As you learn more about 404 errors, you might come across the term “soft 404.”
A “soft” 404 error isn’t actually a 404 error. Attempts by a browser to load the URL did not get a 404 HTTP status code back. It got something else, like a 200-level success code, a 300-level redirect code, or even a 400-level error code of a different variety.
For some reason, the URL leads to a page saying that the page doesn’t exist.
Let’s look at an example.
Users who navigate to the URL “https://www.onepeloton.com/abcd” on Peloton’s website will see this “page not found” error message:
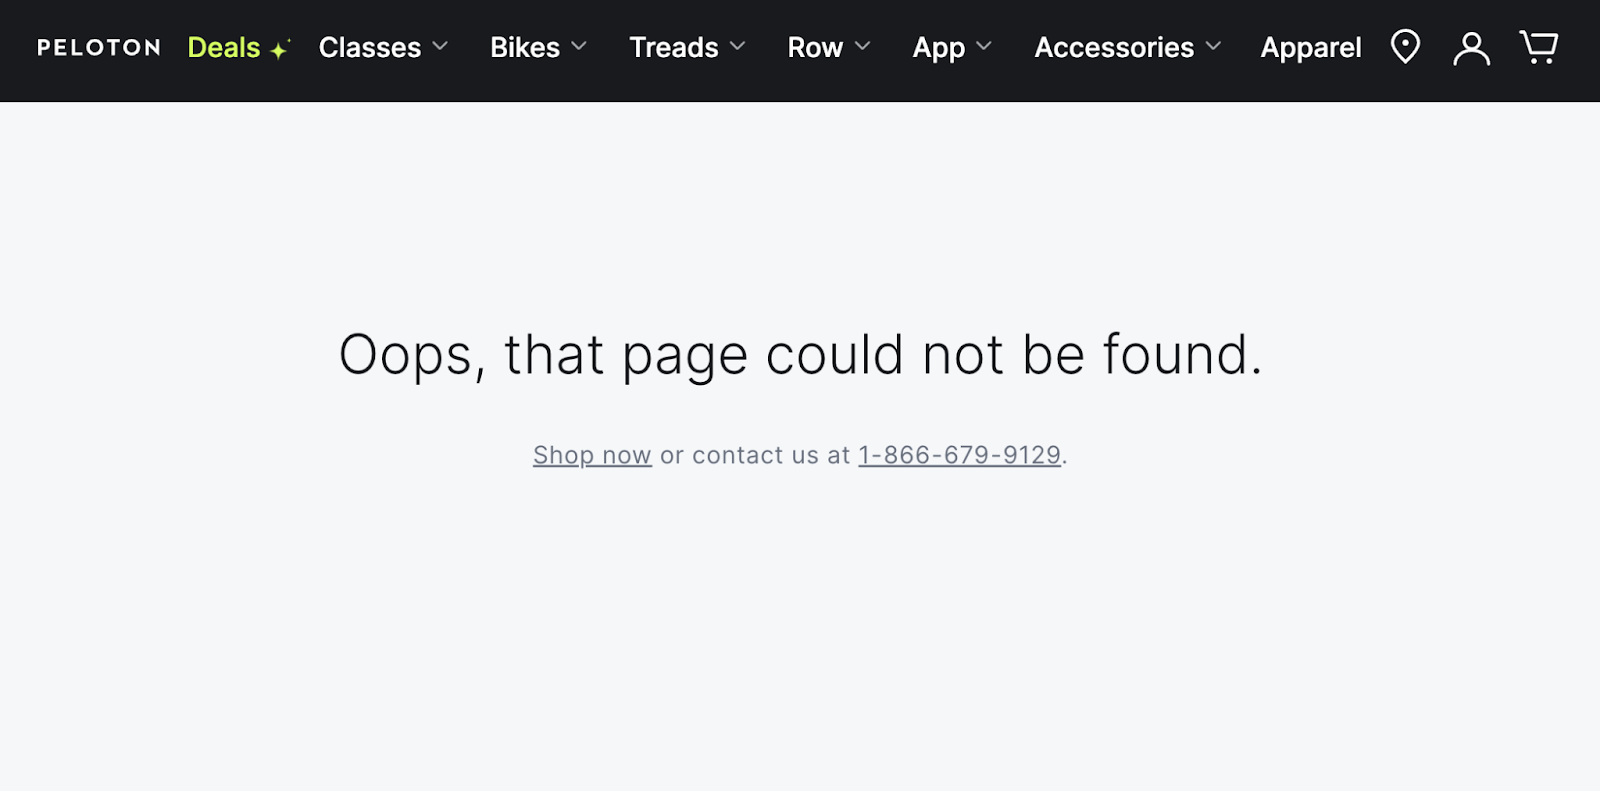
But this URL actually returns the 200 status code.

URLs like these become known as “soft” 404 errors. Because, although they don’t meet the technical definition of a 404 error, they lead users to think the pages at these URLs can’t be found.
In contrast, “hard” 404 errors are instances in which the browser gets back the actual 404 HTTP status code.
Don’t let the naming fool you, though. “Soft” 404 errors can have the same impacts as “hard” 404 errors. So they also deserve attention.
Impacts of 404 Errors
404 errors on your pages can lead to consequences like those listed below. This is problematic if these pages shouldn’t have 404 errors.
1. Poor User Experience
404 errors can hurt your visitor’s user experience. They prevent users from visiting the pages they wanted to see.
Let’s say you’re reading this TIME Magazine article on the best diet advice:

You then decide to click the article’s linked text: “Read about environmentally friendly food.”

But the link leads you to a 404 error page:
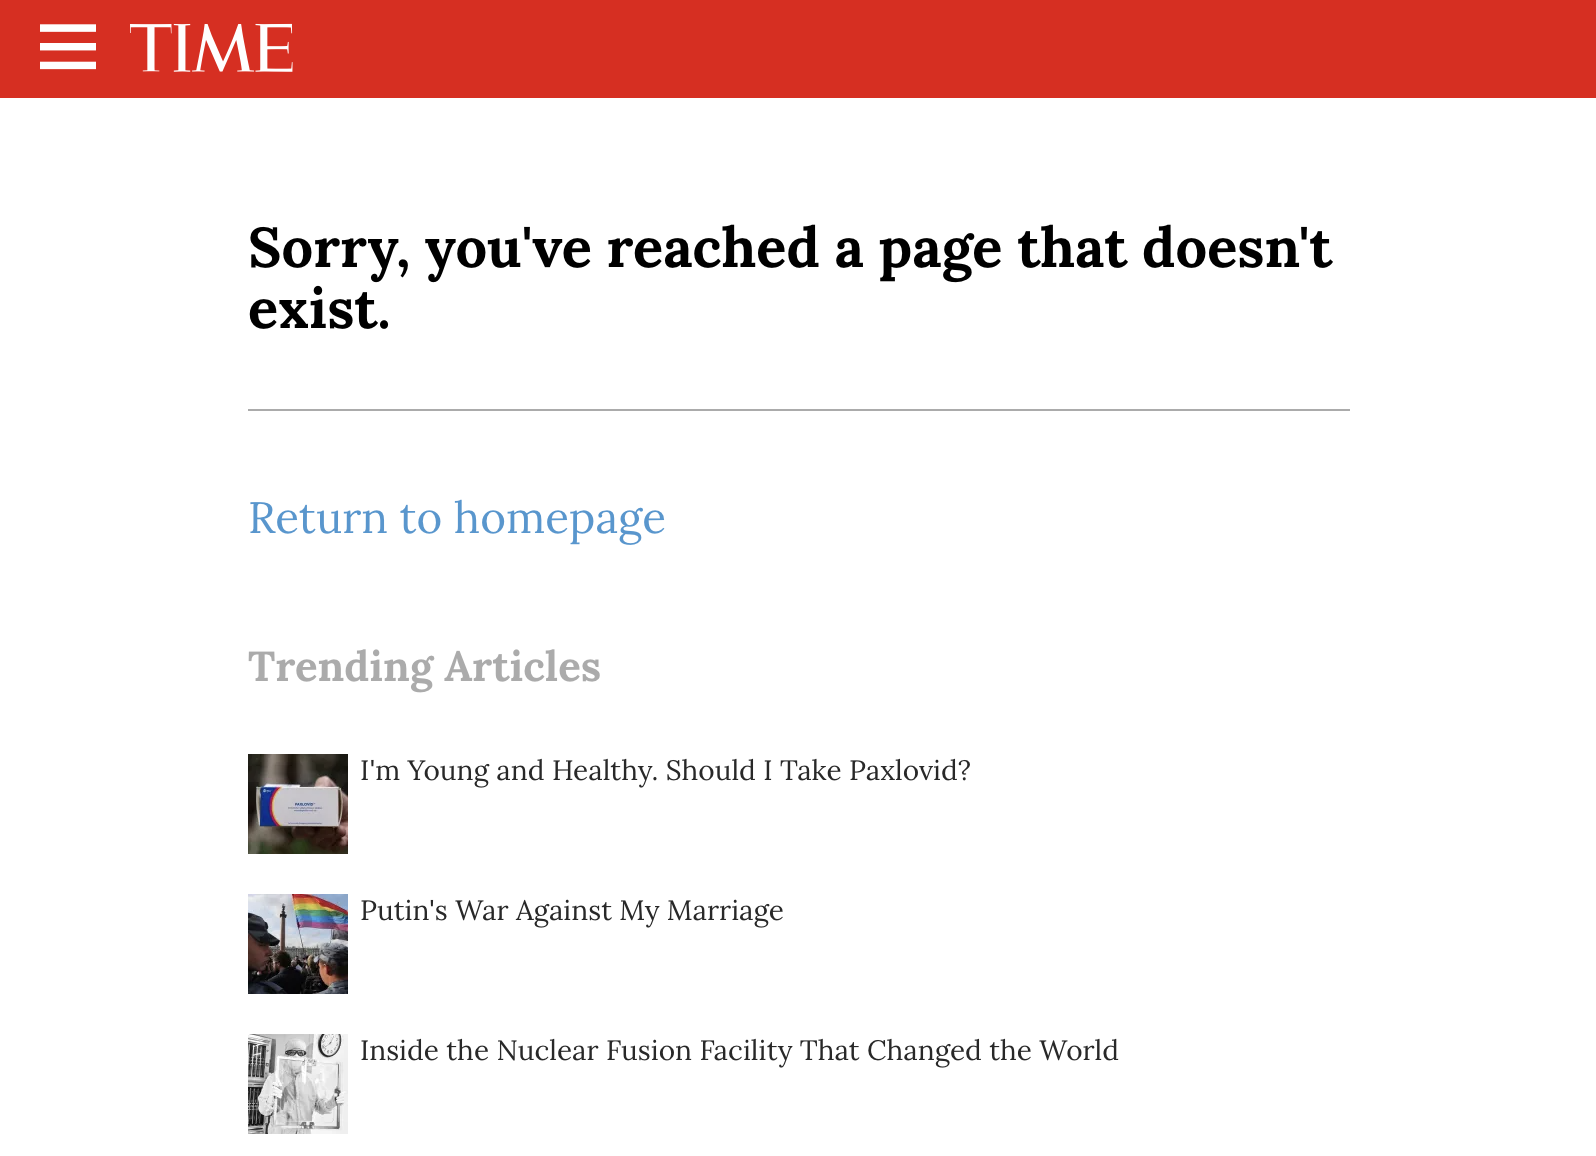
The error prevents you from learning more about environmentally friendly food.
You can:
- Take extra steps to learn about environmentally friendly food—e.g., by searching for information on it elsewhere. This is time-consuming and inconvenient compared to the experience you were expecting when you clicked the link.
- Not learn about environmentally friendly food for the time being. Which is a disappointing alternative given that the article had sparked your curiosity on the topic.
Either way, it’s a negative user experience. Your perception of the brand—and motivation to visit the site again—probably didn’t increase as a result of it.
2. Search Engines Being Unable to Rank Your Page
To rank a page on their search engine results pages (SERPs), search engines first need to index it. Meaning add it to their search database.
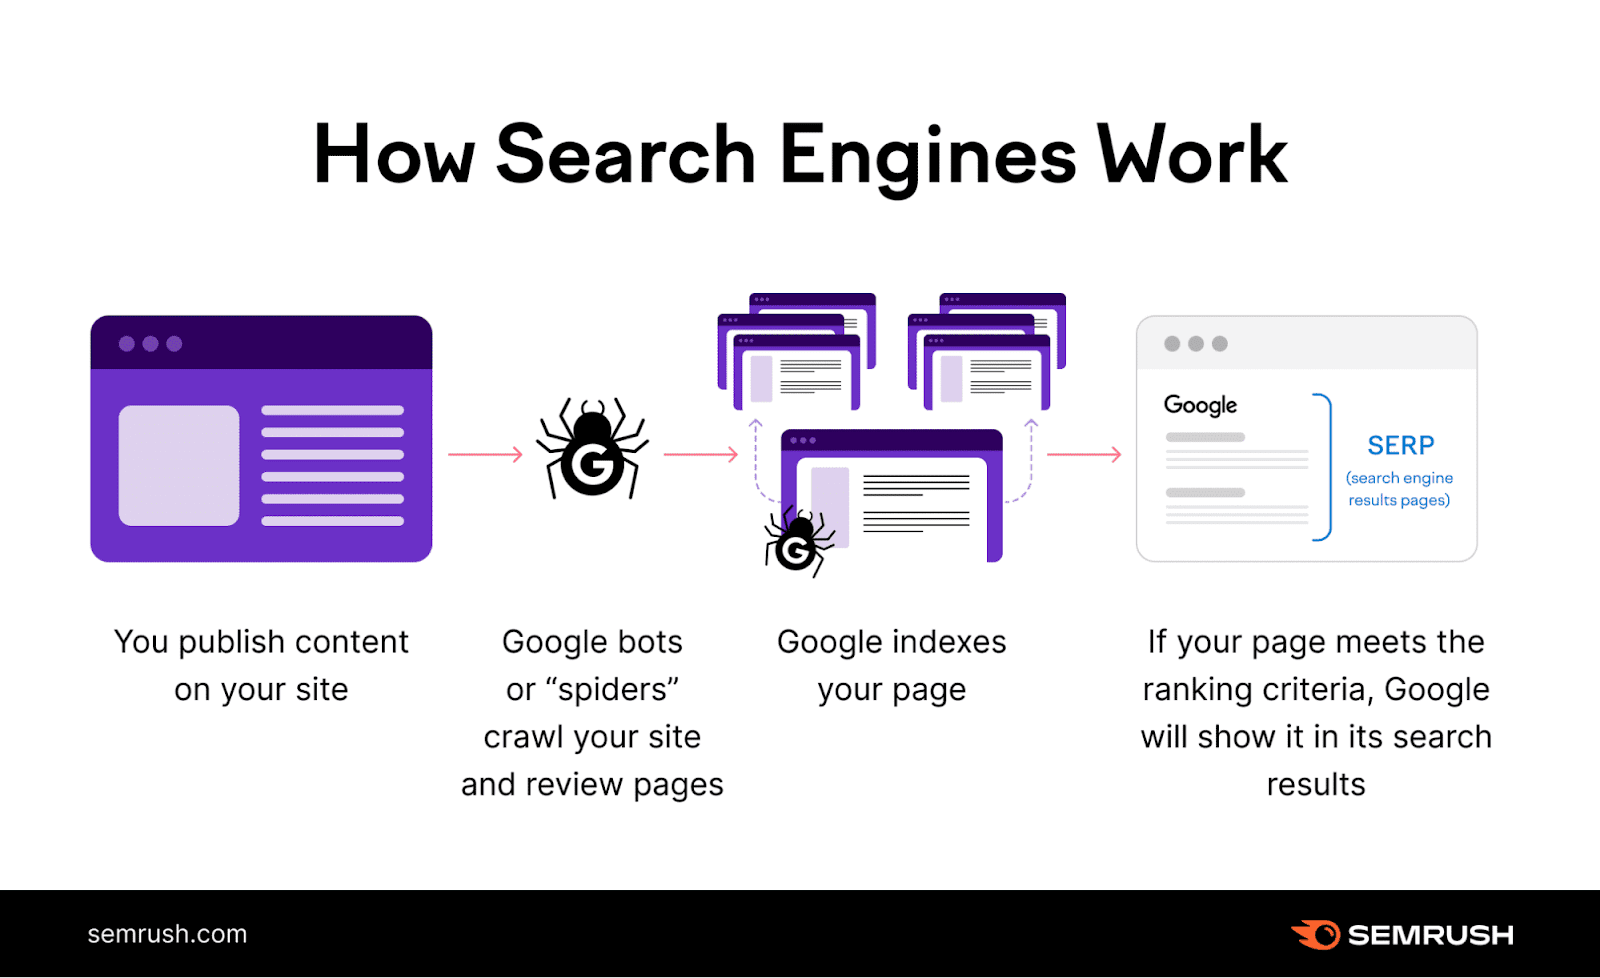
But if the search engine encounters a 404 error on a page that it’s crawling, it learns that the page doesn’t exist.
As a result, the search engine doesn’t want to index that page. Or rank it.
That means users can’t discover that page via a search engine search.
3. Reduced SERP Presence
Pages on your website with 404 errors can also limit your website’s overall visibility on the SERPs.
Because search engines won’t rank pages with 404 errors, a site with 404 error pages will have fewer overall pages eligible to display on the SERPs.
Additionally, any backlinks to pages with 404 errors are no longer helpful, and provide less of a boost to your website overall. This means your website appears less authoritative—and thus less worthy of higher SERP rankings—to search engines.
Such reduced SERP presence may, in turn, result in your website receiving less organic traffic.
How to Identify 404 Errors on Your Website
You could discover 404 errors on your website by clicking each link on it. And seeing if the link leads to a page with a “page not found” error message.
But that approach is tedious and time-consuming. It also can’t differentiate between URLs with “hard” and “soft” 404 error types.
Try these methods for scanning your website for 404 errors at scale instead:
1. Use Semrush Site Audit
Site Audit is a tool that can detect over 140 technical website issues—including the presence of 404 errors. It also suggests solutions for fixing the issues it finds.
Launch the tool and click “Start Audit.”

Type your website domain into the “Domain” field. If you’d like, you can optionally type a project name into the “Project Name” field.
Then, click “Create project.”
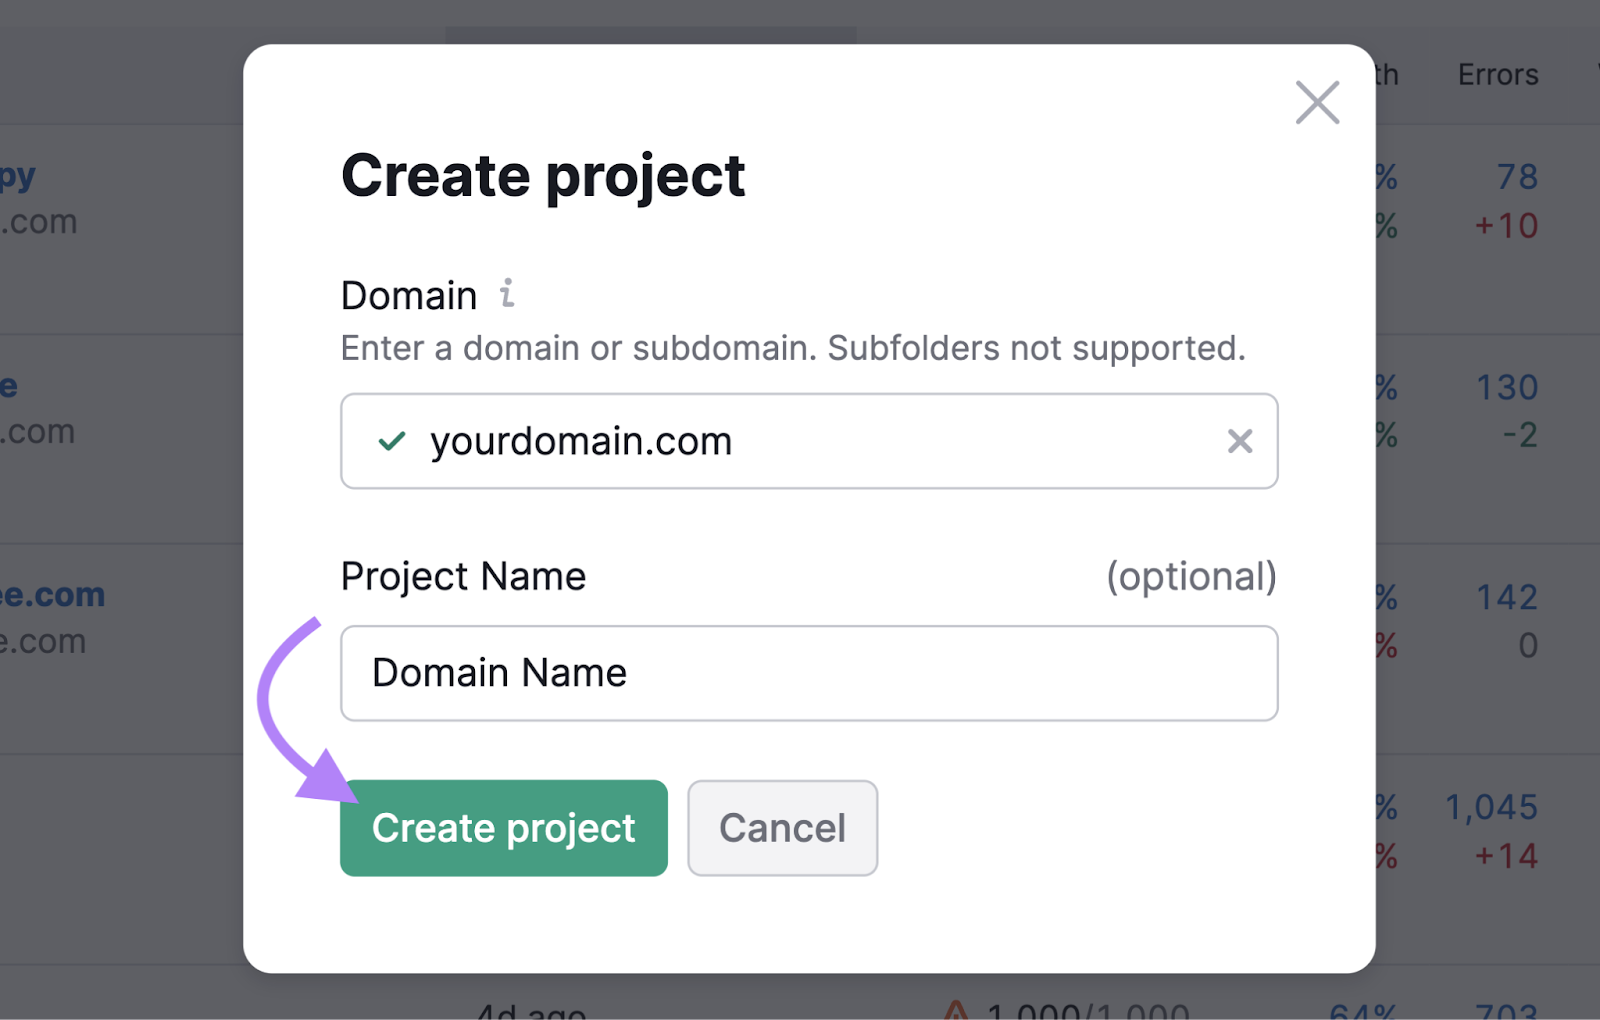
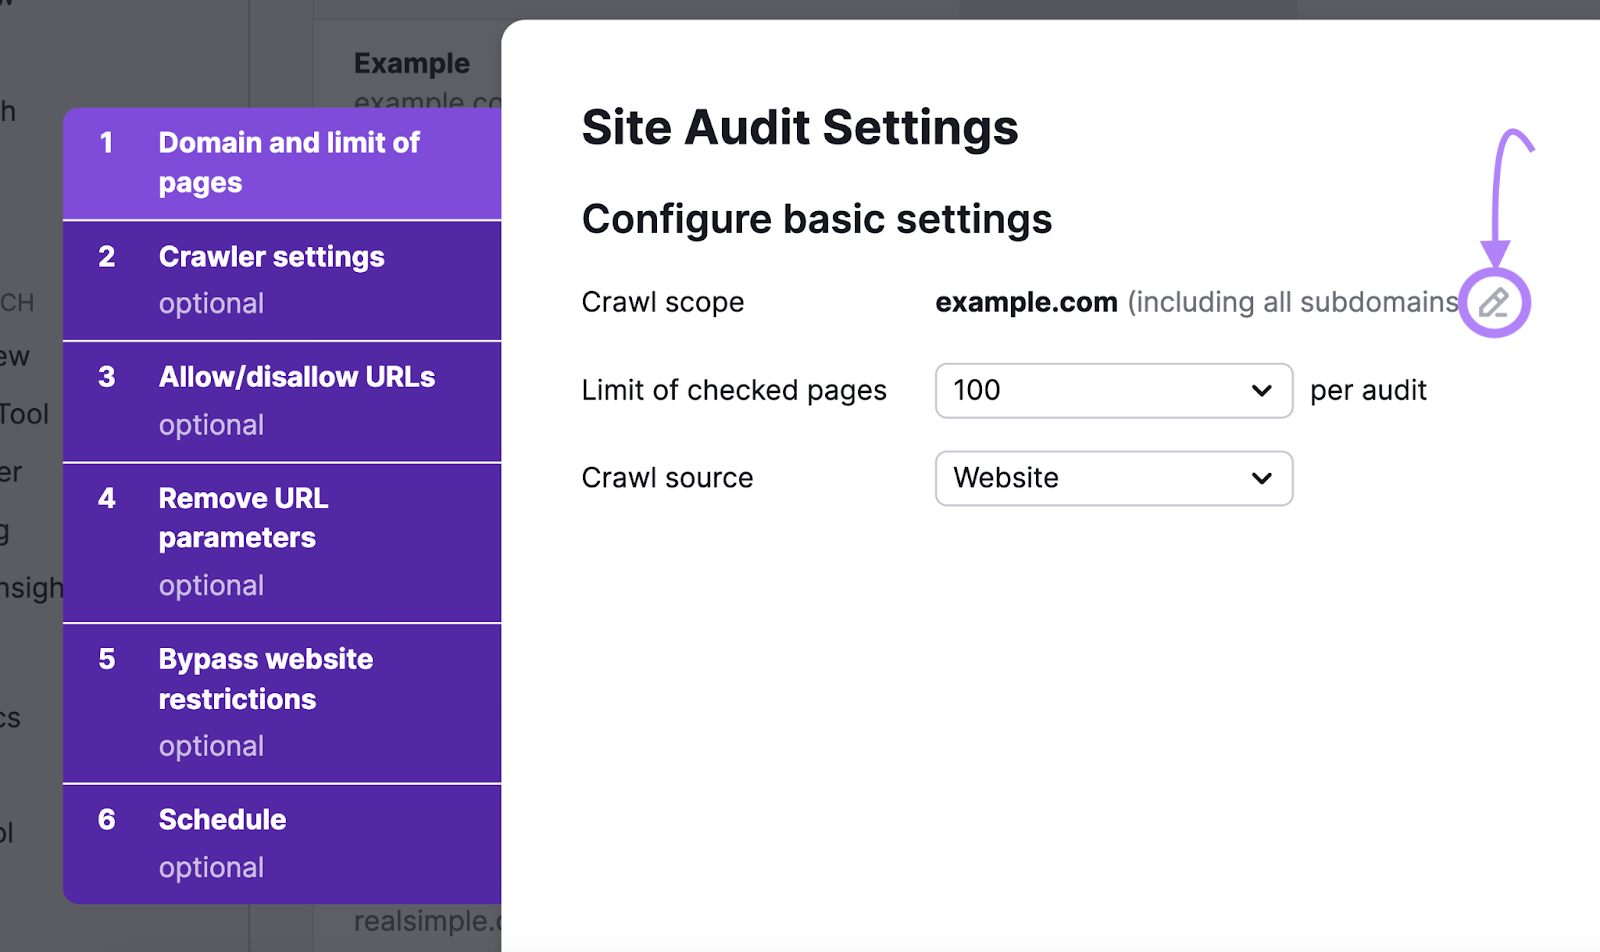
Under the “1. Domain and limit of pages” tab, click the pencil icon next to the “Crawl scope” setting. Choose whether the tool should check your domain’s subdomains.
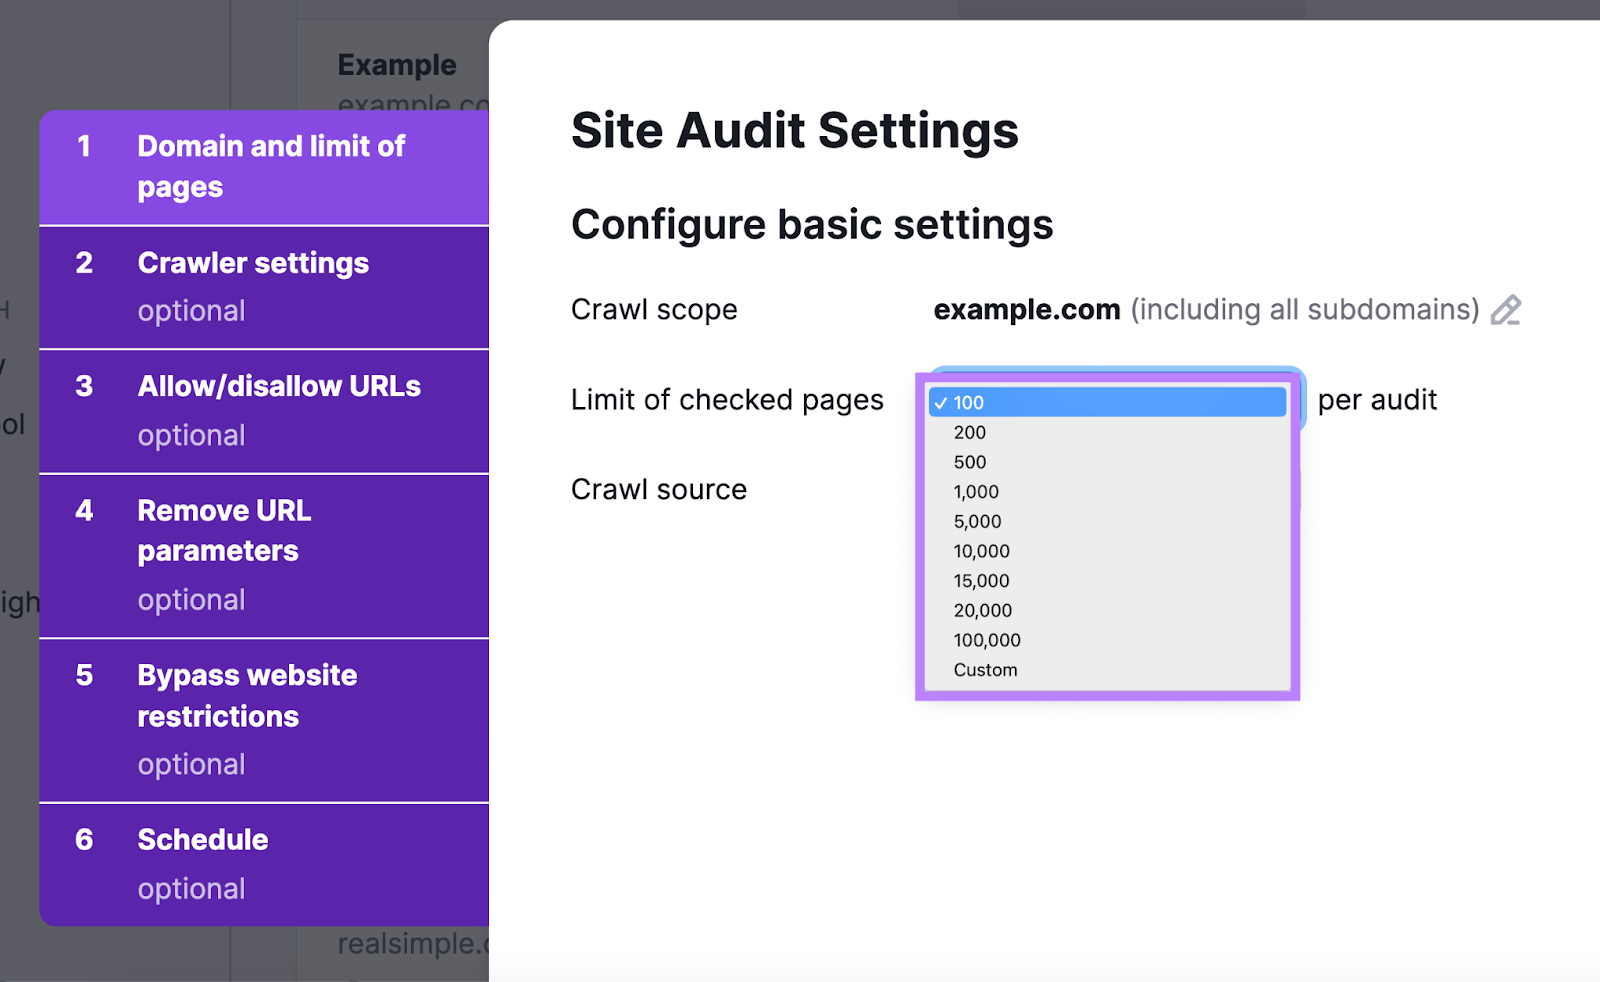
Next, click the “Limit of checked pages” drop-down to set up the number of pages the tool should check at any time. E.g, “100” if you have a small site or want to test how Site Audit works before having it check your entire site.
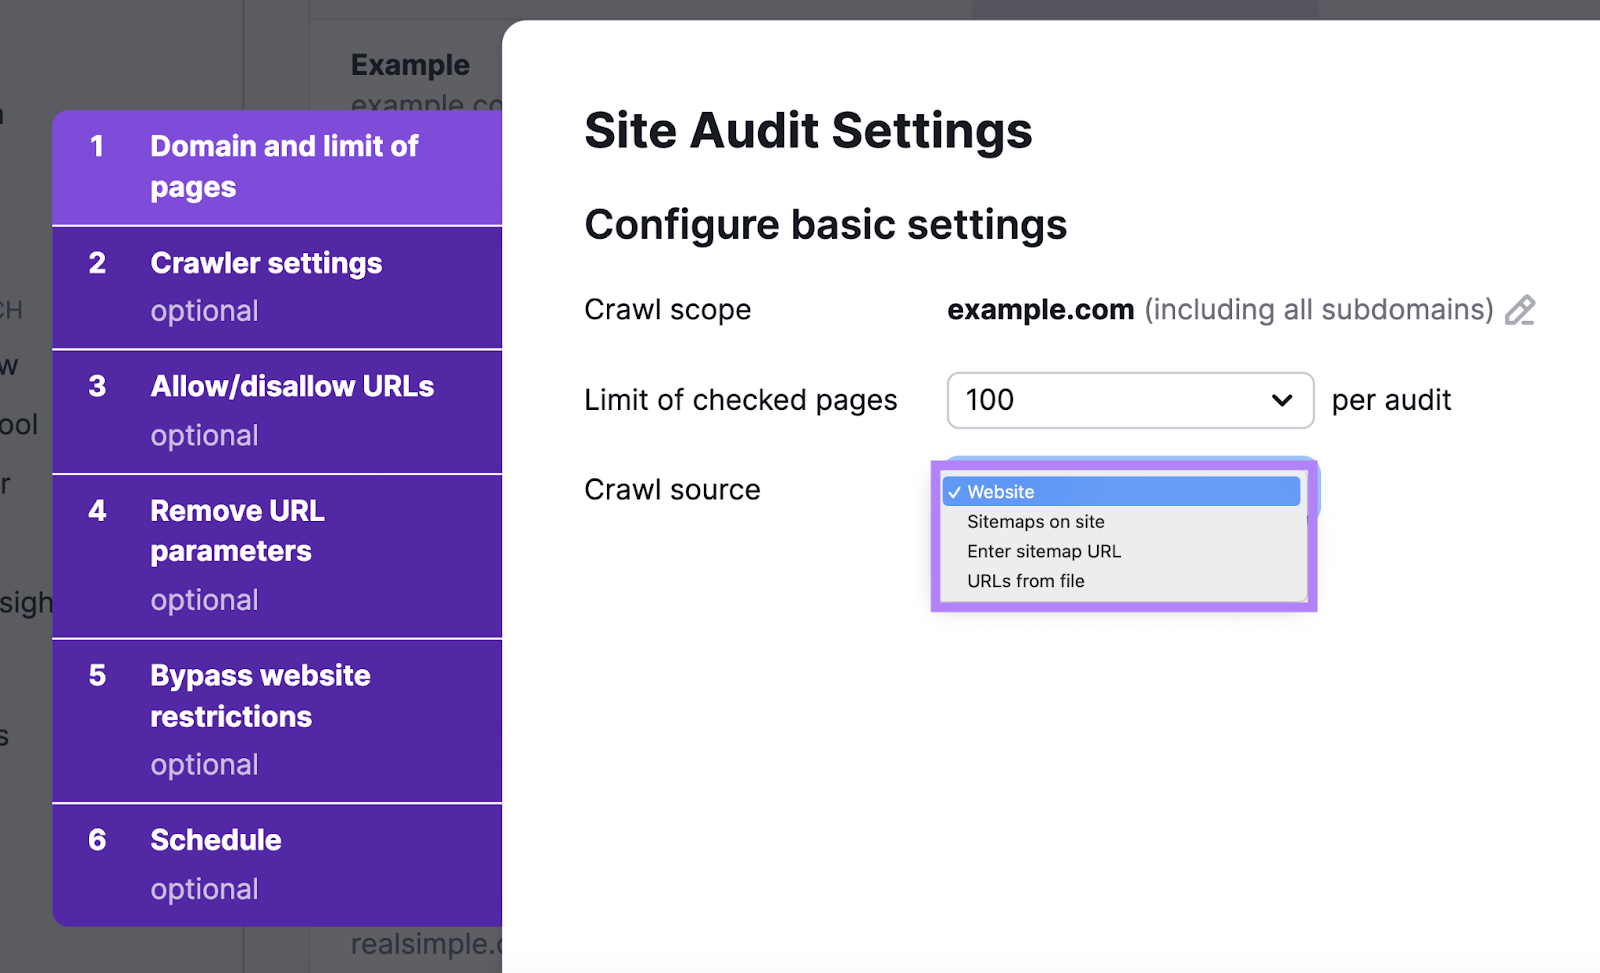
Keep the “Crawl source” drop-down setting as “Website” so the tool will check your whole website.
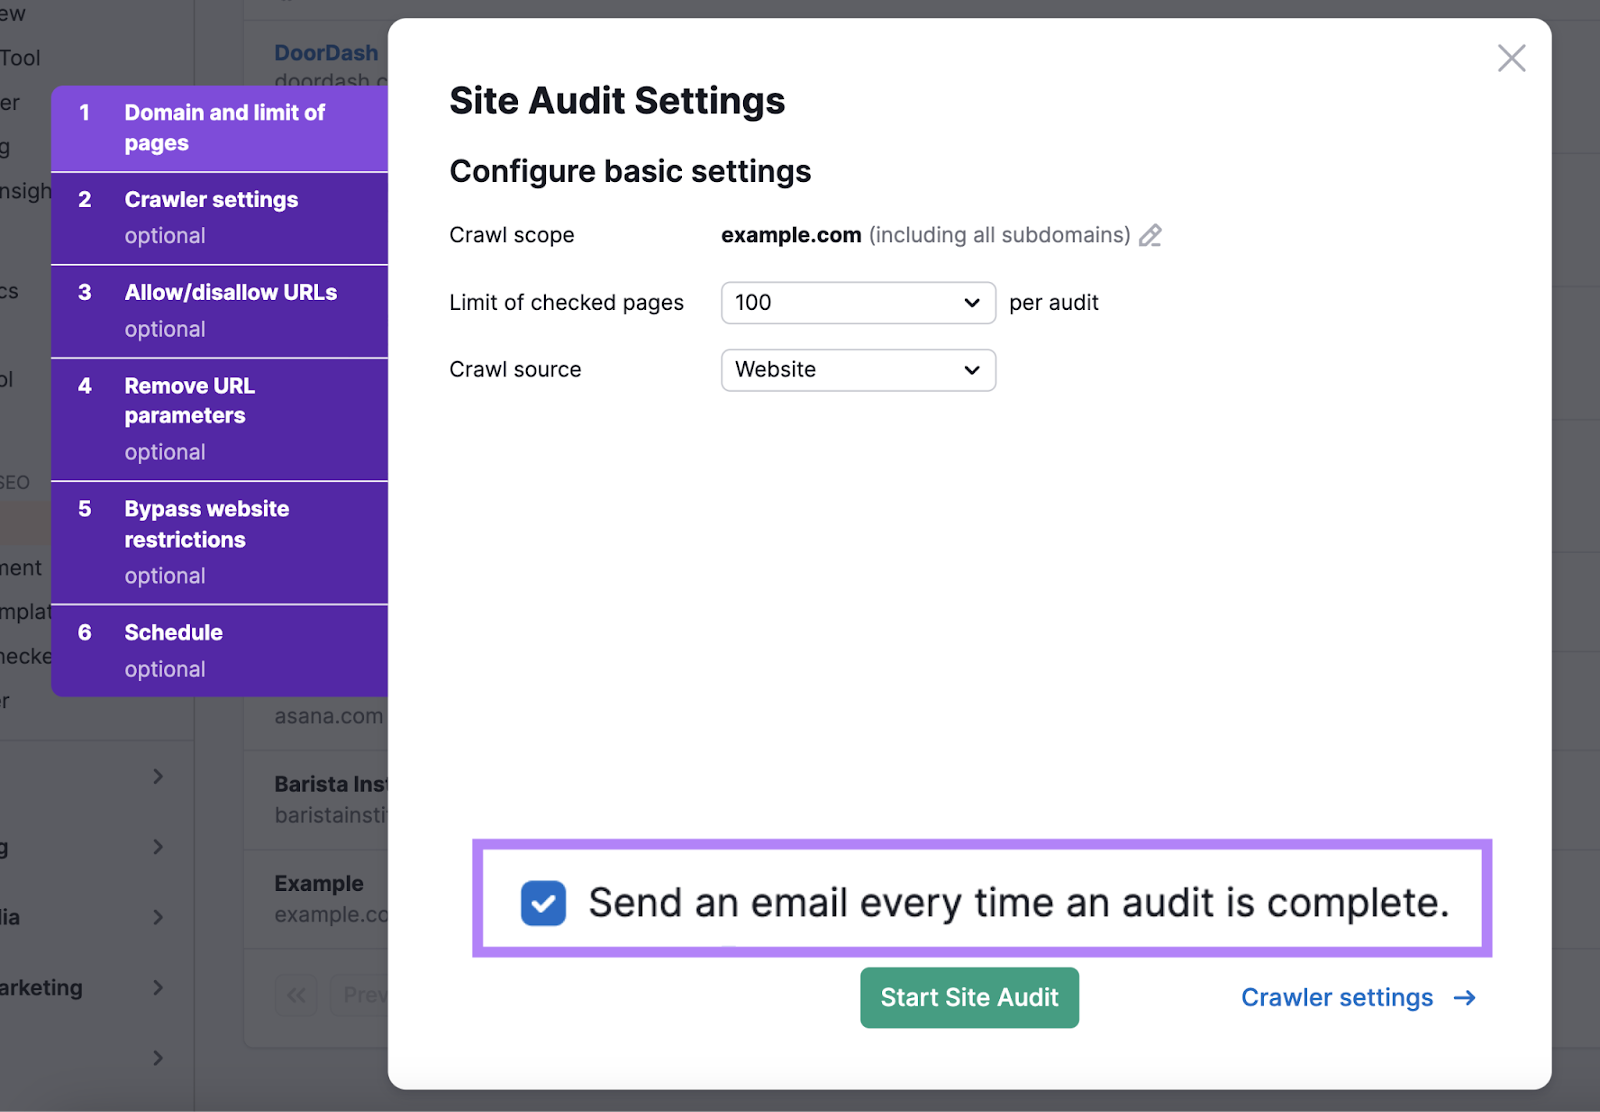
The tool’s “Send an email every time an audit is complete” setting is enabled by default. Disable the setting if you don’t need this email notification.
After that, you can optionally use the tabs numbered two to six on the left to further adjust your audit settings.
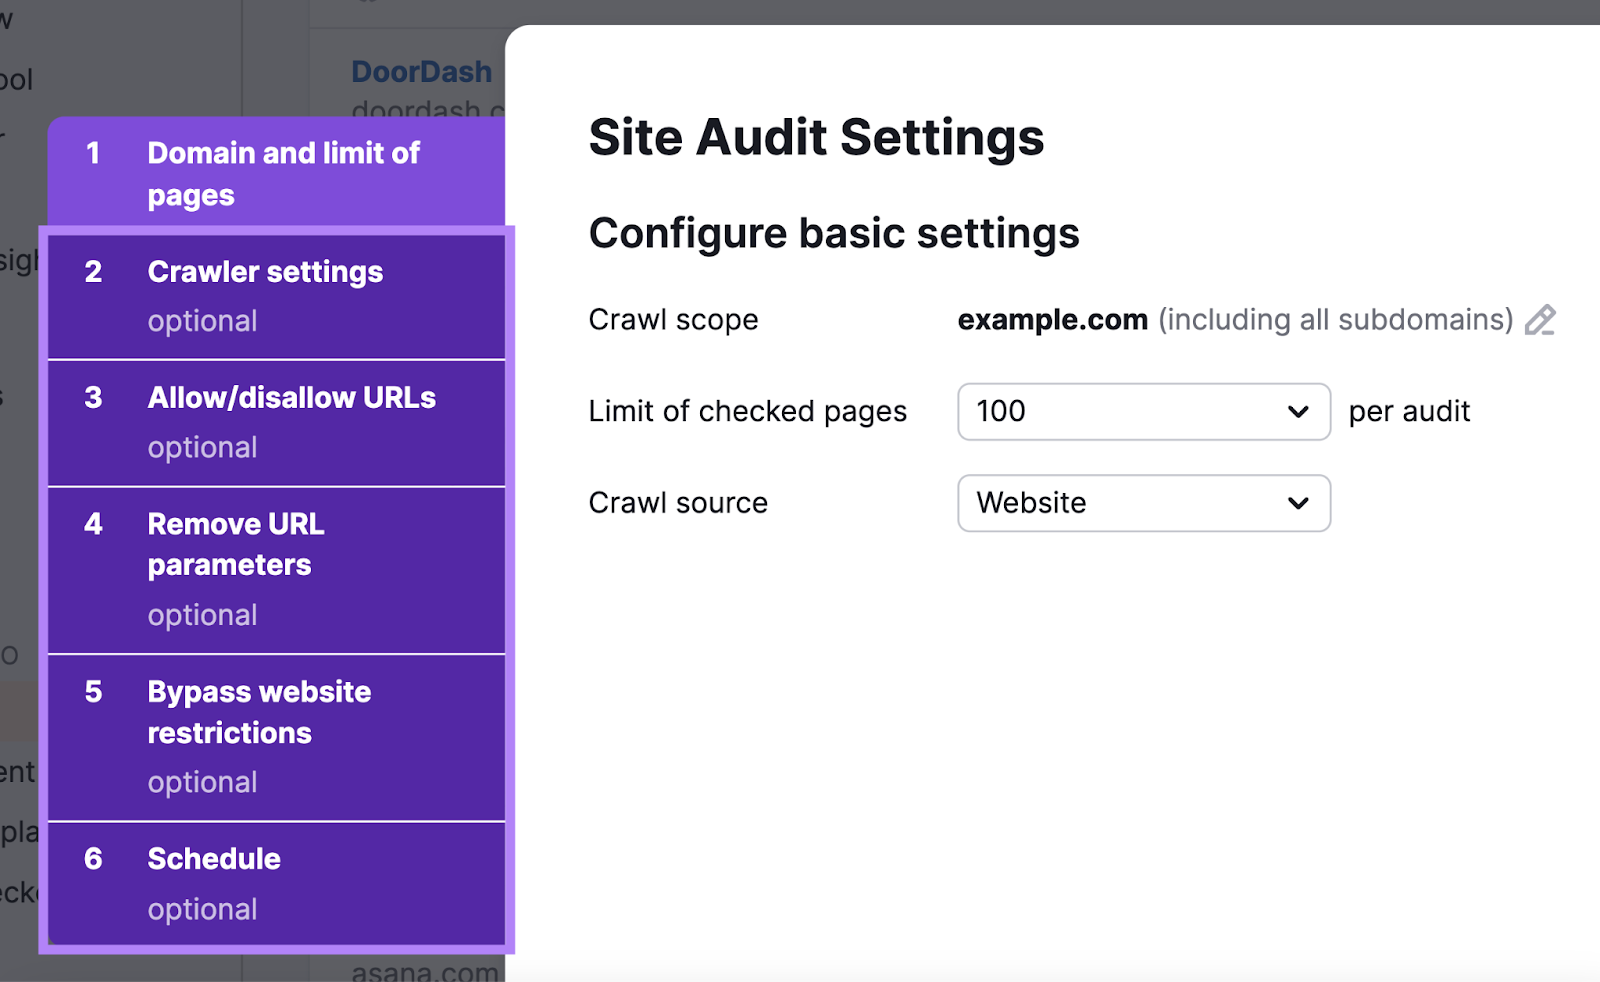
Finally, click “Start Site Audit.”

Site Audit will start checking your website for issues. When the audit is complete, click your domain name to display the complete audit report.

Click the report’s “Issues” tab.
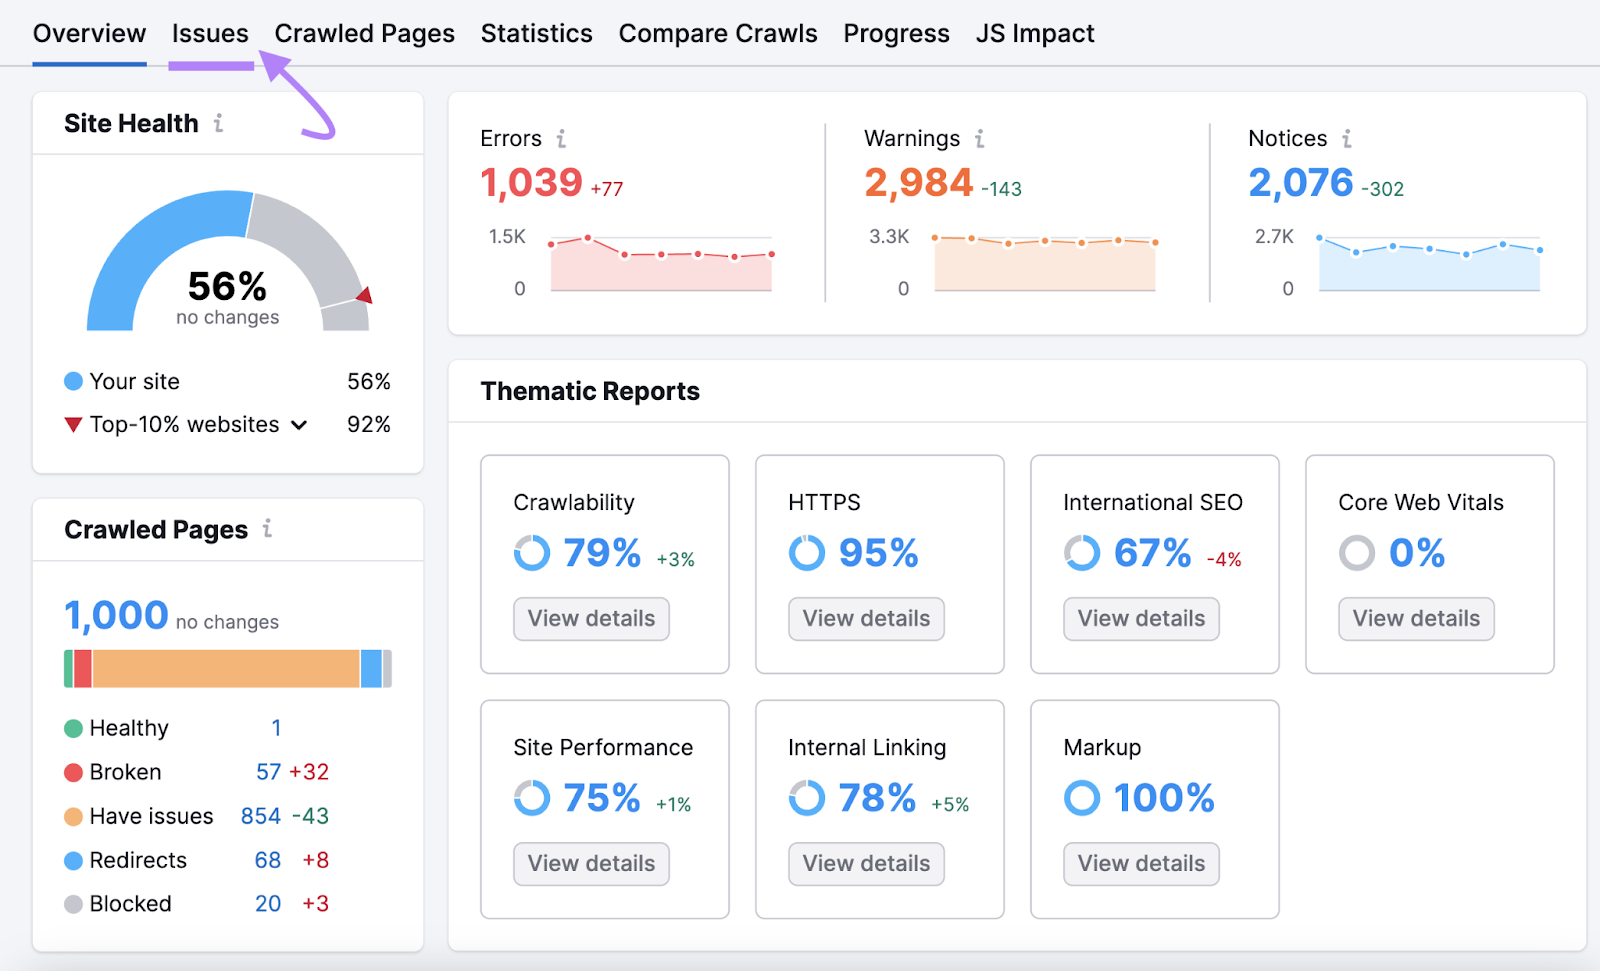
If Site Audit found 404 errors on your website, you’ll see them under the “Errors” section. Look for a row in the table that says “# pages returned 4XX status code.”
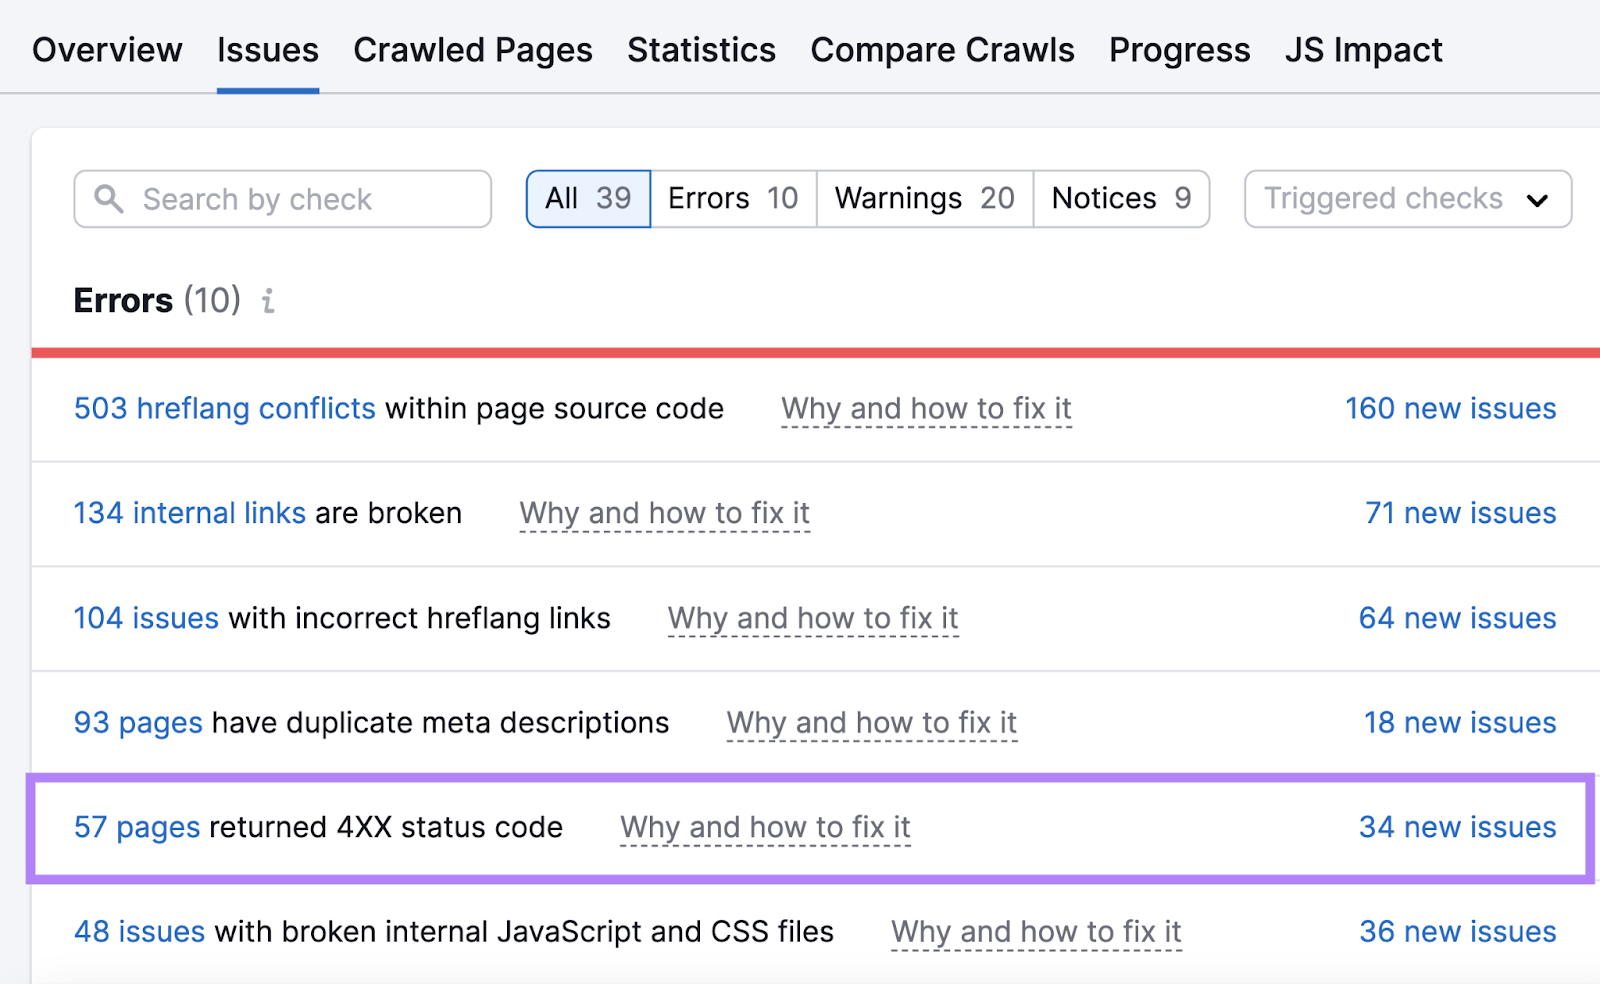
Click this hyperlinked text and Site Audit will display a list of page URLs that have returned a three-digit status code starting with four. Like 404, 410, and 403 errors.
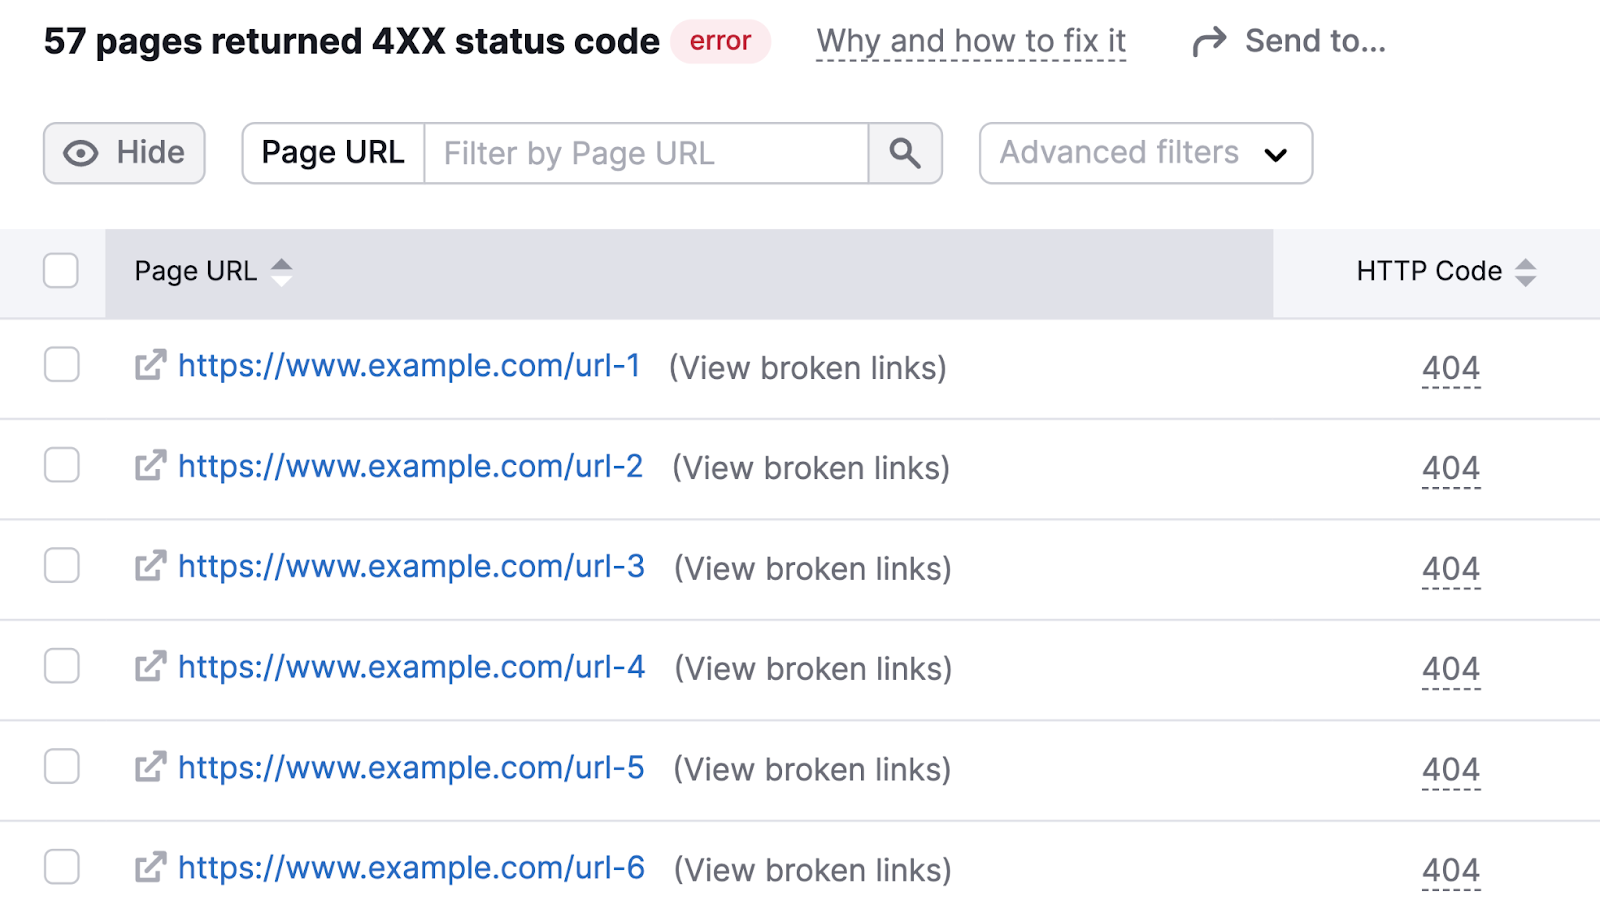
Click the up and down arrows next to the “HTTP Code” heading in the report twice to sort the page URLs by their HTTP status codes in ascending order.
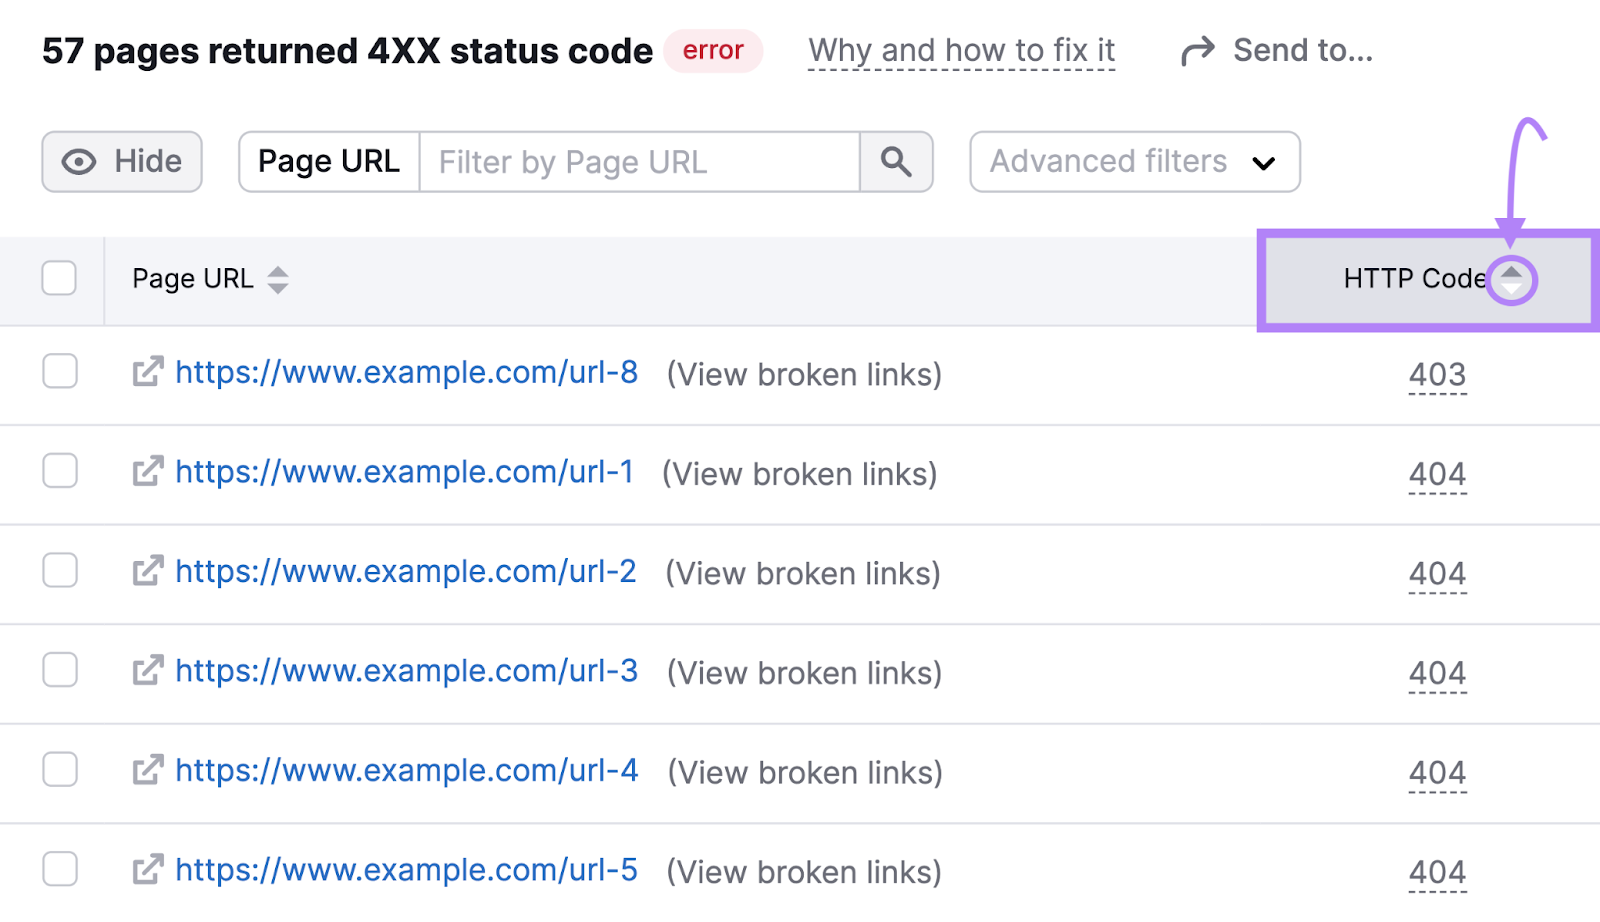
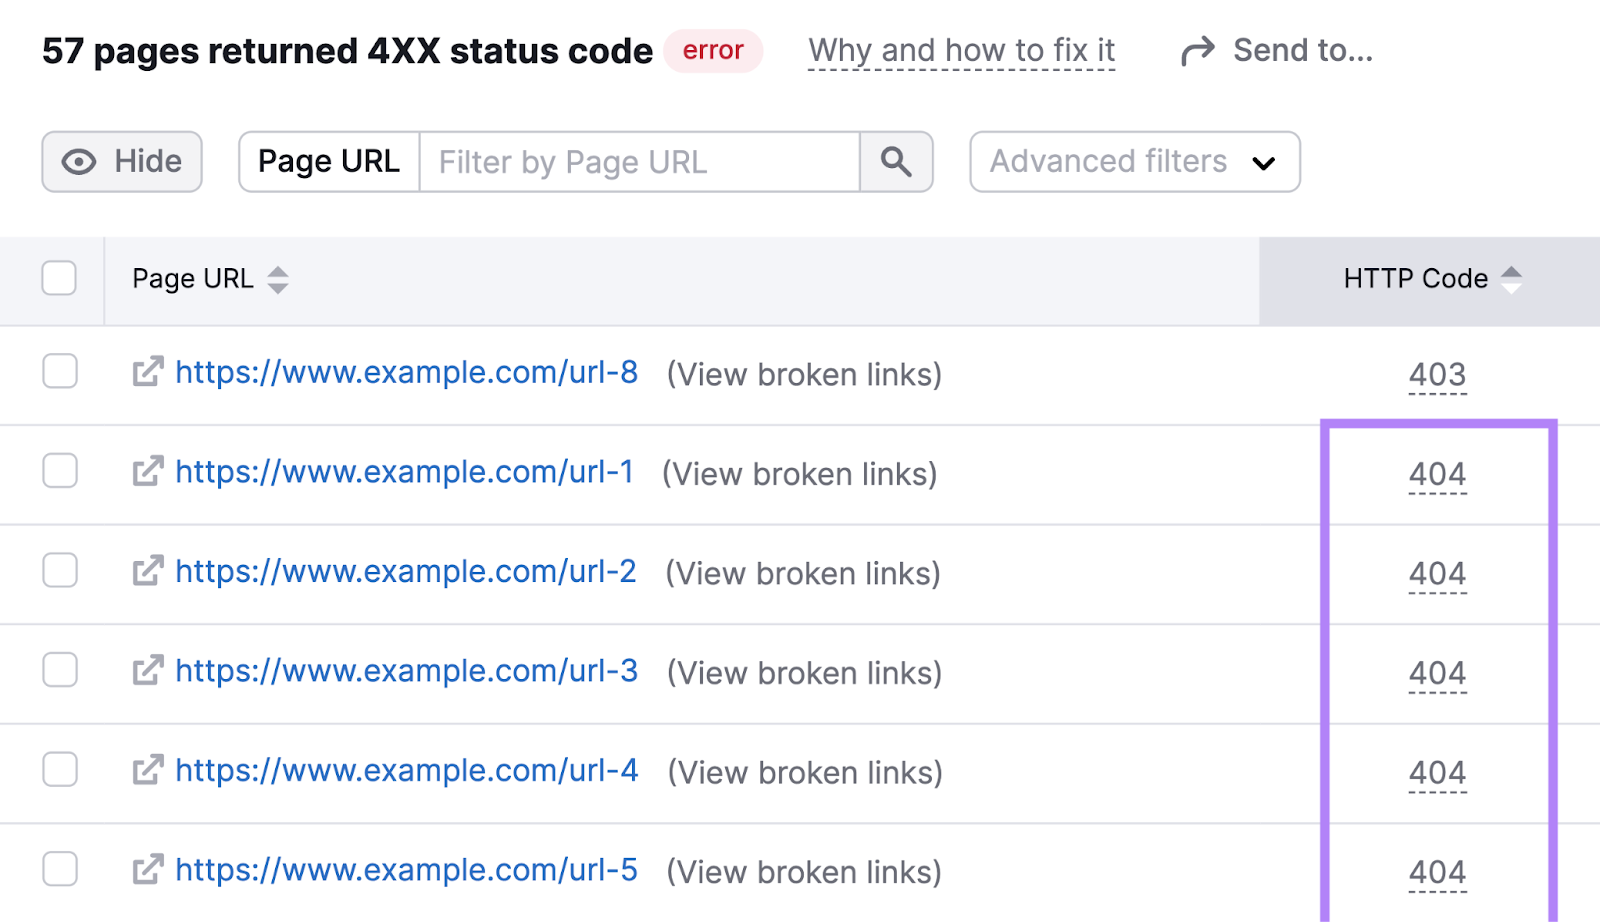
This way, the tool lists all page URLs leading to 404 errors together. For your convenient reference.
For any page URL leading to a 404 error, click “(View broken links)” next to it:
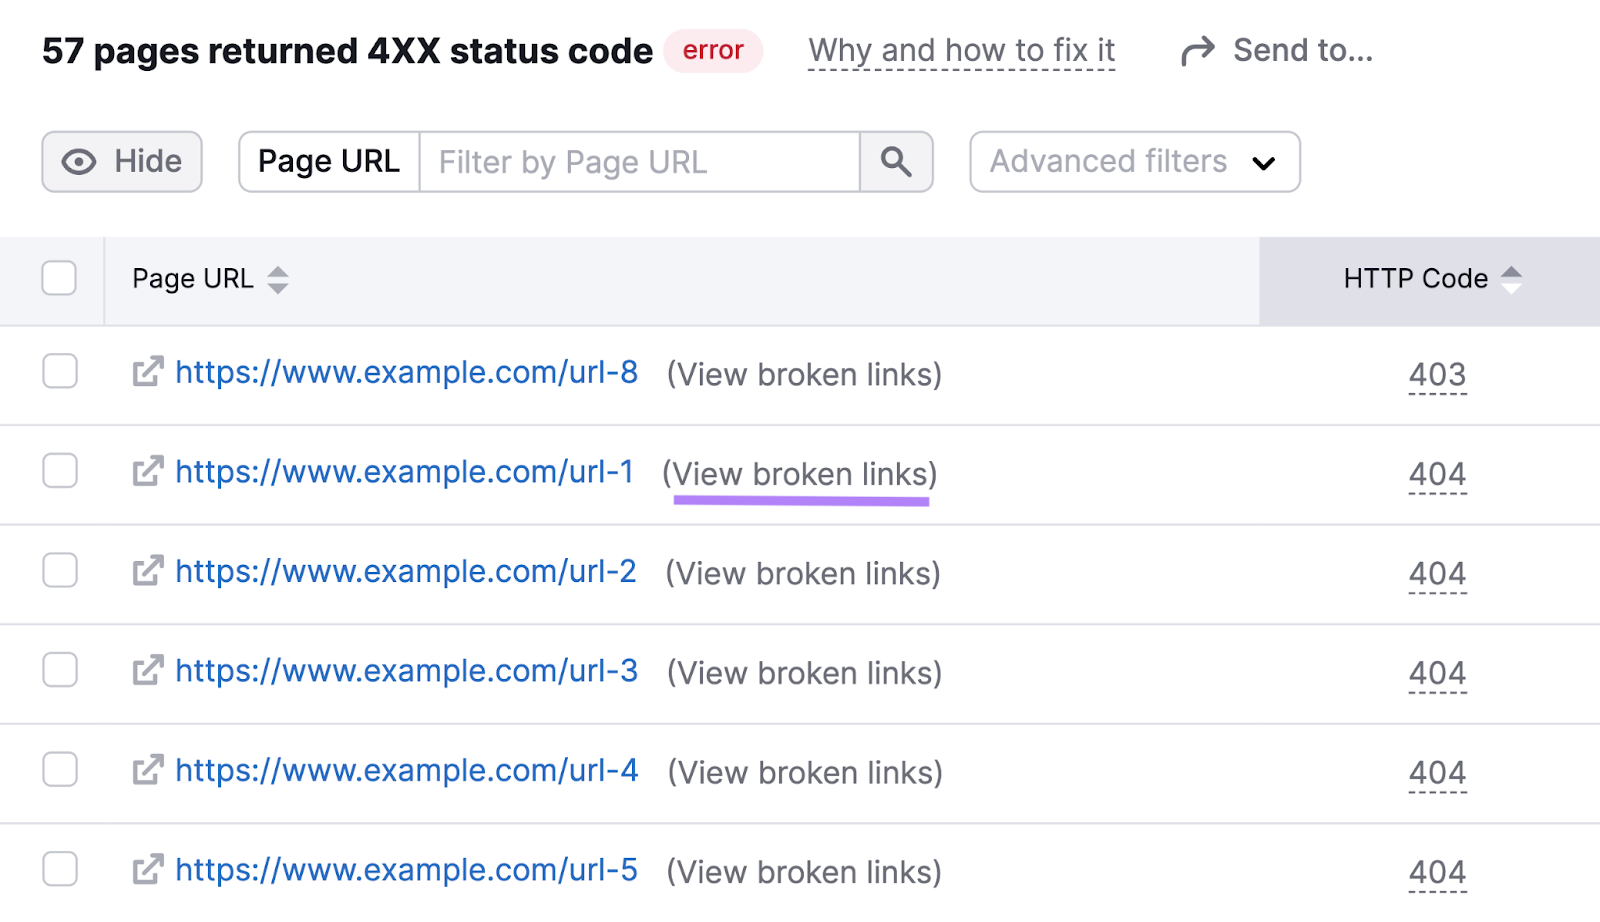
To learn the pages that have included this URL in their content.

From here, you can fix these URLs as needed to prevent users from encountering 404 errors.
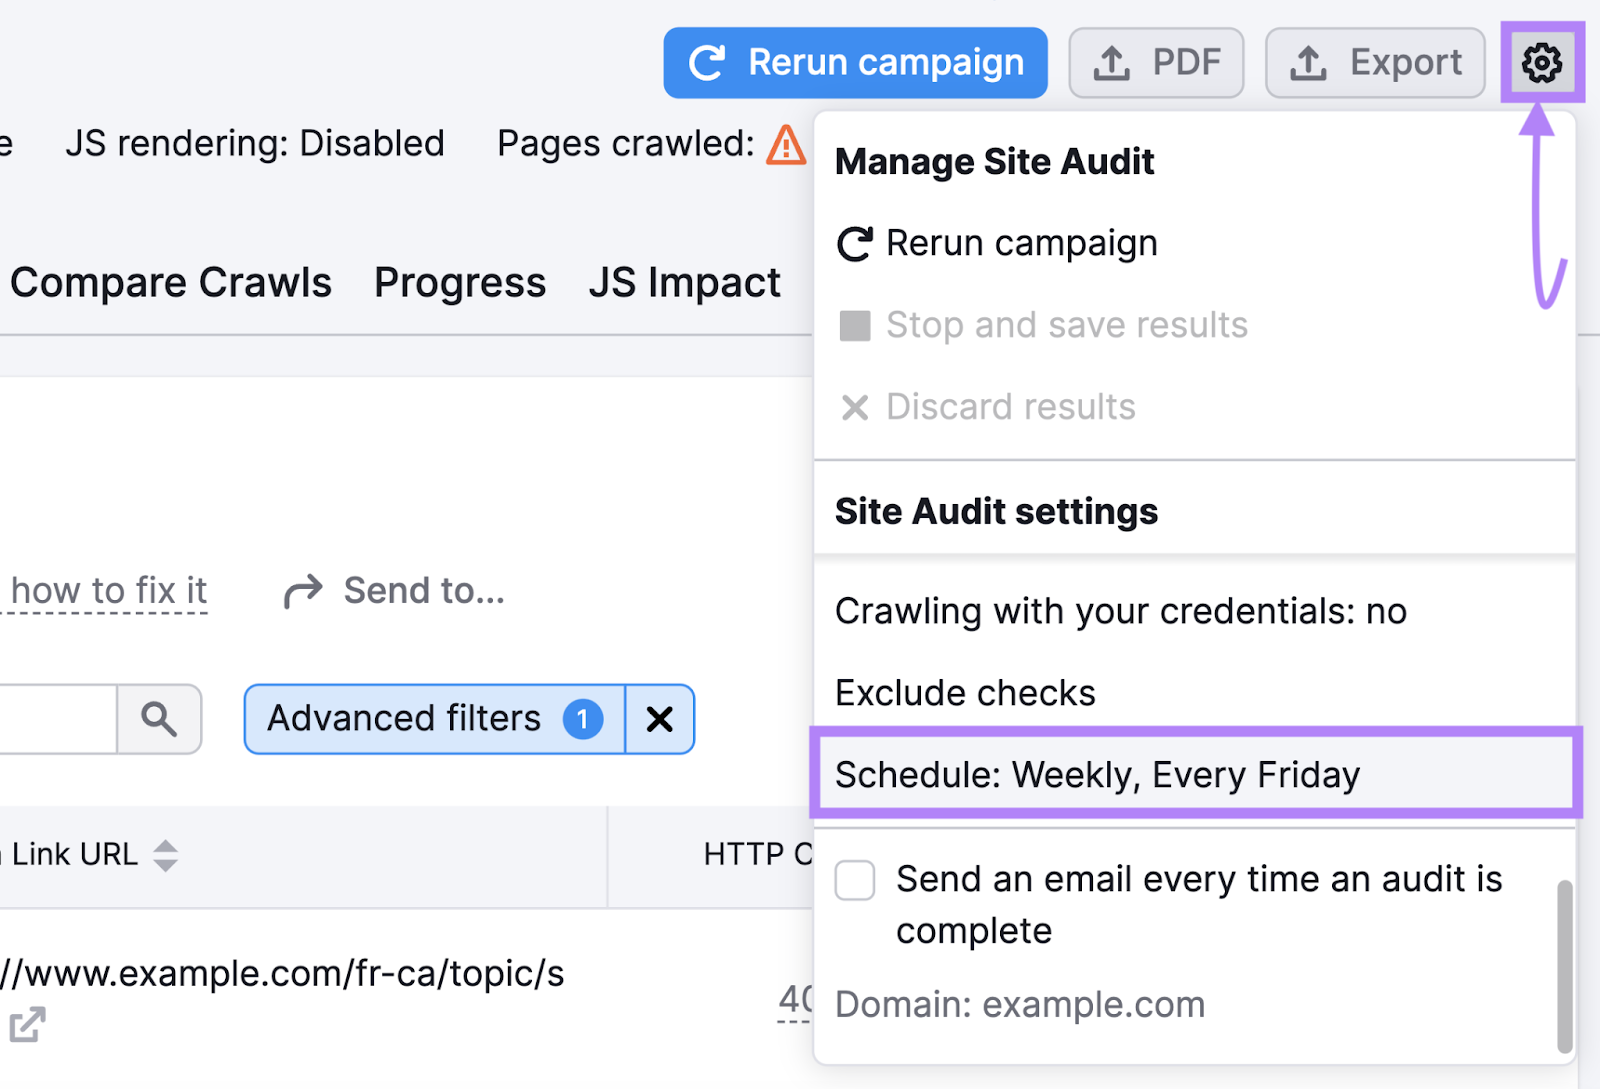
If you’d like to set up regular, automatic auditing, click the gear icon at the top of the report. Then click Schedule: Weekly, Every Friday under “Site Audit settings.” And set up Site Audit to regularly scan your website for 404 errors.
2. Use the Dead Link Checker Tool
The aptly named Dead Link Checker is a tool that checks your website for dead links.
Dead links, also known as broken links, are links that fail to bring the user to the intended destination—possibly because they return a 404 error.
The free version of the tool can check up to 2,000 links on a website at once.
To use it, launch the tool in a browser of your choice. Like Google Chrome.
Type your website domain into the available text box. Leave the “whole website” setting enabled and click “check.”
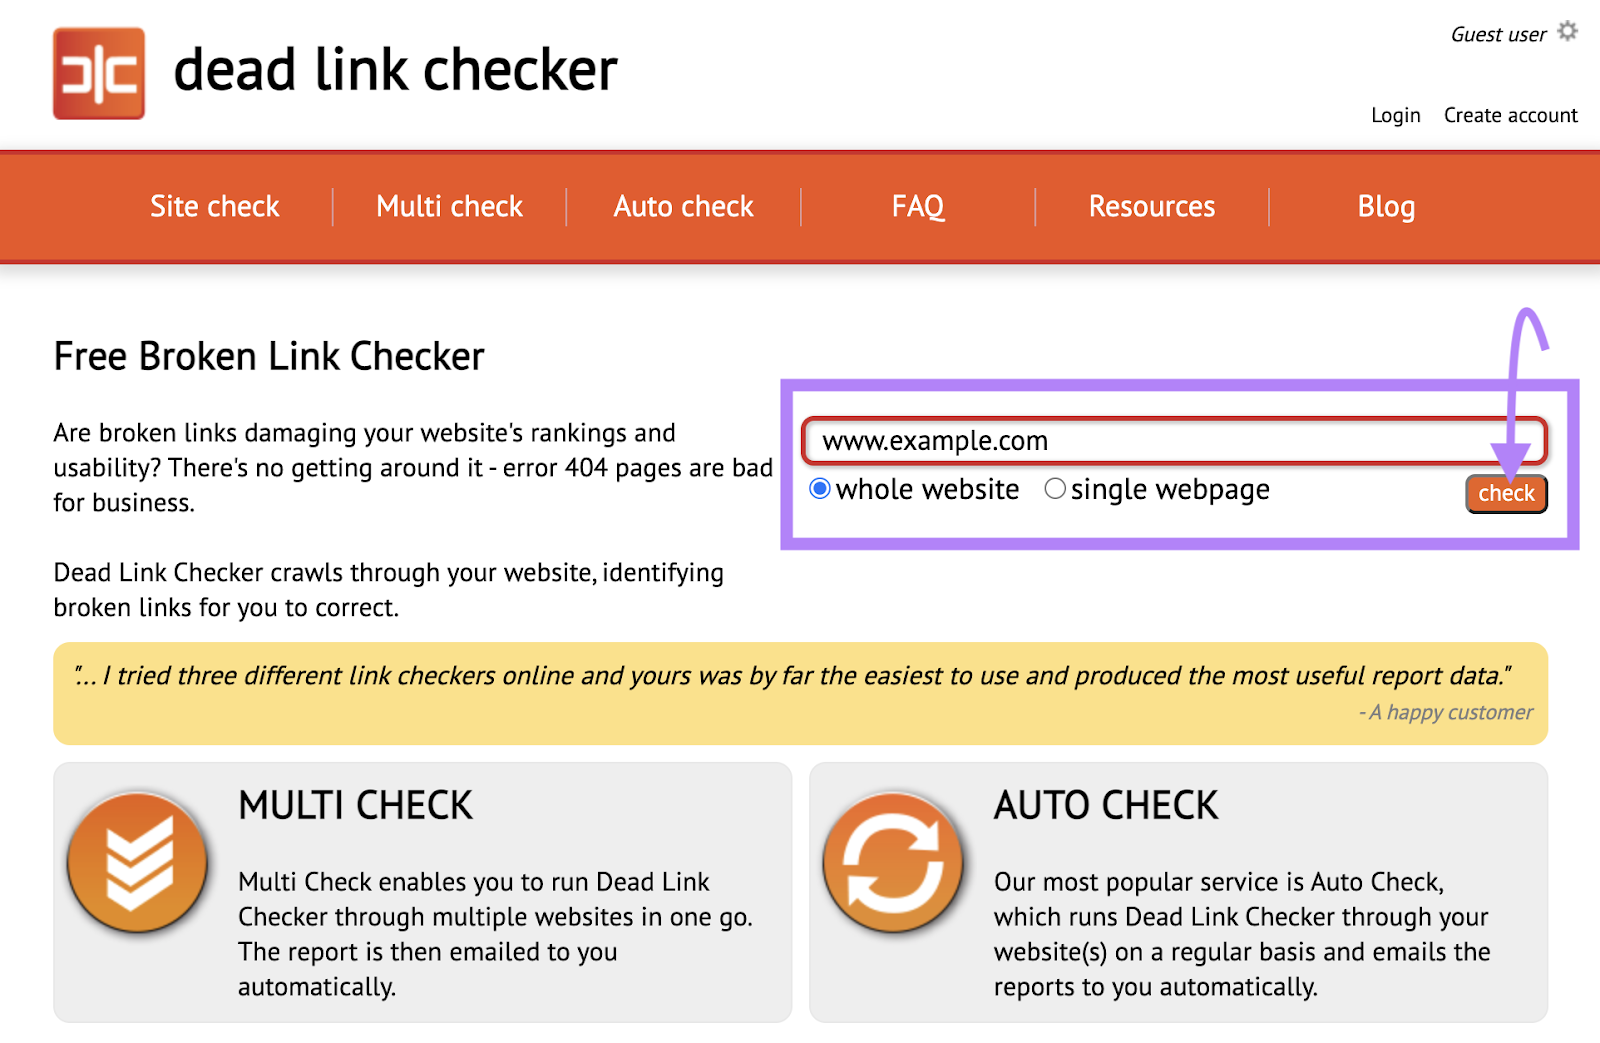
Fill out the security code provided:
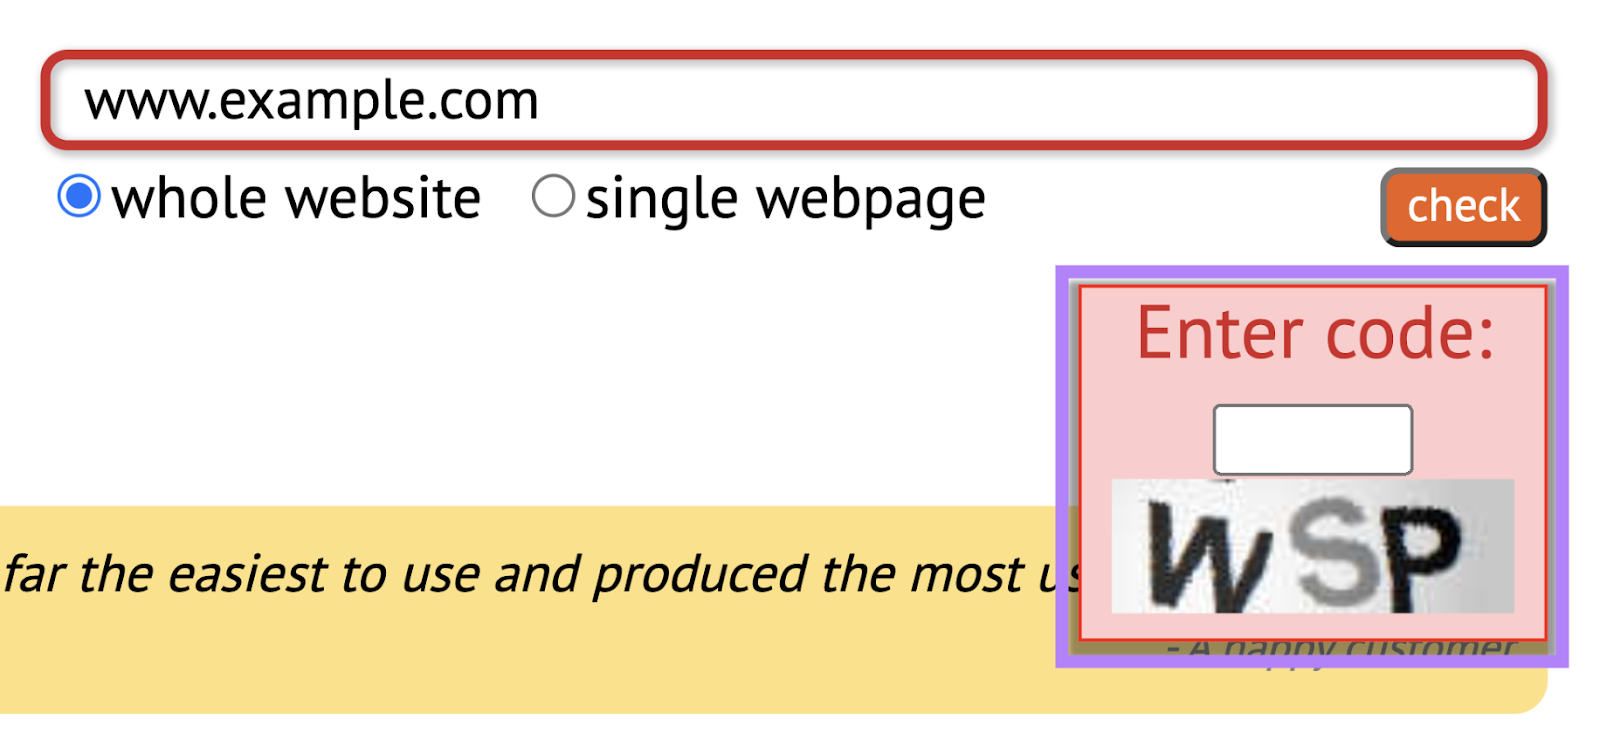
Then, hit the “Enter” or “Return” on your keyboard to start running the tool.
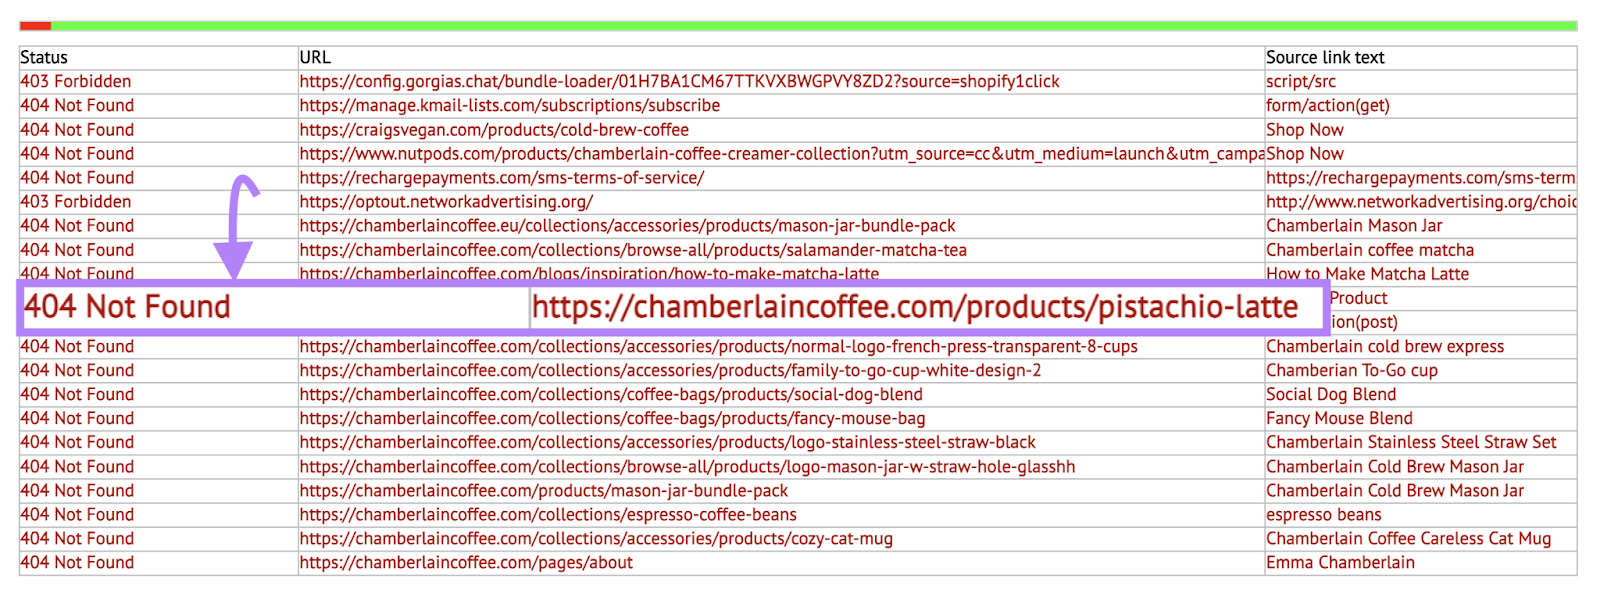
For each broken URL the tool finds, it will display:
- The URL’s status—which will be “404 Not Found” for URLs with 404 errors
- The URL that returned an error
- The URL’s source link text, or anchor text. Clicking the source link text will open the page containing the broken URL in a new browser tab. So you know on which page you can find—and fix—the broken URL.
3. Check Google Search Console
Google Search Console (GSC) is a Google service that provides basic reports on your website’s performance on Google’s SERPs. This includes a page indexing report, which displays URLs with “hard” and “soft” 404 errors (among other issues).
If you haven’t already set up GSC for your website, you can do that using instructions shared in this GSC guide.
To access GSC’s page indexing report, launch GSC. Navigate to your website property using the drop-down menu at the top left.
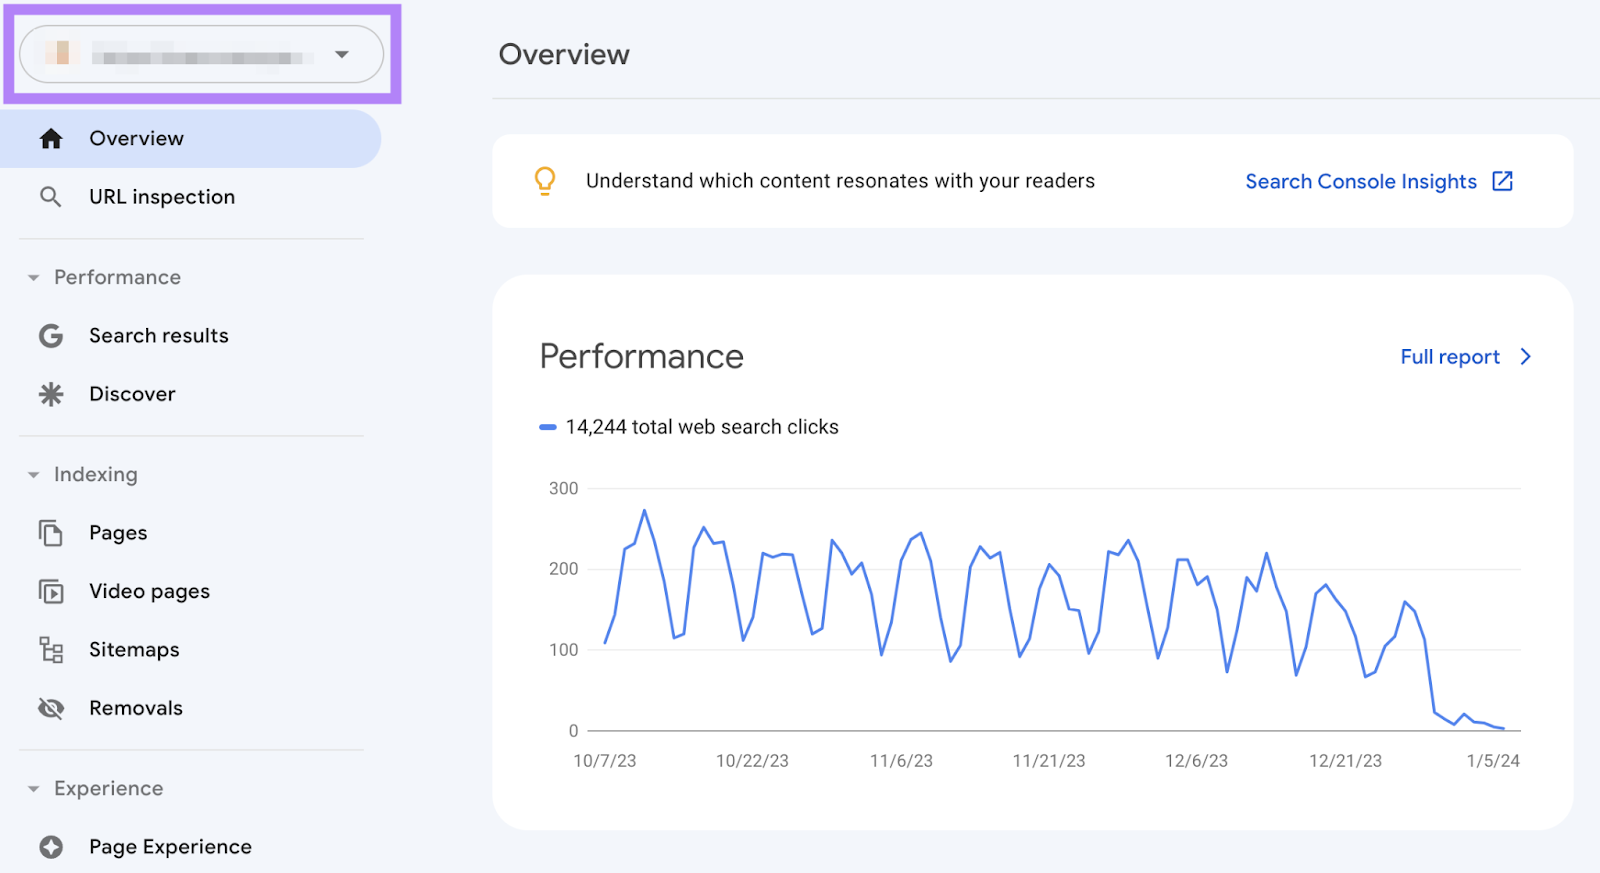
Click “Pages” under the left sidebar’s “Indexing” tab.
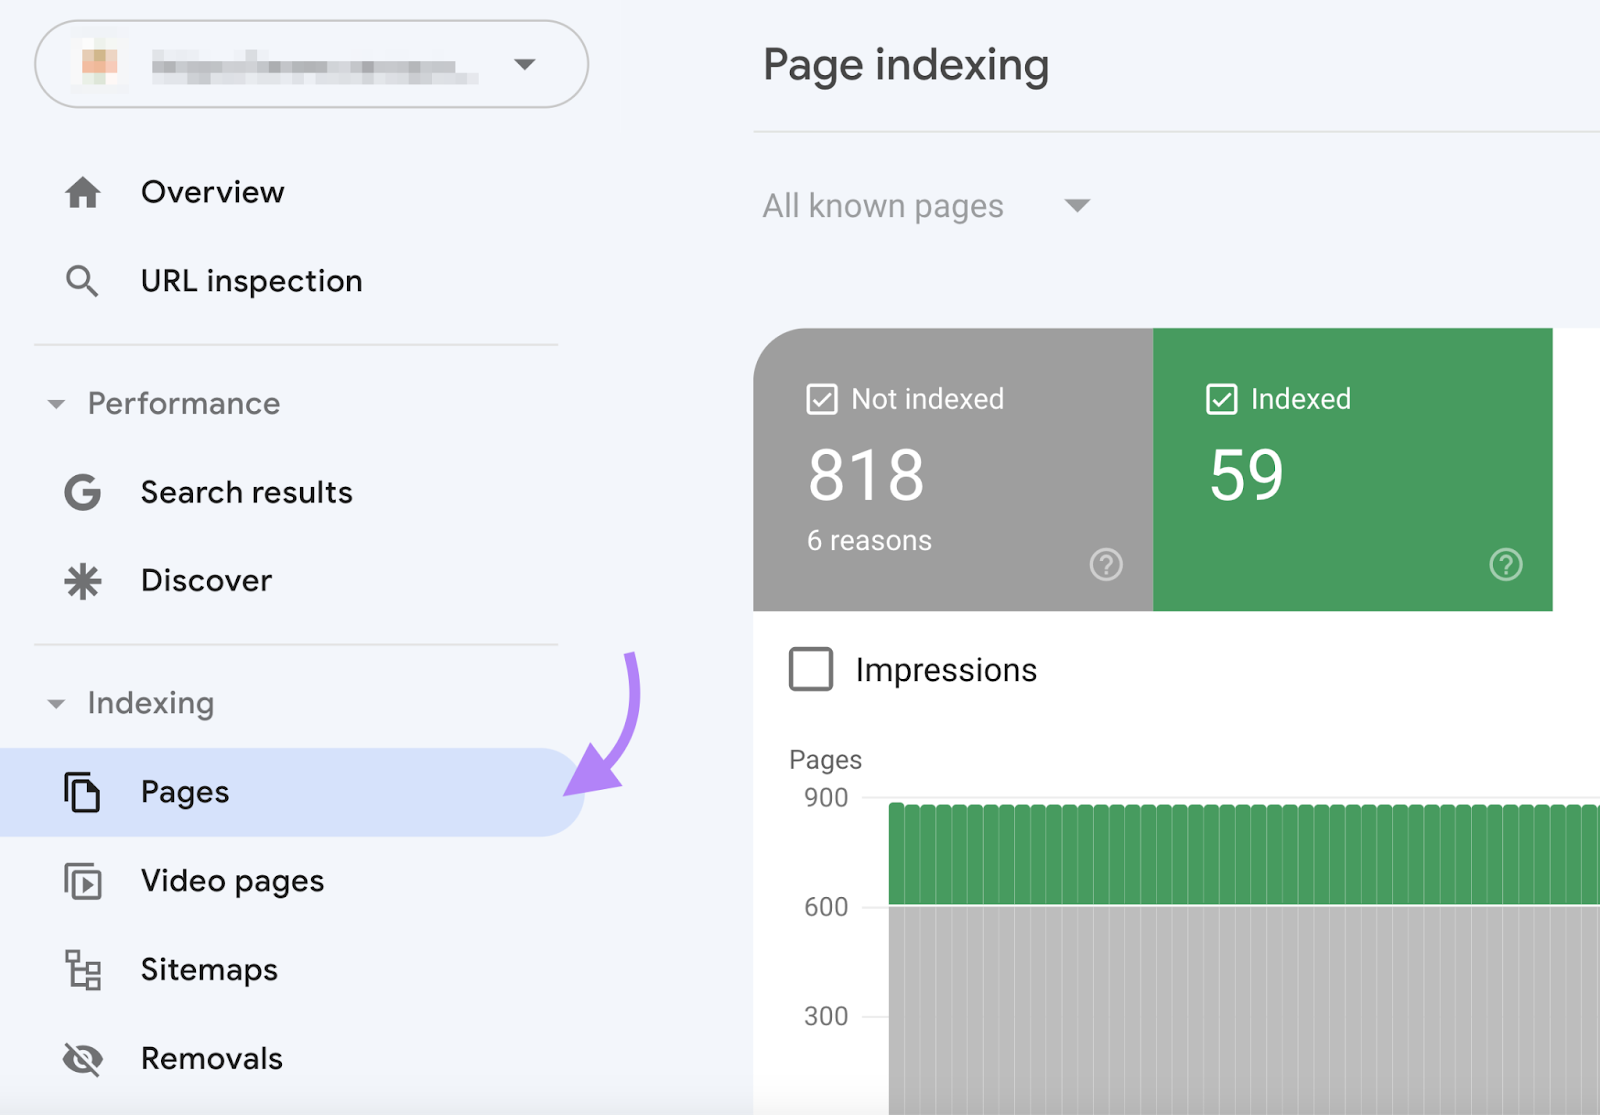
The “Page indexing” report for your website will load. Scroll down the report until you see its “Why pages aren’t indexed” section.
If Google has detected 404 errors on your website, the report will display a “Not found (404)” row.
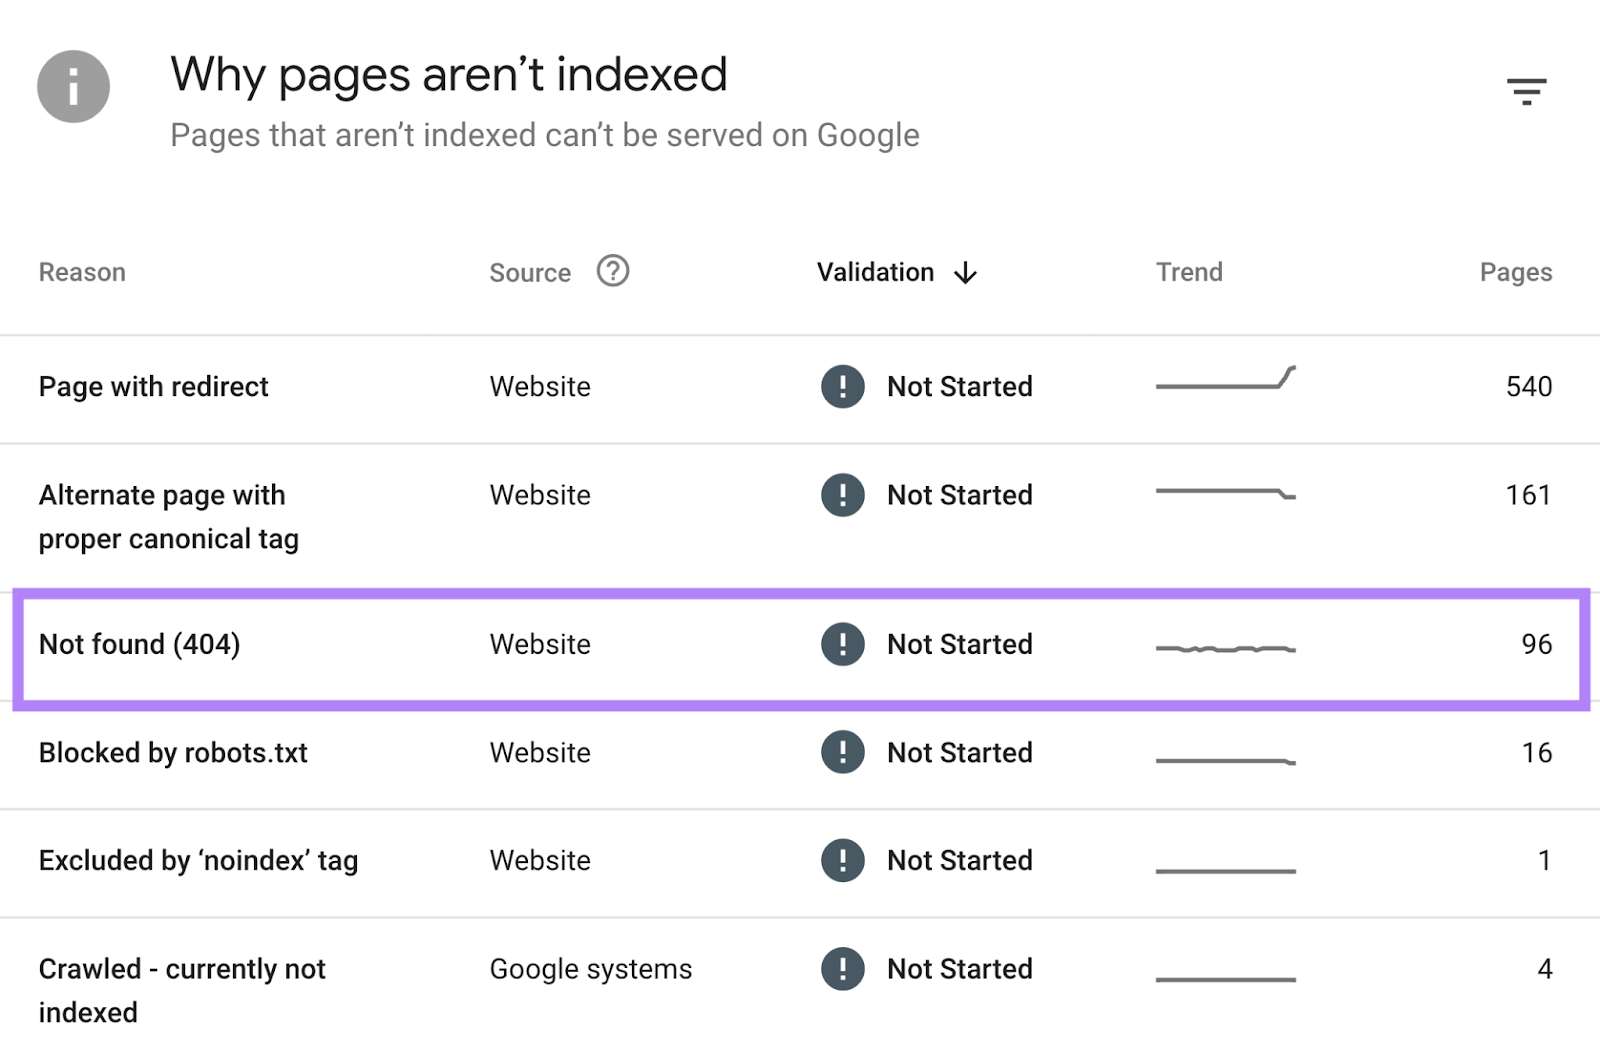
And if Google has detected “soft” 404 errors, the report will display a “Soft 404” row.
Click either row to load the corresponding report.
Scroll down this report to view examples of URLs on your website that return “hard” or “soft” 404 errors (as relevant).
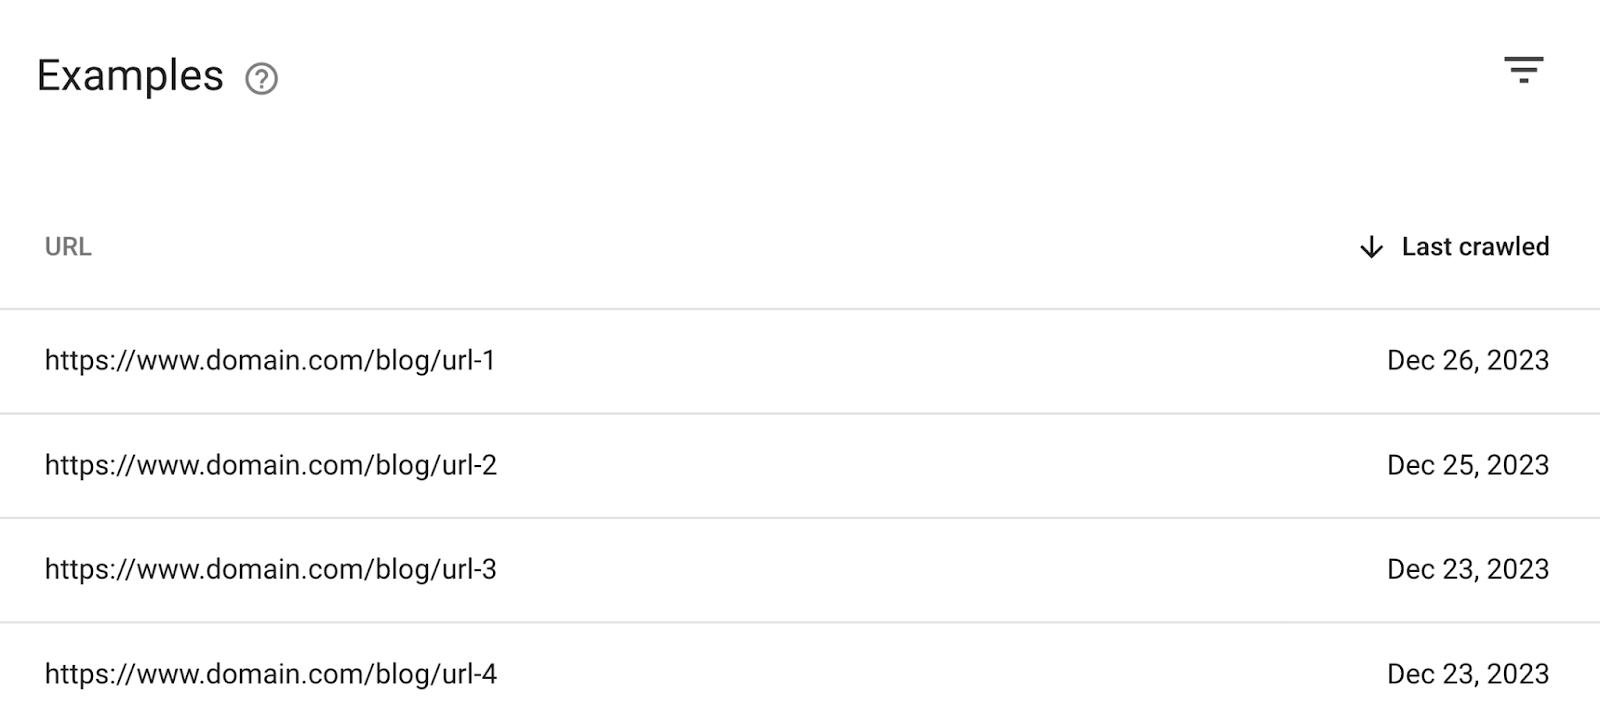
The list of URLs in GSC’s page indexing reports is not exhaustive. For reasons like:
- The report is based on Google’s last crawl of your website (other errors may have cropped up since then)
- The report can display only up to 1,000 URLs at once
Do Your Website’s 404 Errors Need Fixing?
Not all 404 errors need fixing.
If you’re deleting pages from your website and don’t want users to access them, then these pages’ URLs should return 404 errors. So search engines know not to index or rank their content.
If you still want to display and drive traffic to the pages that are throwing up 404 errors, then you’ll need to fix them.
How to Fix Your Website’s 404 Errors
Even if Google detects a “404 not found” error on the page, it will continue trying to crawl the page.
Albeit less frequently over time. And possibly until a point when it stops doing so altogether.
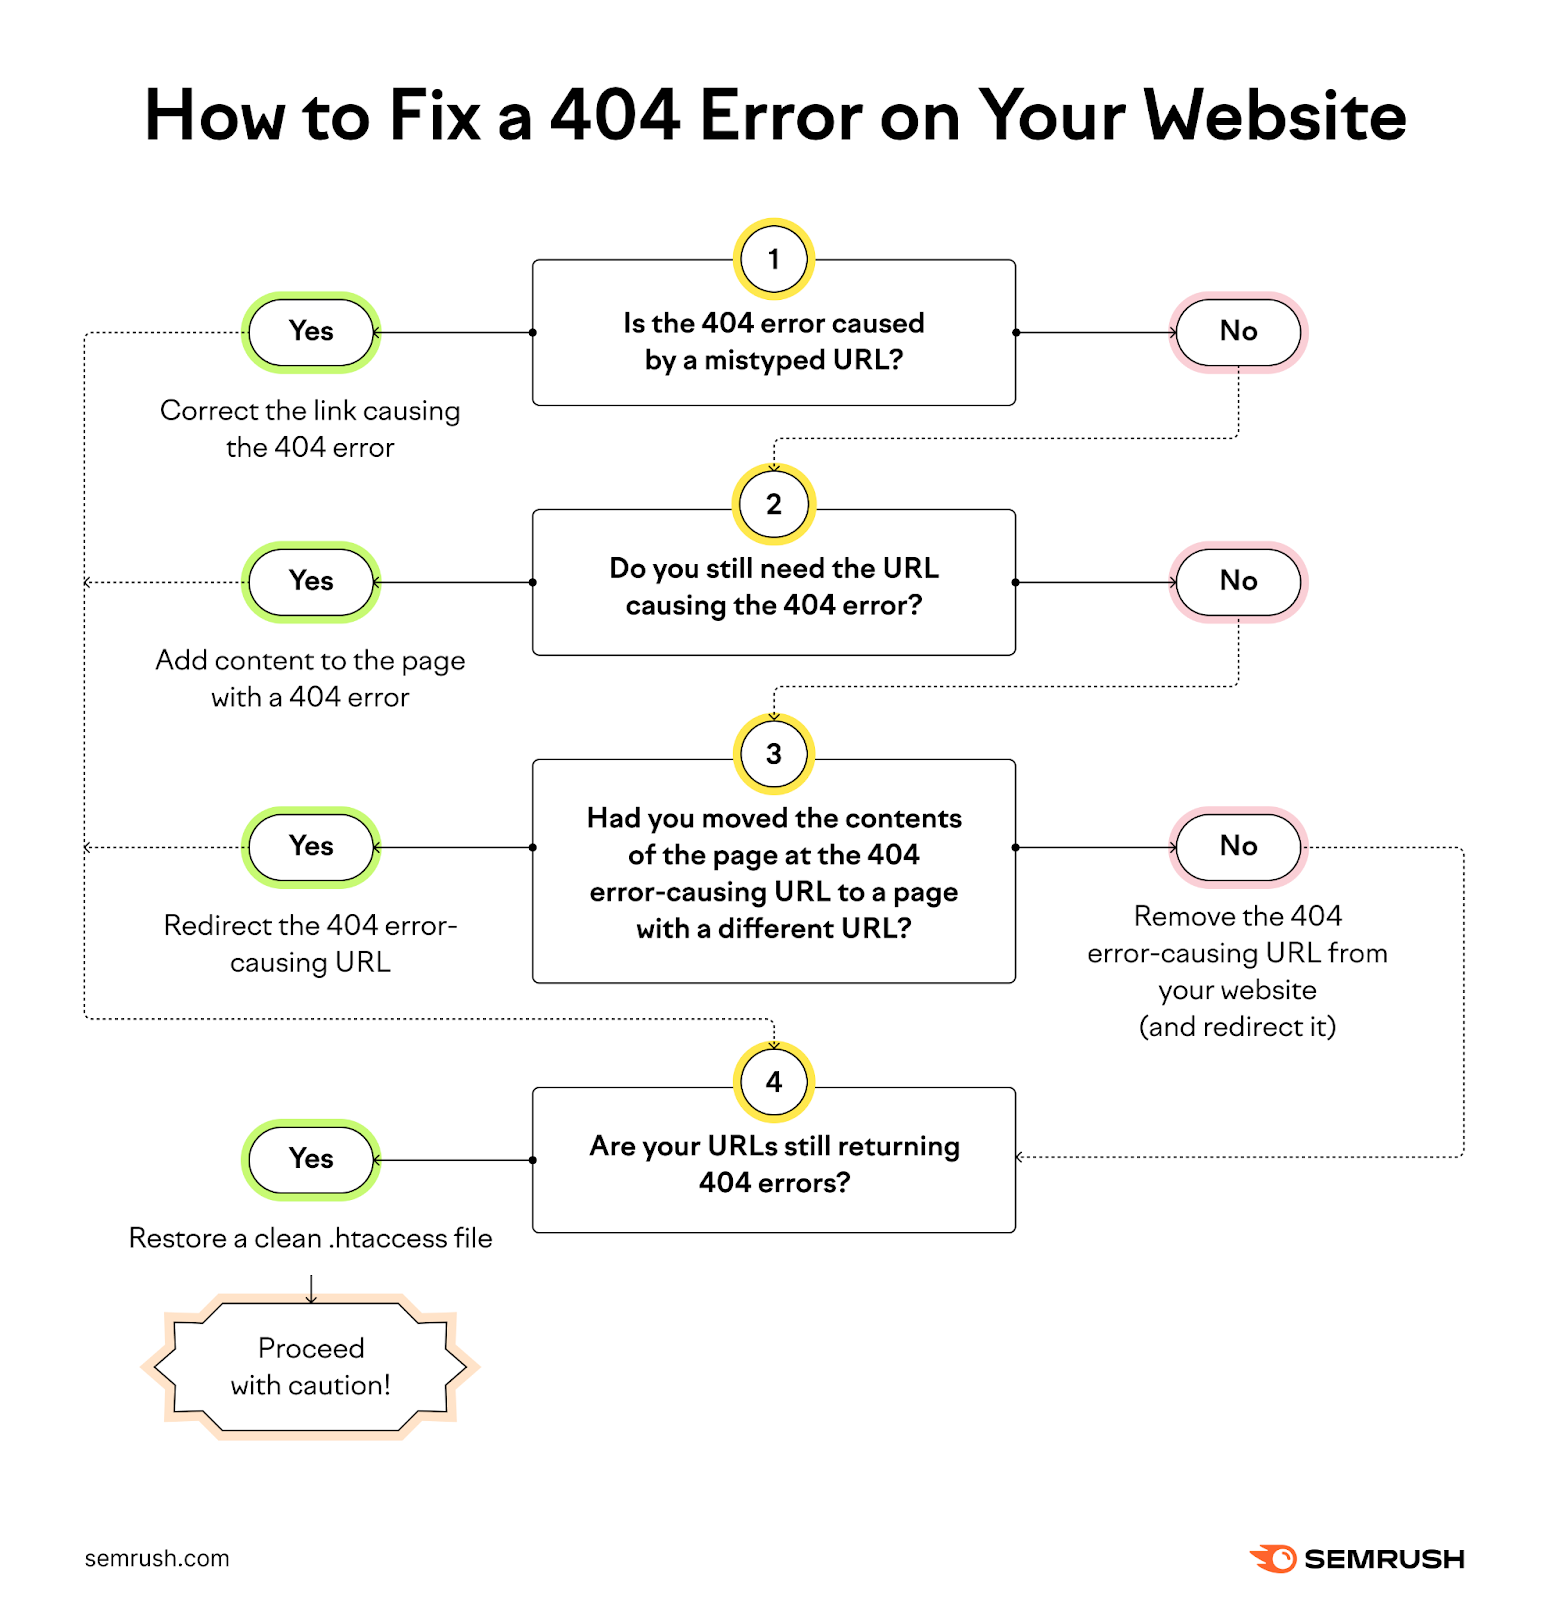
Here are five methods for fixing unwanted 404 errors on your pages before Google’s next crawl of them.
The diagram below shows which method might be most appropriate for any particular 404 error situation:
1. Correct the Link Causing the 404 Error
If a link on your website leads to a 404 error page because someone has mistyped it, edit it so that it leads users to a working page.
Let’s say the link leading to a 404 error page is “https://example.com/blog/hello-wold.” The link had been supposed to lead to “https://example.com/blog/hello-world” instead.
In this case, you can fix the 404 error by editing the link to say “https://example.com/blog/hello-world.”
2. Redirect the 404 Error-Causing URL
Another way of preventing users from landing on a page where content doesn’t exist is to set up a redirect that automatically takes them somewhere else.
This solution is ideal if you have moved a page’s contents from its original URL to a different URL. A redirect can take users to the new page location without you having to update all instances of the link on your website.
Let’s say you originally published a guide to owning a cat at this URL: “https://example.com/owning-a-cat.”
But you subsequently write guides to owning other types of pets. You want to park all your guides under the subdirectory “https://example.com/guides/.”
You change the URL for your guide to owning a cat to: “https://example.com/guides/owning-a-cat.” And you set up a redirect to automatically send anyone who visits “https://example.com/owning-a-cat” to “https://example.com/guides/owning-a-cat.”
Users who visit “https://example.com/owning-a-cat” will see not a 404 error. Instead, they’ll see your guide to owning a cat at the “https://example.com/guides/owning-a-cat” URL without taking any additional effort.
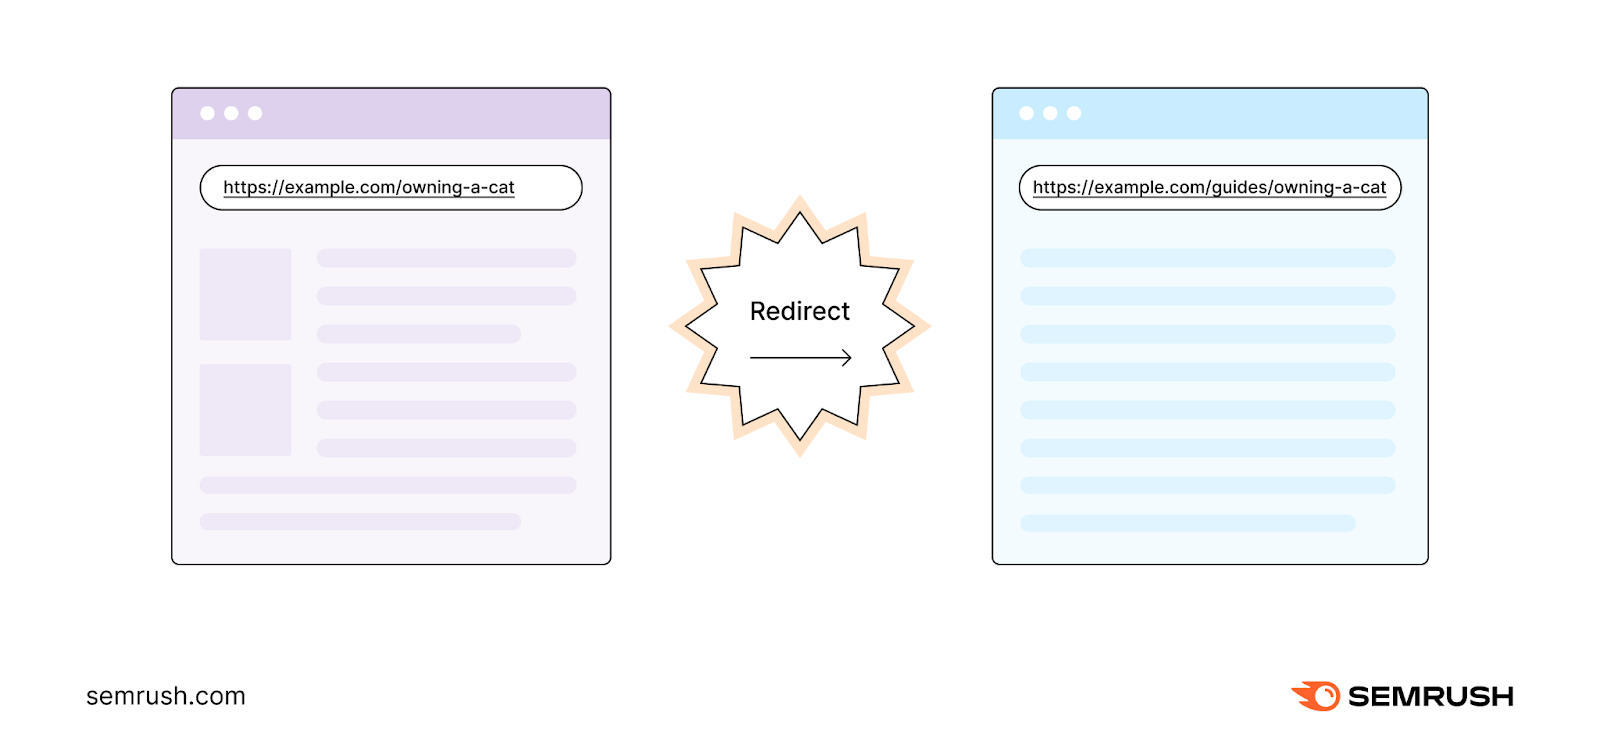
There are various types of redirects. If you intend to permanently redirect users from one URL to another, set up a 301 redirect.
Further reading: Our guide on how to implement redirects explains how to set up a redirect for a Wix or WordPress site.
3. Add Content to the Page with a 404 Error
If you want users to maintain access to the URL currently leading to a 404 error, adding content to the page is a good way of doing so.
Once there is content on the page, the 404 error will go away. Because the website server can now locate resources at that URL for serving to users.
You might be able to populate content on the page by restoring backup content. Or you can always create new content by adding to the page.
4. Remove the 404 Error-Causing URL from Your Website (and Redirect It)
If you no longer need the URL that’s causing a 404 error, remove it from your website.
This way, users won’t be able to click the URL on your website. And risk getting directed to a 404 error.
If you’ve used Semrush Site Audit to identify 404 errors on your website, clicking “(View broken links)” next to a URL with a 404 error will reveal the pages whose content includes it.

You can edit these pages to remove their links to URLs throwing 404 errors.
After that, set up an appropriate redirect for each URL you’ve removed from your website. Just in case users attempt to visit the 404 error-causing URL from their web browser’s bookmarks. Or click external links from another website.
5. Restore a Clean .htaccess File
The .htaccess file is a file containing rules that help configure a website hosted on web servers running the Apache software.
Your website may not load properly if its .htaccess file gets corrupted or you format its rules incorrectly. Thus causing 404 errors when users try to visit specific pages.
In this situation, replacing the corrupted .htaccess file with a clean version can help restore your website to its previous working state.
You can generate a clean .htaccess file using a tool like .htaccess Generator.
After that, edit your existing .htaccess file to replace its contents with the contents of its clean counterpart.
The exact steps will depend on your hosting platform. Here are guides to editing an .htaccess file for websites hosted on various popular hosting platforms:
Your hosting platform’s customer support team can assist if you need help editing your .htaccess file at any point.
And, importantly:
Back up your existing .htaccess file before making changes to it. Just in case you make a mistake when editing its contents.
Check Your Website for Error 404s Regularly
Having pages with error 404 on your website isn’t necessarily a bad thing. But you should be aware of which pages they are.
That way, you can take action to fix unwanted 404 errors that are harming the user experience. Or inadvertently reducing organic traffic to your site.
Semrush’s Site Audit effortlessly detects 404 errors on websites large and small. Sign up for a free Semrush trial to put the tool to work on your website today.
